How to Build a DIY Motorized Wi-Fi Camera Slider
TL;DR
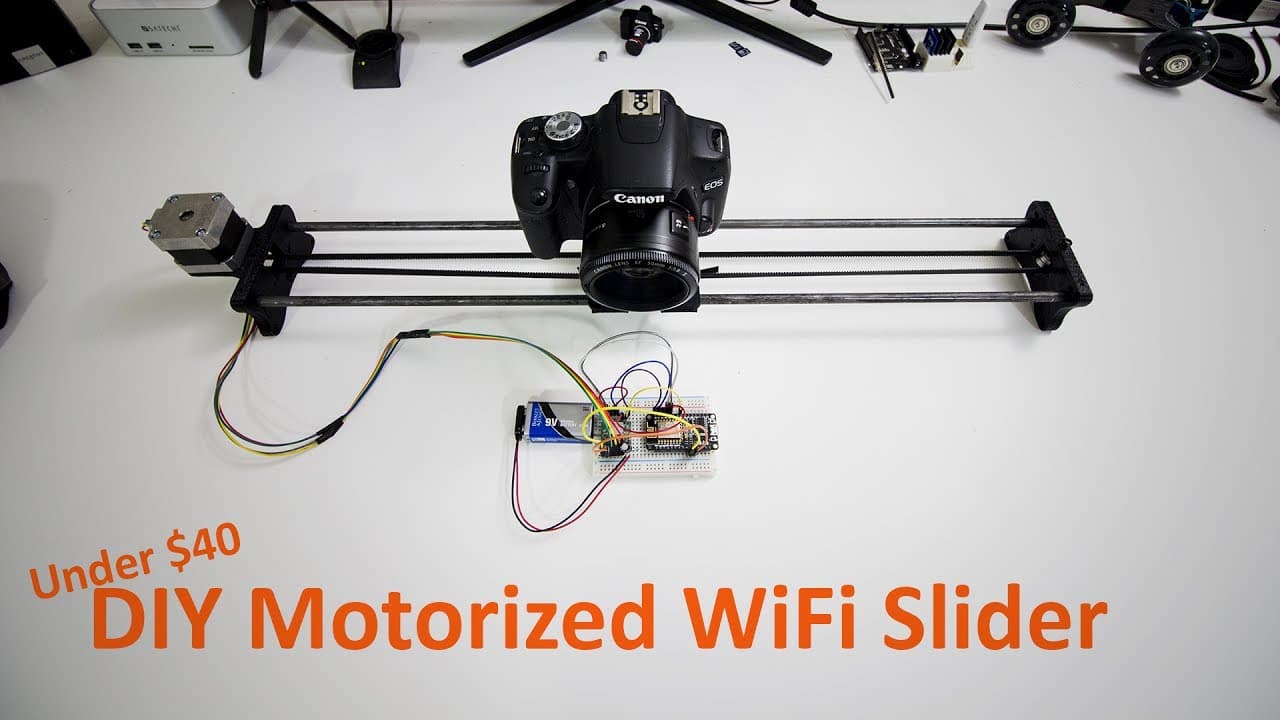
To create a budget-friendly motorized camera slider with Wi-Fi, you'll need a stepper motor, rails, a frame, and a controller. Assemble the parts, upload the provided code to control the slider through a user-friendly web interface, and adjust the speed for smooth camera movements. Detailed parts and instructions are available for replication.
Transcript
Hey guys, what's going on? It's Don here from NovaSpiritTech, and today. I got a really cool project for you guys We are going to be building ourselves a DIY Motorized Wi-Fi enabled camera slider, so let's get started So you guys notice I've been kind of upgrade my studio bit moving my desk around Adding that shelf behind me one of which when you s... Read More
Key Insights
- 🎚️ The DIY camera slider project is aimed at budget-conscious videographers, offering a practical alternative to expensive commercial options.
- 🫵 Detailed specifications and links to components are shared in the description, catering to viewers looking to replicate the project.
- 😒 The use of CAD software and 3D printing for custom parts enhances adaptability and personalization of the slider's design.
- 👨💻 The setup process is straightforward, emphasizing a blend of hardware assembly and coding to make the slider functional.
- 👶 The simplicity of the web interface for speed control makes it user-friendly for individuals new to DIY electronics.
- ❓ Feedback and community involvement are encouraged through platforms like GitHub, fostering a collaborative atmosphere.
- 👶 A variety of shots captured with the new camera slider demonstrate its effectiveness, illustrating how it can enhance videography quality.
Install to Summarize YouTube Videos and Get Transcripts
Explore YouTube Video Summarizer or Get YouTube Transcript Extractor
Questions & Answers
Q: What components are necessary to build the camera slider?
To build the motorized camera slider, you will need a stepper motor, rails for sliding motion, a framework to hold everything together, a controller board for operation, and bearings for smooth movement. Links to specific parts used in the project are provided in the description for convenience, allowing for customization.
Q: How do you control the camera slider once it's assembled?
Once the camera slider is assembled, it is controlled through a web interface. Users connect to the slider's Wi-Fi network and access its IP address at 192.168.4.1, where a simple interface with speed settings allows users to control its movement.
Q: What programming aspect is involved in the project?
The project involves uploading code to the controller board, which operates the camera slider. The code is available on GitHub, allowing users to modify it according to their preferences. The integration of coding ensures the slider can act as an access point for wireless control.
Q: Can the camera slider be adjusted or upgraded after completion?
Yes, the camera slider can be adjusted or upgraded post-completion. Users are encouraged to modify the code or hardware components as they see fit. The video's creator has left the door open for bug reports and enhancements, engaging the community in further development.
Summary & Key Takeaways
-
The video demonstrates how to build a Wi-Fi enabled, motorized camera slider using affordable components, making it accessible for videographers.
-
Key parts include a stepper motor, rails, a frame, and a controller, all of which are detailed for viewers to replicate the project.
-
After assembly, the code needs to be uploaded to control the slider via an easy-to-use web interface, allowing for adjustable speeds.
Read in Other Languages (beta)
Share This Summary 📚
Summarize YouTube Videos and Get Video Transcripts with 1-Click
Try YouTube Summary with ChatGPT & Claude or YouTube Transcript Generator
Explore More Summaries from Novaspirit Tech 📚


Summarize YouTube Videos and Get Video Transcripts with 1-Click
Try YouTube Summary with ChatGPT & Claude or YouTube Transcript Generator