How to Connect ADS1256 to Arduino and STM32 for Data Acquisition
TL;DR
To connect the ADS1256 to Arduino or STM32, use the provided source code that sets up SPI communication and initializes the ADC. This code supports high-precision measurements, allowing for single-ended or differential inputs. Proper configuration and understanding of each component are essential for efficient data acquisition and real-time monitoring.
Transcript
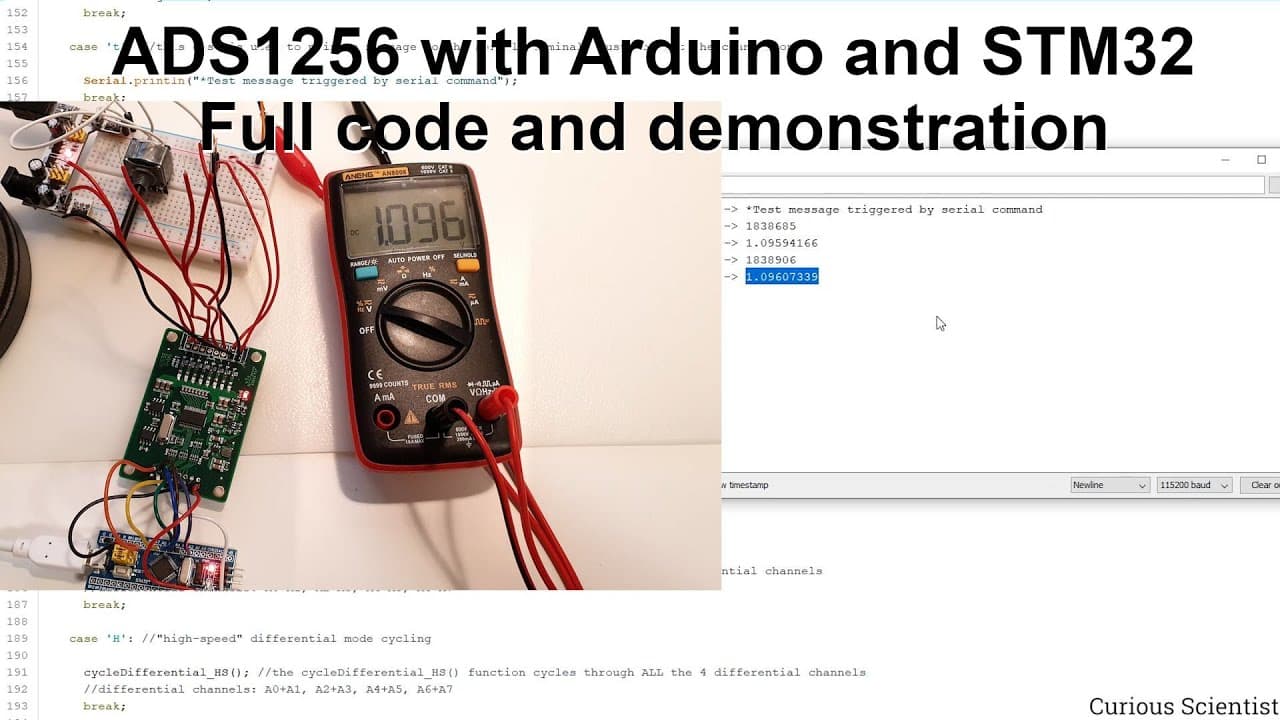
welcome everyone in this video i'm going to guide you through the source code which allows you to connect your ads 1256 to an arduino or stm32 and ultimately to your computer so i have several videos from the past where i showed this circuit but i was just showing the parts of the code and not the wall code together and i was explaining all the dif... Read More
Key Insights
- 📽️ The ADS 1256 can connect with multiple platforms, specifically Arduino and STM32, through SPI, enhancing versatility in projects.
- ✋ The video serves as a resource for understanding complex circuit integrations and high-resolution measurements crucial for sensitive applications.
- ☠️ Use of high baud rates is recommended for efficient data transfer to ensure timely processing of samples at maximum rates.
- ❓ Proper initialization and reset functions are vital for preparing the ADS 1256 before commencing any measurements.
- 🔠 Input configurations for the ADS 1256 can be customized, allowing for differentiated setups suited for various use cases and sensors.
- 👨💻 Continuous data acquisition can be managed effectively through the code, enabling real-time monitoring and analysis of signals.
- 💬 Detailed comments and logic patterns in the code enhance user comprehension and programming skills, making it easier to troubleshoot or modify.
Install to Summarize YouTube Videos and Get Transcripts
Explore YouTube Video Summarizer or Get YouTube Transcript Extractor
Questions & Answers
Q: What is the main purpose of the ADS 1256 in this project?
The ADS 1256 is an 8-channel, 24-bit analog-to-digital converter (ADC) that allows high-resolution data acquisition. With its capability to achieve a sampling rate of 30 kSps, it effectively captures data from sensors such as load cells and strain gauges, making it ideal for precision applications.
Q: How does the communication between the ADS 1256 and microcontrollers occur?
Communication occurs via the Serial Peripheral Interface (SPI) protocol, where specific pins are designated for data transmission and control signals. The microcontroller sends commands through the SPI and receives data from the ADS 1256, utilizing functions to read and write commands to the appropriate registers.
Q: Why is it recommended to check the datasheet for the ADS 1256?
The datasheet contains important details such as register maps, pin configurations, and timing diagrams essential for correct integration and configuration. Understanding these parameters ensures that users can set up the ADC properly according to their specific application needs.
Q: What modifications are needed to use the ADS 1256 with both Arduino and STM32?
The source code accommodates both platforms, with minor changes such as pin assignments and library inclusions. However, it's essential for users to identify their specific microcontroller pin configurations to ensure successful connections and functionality.
Q: What additional functionalities does the provided code offer for final users?
The code includes various functions to handle specific commands like reading/writing registers, continuous data conversion, and managing different measurement modes (single-ended and differential). Users can send commands through the serial terminal to interactively retrieve data and control the converter's operations.
Q: How can users visualize the measured data from the ADS 1256?
The video mentions using client software developed for visualization and data logging, which reads the formatted data coming from the ADS 1256. Users can set parameters like sampling rates and visualize the time-based data outputs on their computer.
Q: What should viewers do if they encounter difficulties understanding the code explanations?
Viewers are encouraged to refer back to earlier videos linked throughout the tutorial for detailed explanations of specific code elements and techniques. This approach allows them to build a more comprehensive understanding progressively.
Q: What kind of support is the creator seeking from viewers?
The creator expresses a desire for subscriptions to their channel and welcomes donations through their website. This support helps fund the creation of new content and the purchase of advanced components for future projects.
Summary & Key Takeaways
-
This video tutorial provides a detailed walkthrough of the source code for connecting the ADS 1256 analog-to-digital converter (ADC) to both Arduino and STM32 microcontrollers.
-
It explains configuration settings, SPI communication specifics, and offers insights into the data reading and processing methods while emphasizing the importance of understanding each code component.
-
The creator encourages viewers to subscribe and support their content while highlighting the usefulness of the source code for various hobby and research projects involving high-precision measurements.
Read in Other Languages (beta)
Share This Summary 📚
Summarize YouTube Videos and Get Video Transcripts with 1-Click
Try YouTube Summary with ChatGPT & Claude or YouTube Transcript Generator
Explore More Summaries from Curious Scientist 📚
![Building a Peltier cooler-based cooling box - First iteration, improvements [Part 2/6] thumbnail](/_next/image?url=https%3A%2F%2Fi.ytimg.com%2Fvi%2F0YlNw0EGnzI%2Fhqdefault.jpg&w=750&q=75)


Summarize YouTube Videos and Get Video Transcripts with 1-Click
Try YouTube Summary with ChatGPT & Claude or YouTube Transcript Generator