Building a Peltier cooler-based cooling box - First iteration, improvements [Part 2/6]
TL;DR
Upgrades to a cooling box improve temperature control and air circulation.
Transcript
welcome everyone this is the second iteration of the cooling box video so in the previous video i started to show you how to build this cooling box this is a 64 liters cooling box and you can see that it has a corrugated sheet on the outside as well as the inside and in between those two corrugated sheet layers we have a three centimeter polystyren... Read More
Key Insights
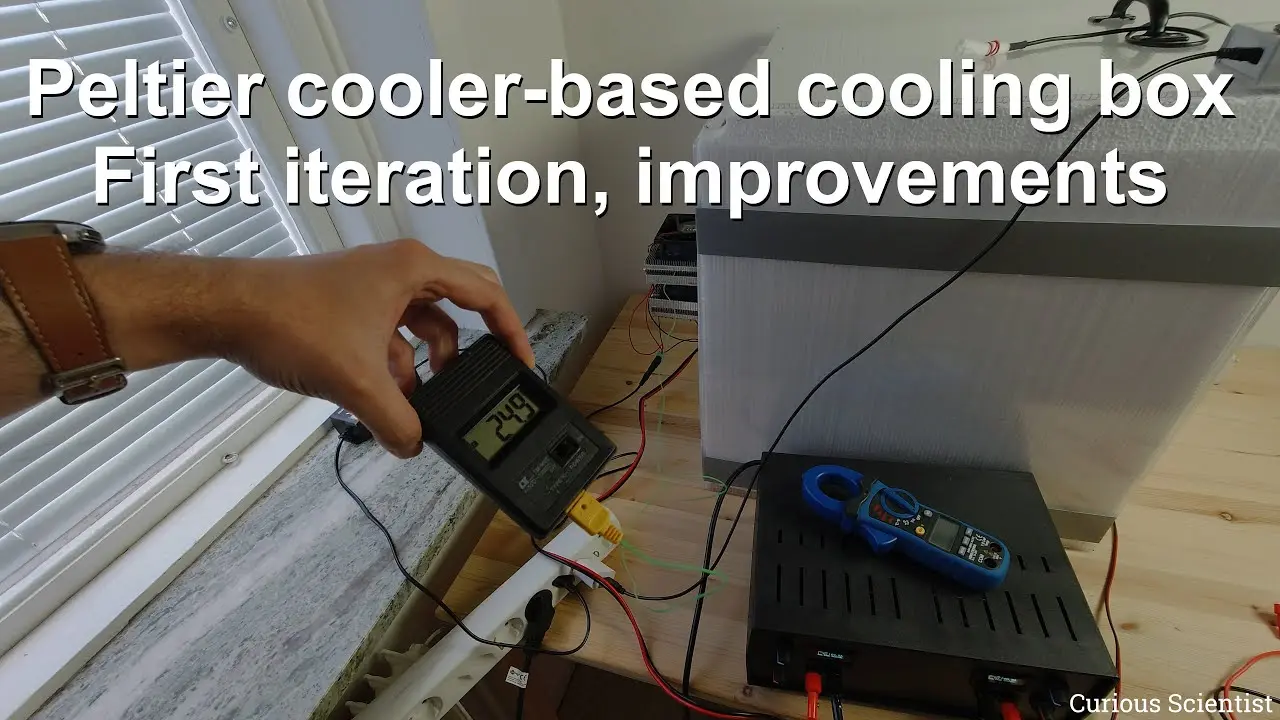
- ⚡ The implementation of a variable power supply allowed for finer voltage adjustments, leading to improved cooling performance by minimizing voltage inefficiencies.
- 😘 Fan upgrades improved air circulation around the coils, contributing to lower operational temperatures across the cooling system.
- 👣 Monitoring devices were crucial in tracking temperature changes accurately, providing real-time feedback on system performance.
- 👻 Evaporative cooling techniques can be effectively utilized to enhance the performance of conventional cooling systems, allowing for lower temperatures under specific conditions.
- 👻 The design allows modifications to be mannered, illustrating a flexible approach towards building efficient thermal management systems.
- 😨 Care must be taken when experimenting with water in the vicinity of electrical components to avoid potential short circuits and hazards.
- 😘 Future experiments are aimed at achieving even lower temperatures, with possibilities for new cooling technologies to be tested in upcoming iterations.
Install to Summarize YouTube Videos and Get Transcripts
Explore YouTube Video Summarizer or Get YouTube Transcript Extractor
Questions & Answers
Q: What primary modifications were made to the cooling box in this iteration?
Significant modifications included the installation of a variable power supply to allow voltage adjustments below 12 volts, enhancing the performance of the peltier cooler. Additionally, a larger fan was incorporated to better circulate air around the heatsink, and a redesign improved overall air flow dynamics, contributing to better cooling efficiency.
Q: How did the upgrade to the power supply affect the cooling performance?
The switch to a variable power supply enabled better control over the voltage supplied to the peltier unit, allowing the experimenter to adjust the voltage downward, which could lead to improved efficiency and performance. This change directly impacted the temperature readings, facilitating lower hot side temperatures and enhancing cooling capability.
Q: What were the temperature readings observed during the experiments?
Initial readings showed the hot side temperature at 34 degrees Celsius with previous settings. After modifications, temperatures dropped to 31.3 degrees Celsius. The internal cold side heatsink achieved temperatures around 9 degrees Celsius, demonstrating significant improvements thanks to better airflow and component upgrades.
Q: Why was evaporative cooling introduced in this experiment?
Evaporative cooling was introduced as an additional method to lower temperatures within the cooling box. By spraying water on the heatsink, the evaporative process effectively decreased the temperature by several degrees, illustrating how adding humidity can enhance cooling performance in conjunction with the peltier setup.
Summary & Key Takeaways
-
The creator introduces upgrades made to a previous cooling box experiment, including a variable power supply and enhanced fans for improved air circulation.
-
Temperature monitoring shows substantial improvements, with the hot side temperature decreasing significantly after modifications, showcasing the efficiency of the new setup.
-
Future experiments are planned, focusing on achieving even lower temperatures and incorporating new cooling methods, demonstrating a commitment to optimizing the cooling box design.
Read in Other Languages (beta)
Share This Summary 📚
Summarize YouTube Videos and Get Video Transcripts with 1-Click
Try YouTube Summary with ChatGPT & Claude or YouTube Transcript Generator
Explore More Summaries from Curious Scientist 📚


Summarize YouTube Videos and Get Video Transcripts with 1-Click
Try YouTube Summary with ChatGPT & Claude or YouTube Transcript Generator