RP2040 + ADS1256 DAQ board
TL;DR
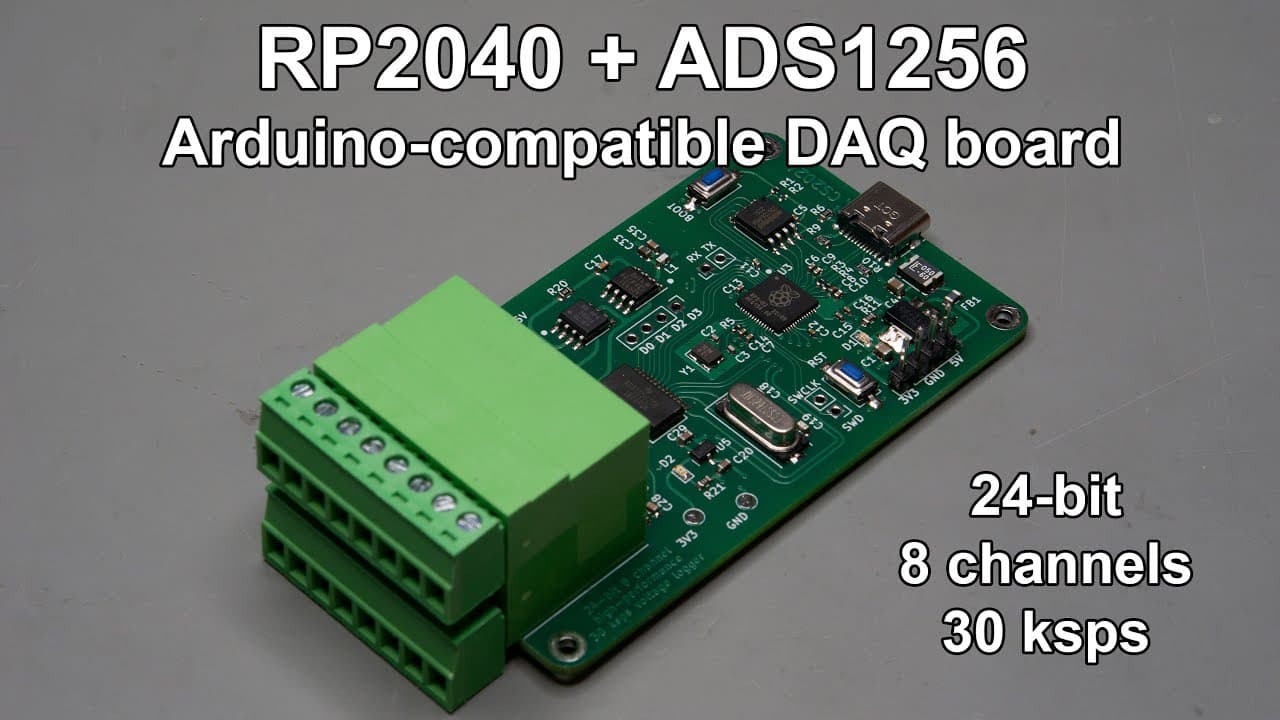
The video discusses the development and testing of a new ADS 1256 board prototype using the RP2040 microcontroller.
Transcript
this video is sponsored by pcbway welcome everyone in this video I'm going to show you another iteration of my ads 1256 board so previously I introduced three different kind of uh boards I have the first prototype which is based on obviously the ads 1256 and an 80 Mega 32 u4 microcontroller and then I kept this microcontroller but I kept iterating ... Read More
Key Insights
- 😒 The new board iteration uses an RP2040 microcontroller for enhanced performance over previous designs with an Atmega microcontroller.
- 🎓 Integration of a USB-C connector provides modern connectivity, making the board user-friendly.
- 👀 The prototype’s compact design facilitates fitting into selected enclosures, looking to improve product aesthetics and usability.
- 📡 Careful attention to PCB layout, including rounded traces, aims to enhance signal integrity.
- ✊ Testing includes critical safety steps to prevent damage to connected devices during initial power-up.
- 🧡 The board is designed for high-resolution data acquisition with options for multiple channels, appealing to a range of electronics and engineering applications.
- 👤 Manufacturing services offered by PCBWay aim to democratize electronic prototyping, making it easier for users to engage with DIY projects.
Install to Summarize YouTube Videos and Get Transcripts
Explore YouTube Video Summarizer or Get YouTube Transcript Extractor
Questions & Answers
Q: What are the key features of the new ADS 1256 board prototype?
The new ADS 1256 board prototype features a compact design with the RP2040 microcontroller, which replaces the previous microcontroller for improved performance. It includes USB-C connectivity, further miniaturization with a focus on layout efficiency, and provisions for memory and serial programming pins. These enhancements aim to offer a robust and user-friendly data acquisition solution.
Q: How did the creator handle initial testing and troubleshooting?
The creator conducted thorough initial testing by measuring voltages and checking connections before connecting the board to a computer. This was to prevent potential damage to the computer's motherboard. Any issues discovered during the connectivity tests prompted troubleshooting steps, which included refining pin definitions and reselecting appropriate board types in the software for effective communication with the microcontroller.
Q: What manufacturing services are mentioned in the video?
The video highlights PCBWay as a sponsor, emphasizing their PCB manufacturing and assembly services. The creator provides a bill of materials and encourages viewers to utilize these services to create their own versions of the board. This facilitates easier access for hobbyists and professionals interested in replicating or customizing the design.
Q: How does the creator plan to market the new board?
The creator plans to sell the finished board along with its software through a web shop. To do this, they will need to complete necessary administrative tasks, particularly with tax regulations. Once ready, the product will be made available for purchase, allowing users to build their own data acquisition systems at lower costs compared to commercial offerings.
Q: What challenges are highlighted during the development process?
The development process included several challenges, such as incorrect pin definitions in the initial code, leading to communication issues with the microcontroller. Additionally, time was taken to carefully file and prepare the enclosure panels to achieve a neat fit. These challenges underscore the complexity of hardware design and the necessity of meticulous prototyping and testing.
Q: What steps are involved in the assembly of the board?
To assemble the board, the creator spreads solder material using a stencil, places components according to designed layouts, and employs a reflow station for soldering. Once the circuit is assembled, it undergoes electrical testing to verify voltage levels and component functionality, ensuring everything operates as intended before subsequent use or sale.
Summary & Key Takeaways
-
The video presents advancements in a board prototype featuring the ADS 1256 and an RP2040 microcontroller, highlighting layout changes, component specifications, and design improvements.
-
The creator demonstrates assembling the board, ensuring proper soldering, and testing its functionalities, emphasizing USB connectivity and voltage regulation during the testing phase.
-
Aimed at market readiness, the prototype is designed for data acquisition applications, with plans for selling the final product and accompanying software via a web shop.
Read in Other Languages (beta)
Share This Summary 📚
Summarize YouTube Videos and Get Video Transcripts with 1-Click
Try YouTube Summary with ChatGPT & Claude or YouTube Transcript Generator
Explore More Summaries from Curious Scientist 📚


![Building a Peltier cooler-based cooling box - First iteration, improvements [Part 2/6] thumbnail](/_next/image?url=https%3A%2F%2Fi.ytimg.com%2Fvi%2F0YlNw0EGnzI%2Fhqdefault.jpg&w=750&q=75)
![Building a coil winder [Part 6] - A few improvements thumbnail](/_next/image?url=https%3A%2F%2Fi.ytimg.com%2Fvi%2F3eyxG_g2iUA%2Fhqdefault.jpg&w=750&q=75)
Summarize YouTube Videos and Get Video Transcripts with 1-Click
Try YouTube Summary with ChatGPT & Claude or YouTube Transcript Generator