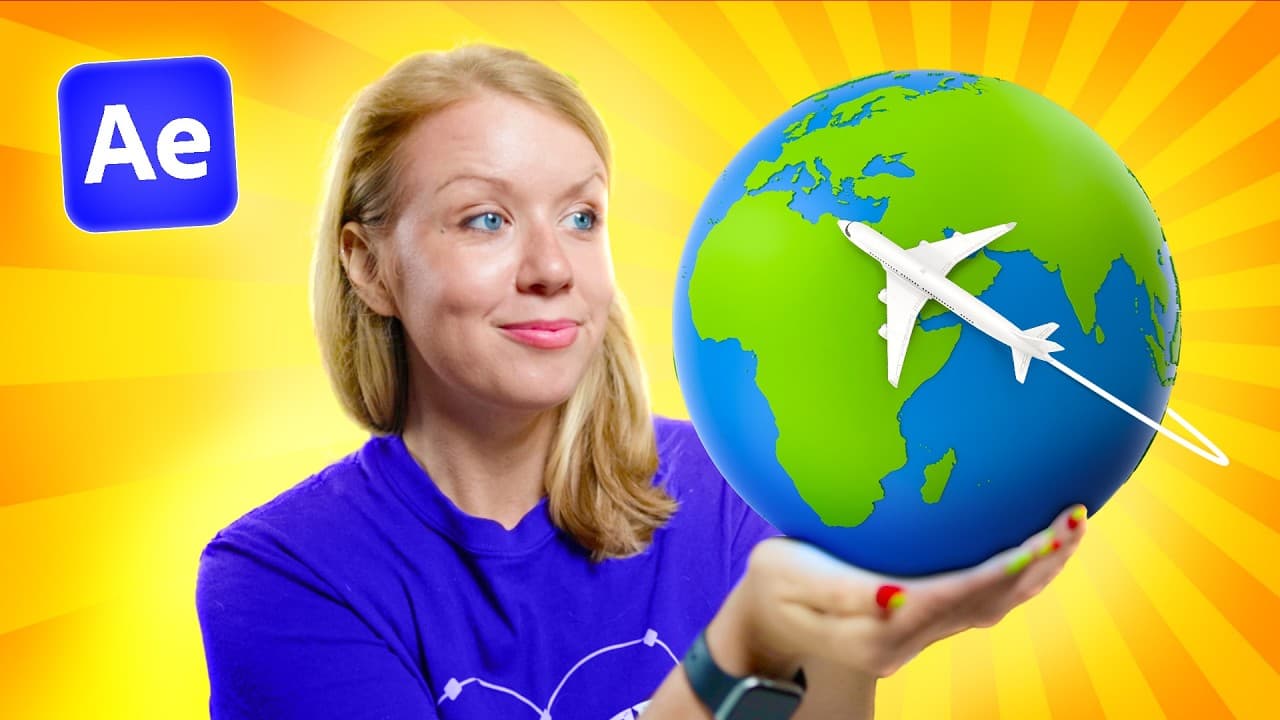
How to Create a 3D Map Animation in After Effects
TL;DR
Build the scene by dropping in a map graphic, drawing a curved route with the pen tool, and making both layers 3D, then rotating the map -90 degrees on X so it lies flat like a table. Parent a 3D camera to a null layer named camera aim so rotating the null orbits the camera while it stays pointed at the map. Animate the route with trim paths and paste the line's path data into the plane's position.
Transcript
Here's how to create this 3D animation, including this 3D airplane, just using After Effects. Let's jump on in. First of all, let's create a new composition. 1080p is good enough for me. Let's hit okay. And the first step here is to set up our scene. Let's drop in whatever map graphic that you're using. In my case, I got this one from Invato. Altho... Read More
Key Insights
- Rotating a 3D map layer -90 degrees on the X axis makes it face upward as if lying on a table, which is the foundational move for the whole scene because every other element is then positioned relative to that flat horizontal surface.
- Parenting a 3D camera to a null layer, renamed camera aim and placed at the center of the animation in 3D space, lets you rotate the null to orbit the camera upward while it stays pointed at the map, which is far easier than keyframing camera position and rotation directly.
- Camera movement must be fast enough for parallax between layers to be visible. If the orbit is too slow, the depth separation never registers on screen and there is no point in having built the scene in 3D in the first place.
- Holding Y on the keyboard moves a layer's anchor point, and holding Control on Windows or Command on Mac while dragging snaps the layer to another layer, which is how the travel line gets seated exactly on top of the map without clipping through it.
- Working in two viewport windows is recommended for any 3D scene: one window shows the active camera while the other can be moved around freely with Alt or Option plus mouse, so you can inspect the setup without disturbing the camera's position.
- Trim paths, added through the add button on the shape layer, animates the travel line extending across the map by keyframing the end parameter from 0 to 100. Moving those keyframes closer together speeds up the reveal.
- Copying the path property from the travel line and pasting it into the airplane layer's position property automatically generates curved keyframes that follow the route. It does not match the line exactly, but it is much easier than animating the flight path from scratch.
- 3D models such as the GLB airplane file only work under the advanced 3D renderer. If the composition is set to classic 3D, the renderer must be changed in the settings at the bottom of the composition panel before the model will function.
- Duplicating the map layer, darkening and lowering the bottom copy, applying the venetian blinds effect to create horizontal lines, and reducing the top copy's opacity produces a layered look that reveals more depth in the map.
Install to Summarize YouTube Videos and Get Transcripts
Explore YouTube Video Summarizer or Get YouTube Transcript Extractor
Questions & Answers
Q: How do you make a map lie flat in After Effects 3D space?
Tick the 3D checkbox on the map layer, pressing F4 first if the checkbox column is not visible. Then select the map layer, press R to open the rotation properties, and change the X rotation to -90 degrees. This makes the map face upward as if it were lying on a table, which becomes the horizontal surface that the travel line, location markers, and airplane are all positioned on top of. The same 3D checkbox is applied to the travel line layer so both exist in the same 3D space.
Q: How do you stop a 3D line from clipping through a map layer?
Select the line layer and hold Y on the keyboard to move its anchor point down to the bottom of the line. Then move the line up, holding Control on Windows or Command on Mac while dragging so it snaps to the map layer. To verify the result, switch to a two-view layout and hold Alt or Option while using the mouse to change the angle in the left window. Watching from that angle shows the moment the line starts to clip through the map, confirming when it is correctly sitting on top instead.
Q: What is the best way to animate a camera in a 3D After Effects scene?
Right-click in the timeline to create a 3D camera with default settings, then create a null layer, make it 3D, and move it to the center of the animation in 3D space. Parent the camera layer to the null and rename the null camera aim. Rotating the aim layer now moves the camera up while keeping it pointed at the map, and the camera layer itself can still be moved in and out or side to side. Keyframing the aim layer's rotation creates a slow orbit above the map.
Q: Why does camera movement speed matter in a 3D map animation?
The orbit should not be too slow because you need enough camera movement for the parallax between layers to be visible. Parallax is the whole reason for building the scene in 3D rather than 2D, so if the camera barely moves, the separation between the map, the grid solid below it, the ocean footage, and the clouds never becomes apparent to the viewer. As stated in the tutorial, without visible parallax there is no point in making it 3D in the first place.
Q: How do you animate a travel route line extending across a map?
Select the shape layer in the timeline and use the small add button on the layer to pick trim paths. Under trim paths, keyframe the end parameter from 0 to 100 and the line will extend across the map. If the reveal plays too slowly, move the keyframes closer together to speed it up. These trim path keyframes later need to line up in time with the airplane's position keyframes so the plane and the trail it appears to leave behind stay in sync.
Q: How do you make a 3D airplane follow a curved path in After Effects?
On the travel line layer, expand the properties until you find path, click that parameter with the stopwatch in front of it, and copy it. Then select the plane layer, press P to open the position properties, and paste the path data into it. This automatically generates keyframes following the curved path. It does not follow the travel line exactly, but it is much easier than animating from scratch. Align the plane's position path with the travel line in both front view and top view, then select the keyframes and press F9 to ease them.
Q: What renderer do you need to use 3D models in After Effects?
3D models only work with the advanced 3D renderer. If the composition is set to classic 3D, the renderer must be changed in the settings at the bottom of the composition panel before a model will function. In this tutorial, a pre-textured GLB airplane model is dragged directly into the preview window, at which point a small window pops up allowing the model to be scaled down before confirming with okay.
Q: How do you add depth and parallax underneath a 3D map?
Create a new solid layer, make it 3D, rotate it 90 degrees so it lies down, and move it below the map to create separation that makes parallax more visible from the main camera. Add a grid effect to the solid, make the grid smaller, and lower the border radius so the lines are not too thick. Then add a gradient effect switched to radial ramp, white in the middle and darker toward the outside, so the grid appears to disappear into the distance. An ocean stock video can be placed under the grid layer, scaled up, and color graded.
Q: How do you create location markers for a 3D map animation?
Hide the other layers, use the pen tool to draw a line such as an arrow pointing down, then press Control or Command plus T to enable the type tool and write the location name above it. Duplicate the two layers and change the text for a second location. Select each pair and precompose them, naming them after the locations, for example USA and Europe. Turn both precomps into 3D layers, position them in the scene, and use the front view to confirm they are not clipping under the map. Moving the anchor point to the bottom of the marker allows scale keyframes to create a popup animation rising from the map.
Summary & Key Takeaways
-
The scene starts with a new 1080p composition and a map graphic recolored using a fill effect. A curved travel route is drawn with the pen tool over an enabled grid, renamed travel line, and given a thinner stroke with a round line cap so it reads more cleanly from any camera angle.
-
Both the map and line layers are switched to 3D with the 3D checkbox, revealed by pressing F4 if hidden. The map is rotated -90 degrees on X so it faces up like a table, and the line's anchor point is moved with the Y key so the line snaps onto the map surface without clipping through it.
-
A 3D camera is created with default settings and parented to a 3D null layer renamed camera aim, positioned at the center of the animation in 3D space. Rotating the aim layer orbits the camera while keeping it pointed at the map, and keyframes drive a slow orbit fast enough to reveal parallax.
-
Depth is built with a 3D solid rotated 90 degrees and placed below the map, carrying a grid effect and a gradient ramp switched to radial so it fades into the distance. An ocean stock video from Envato sits under the grid, scaled up and color graded.
-
Animation comes from trim paths on the travel line, keyframing the end parameter from 0 to 100. A GLB airplane model is dropped into the preview window, which requires the advanced 3D renderer rather than classic 3D, and the line's copied path data is pasted into the plane's position property to generate matching keyframes.
-
Location markers are built from a pen tool arrow plus a text layer, duplicated for a second city, and precomposed into layers named USA and Europe. Made 3D and anchored at their base, they get scale keyframes for a popup animation, checked in front view so they do not clip under the map.
-
Optional polish includes duplicating the map layer, darkening the lower copy, applying the venetian blinds effect to it for horizontal lines, and lowering the top layer's opacity to reveal depth. A clouds solid placed near the camera in 3D space gets turbulent noise with raised contrast and lowered brightness and complexity.
Read in Other Languages (beta)
Share This Summary 📚
Summarize YouTube Videos and Get Video Transcripts with 1-Click
Try YouTube Summary with ChatGPT & Claude or YouTube Transcript Generator
Explore More Summaries from Premiere Gal 📚
Summarize YouTube Videos and Get Video Transcripts with 1-Click
Try YouTube Summary with ChatGPT & Claude or YouTube Transcript Generator