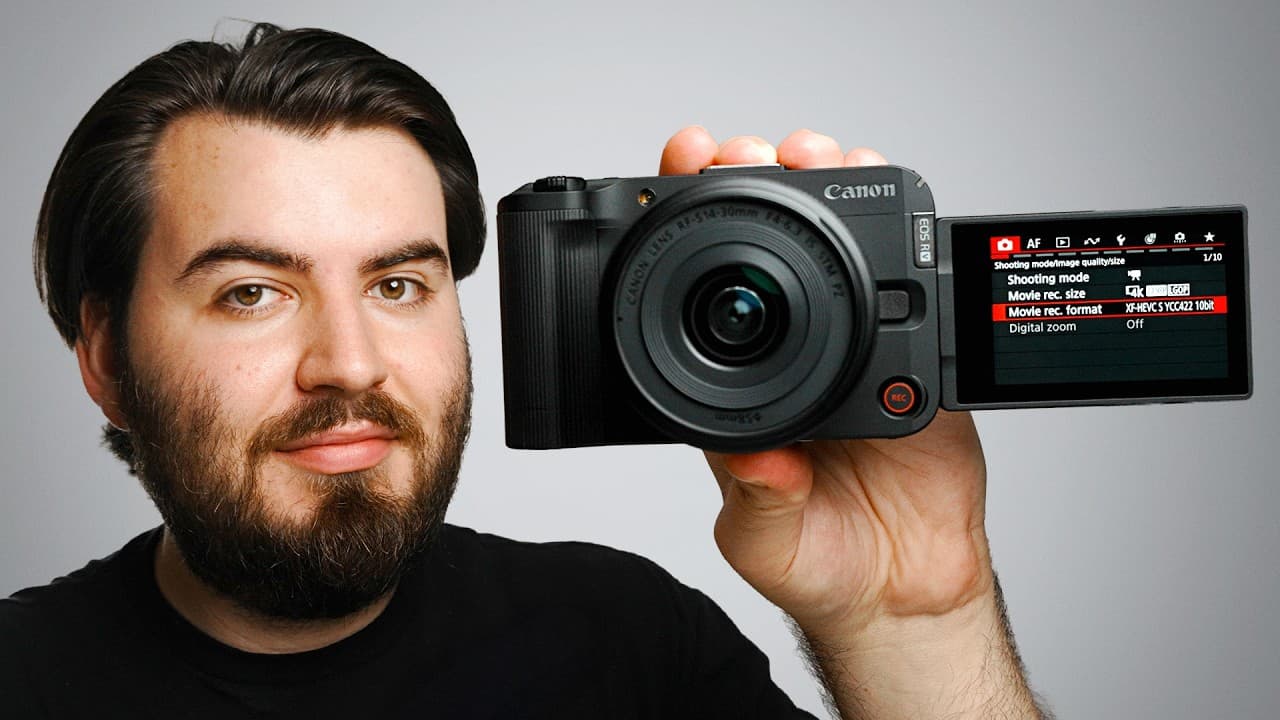
How to Set Up the Canon R50 V for YouTube
TL;DR
Set the Canon R50 V to manual exposure, 4K at 24 fps, a 1/50 shutter speed, low aperture, manual ISO, custom white balance, and controlled audio for studio videos. For vlogging, movie auto exposure and digital stabilization make changing conditions easier to manage, while exposure compensation provides limited brightness control.
Transcript
The Canon R50V is one of the best beginner cameras when it comes to content creation, but it's only as good as the settings you use. So, in this video, I'm going to show you how to set it up for YouTube talking head videos like this, for vlogging, and for slow motion content. So, grab your R50V and let's dive in. You got to just press record. First... Read More
Key Insights
- Manual exposure is the preferred studio mode because it prevents shutter speed, aperture, and ISO from changing during a talking-head recording. This produces a consistent image when the camera, lighting, and subject remain in a controlled environment.
- The recommended studio recording setup is 4K at either 24 or 30 frames per second, with 4:2:2 10-bit selected as the highest recording option shown. A sufficiently fast SD card is necessary to access all available recording modes.
- Shutter speed should be set to roughly twice the selected frame rate for natural motion blur. The demonstrated settings are 1/50 for 24 frames per second and 1/60 for 30 frames per second, helping motion avoid an overly jittery appearance.
- A low aperture number allows more light into the camera and creates a blurrier background. The kit lens reaches f/4 in the demonstration, while the Sigma 16mm f/1.4 can open farther for additional light and stronger background separation.
- ISO should be controlled manually in a studio and kept as low as practical to maintain image quality. The demonstrated scene uses ISO 640, while added lighting is recommended as the preferred way to brighten the image without increasing ISO unnecessarily.
- Custom white balance is the most accurate color option presented for controlled recording. Sampling a gray card allows the camera to establish a neutral reference, while the neutral picture style provides a natural look without requiring the more involved grading workflow of Canon Log 3.
- Manual audio levels are essential for preventing clipped recordings. The external microphone input should be reduced until speech peaks near the green area around 12 instead of reaching the red zone, then checked through headphones for loudness, quietness, or clothing rustle.
- Movie auto exposure is useful for vlogging because it automatically responds as lighting conditions change. Exposure compensation can brighten or darken the result, while the camera's digital image stabilization can assist handheld footage because the R50 V lacks in-body image stabilization.
Install to Summarize YouTube Videos and Get Transcripts
Explore YouTube Video Summarizer or Get YouTube Transcript Extractor
Questions & Answers
Q: How should I set up the Canon R50 V for talking-head videos?
Set the shooting mode to manual exposure so the image does not change during recording. Choose 4K at 24 or 30 frames per second and select 4:2:2 10-bit recording. For 24 fps, use a 1/50 shutter speed, open the aperture as far as appropriate, and set ISO manually. Complete the setup with custom white balance, a neutral picture style, and manually controlled audio.
Q: What frame rate and shutter speed should I use on the Canon R50 V?
For a cinematic-style talking-head recording, select 24 frames per second and set the shutter speed to 1/50. If you prefer 30 frames per second, use 1/60. These shutter settings are roughly double their corresponding frame rates, producing an appropriate amount of motion blur and helping movement look natural instead of excessively jittery.
Q: How do I choose aperture and ISO for a Canon R50 V studio setup?
Use the lowest practical aperture number to admit more light and create greater background blur. The demonstrated kit lens opens to f/4, while the Sigma 16mm f/1.4 can produce a blurrier background and gather more light. Set ISO manually and keep it as low as practical. The example uses ISO 640, with added lighting recommended when more brightness is needed.
Q: How can I get accurate white balance and color on the Canon R50 V?
Create a custom white balance by sampling a gray card under the lighting used for the recording. This provides the most accurate white-balance method presented. For finished-looking color without extensive editing, select the neutral picture style. Color filters can create a graded appearance in-camera, while Canon Log 3 provides a flat image intended for users who want to apply their own grade later.
Q: How should I adjust external microphone levels on the Canon R50 V?
Open the sound recording settings, select the connected external microphone, and change its recording mode to manual. Speak at the expected recording volume while lowering the level until peaks remain near the green area around 12 and avoid the red clipping zone. Before recording, connect headphones and listen for excessive volume, low volume, clothing rustle, or other unwanted sound.
Q: Which Canon R50 V settings help with long recording sessions?
Change the auto power-off temperature setting from standard to high. The transcript states that standard can limit recording to about 30 minutes before shutdown, while high allows operation to continue as long as sufficient battery life remains. Also disable the listed power-saving options so the display does not dim and the camera does not shut off while you are preparing or recording.
Q: How should I prepare and format an SD card for the Canon R50 V?
Use an SD card with sufficient speed for the recording modes you plan to select. Transfer every important file from the card before formatting because the process deletes everything stored on it. In the wrench menu, choose Format Card, select the low-level format option, and confirm. Begin the setup with a fully charged battery so configuration and recording are not interrupted.
Q: What Canon R50 V settings are best for vlogging in changing light?
Switch from manual exposure to movie auto exposure so the camera can respond as you move between brighter and darker environments. Use exposure compensation when the overall image needs correction, raising it when footage looks dark or lowering it when footage looks bright. The transcript advises avoiding adjustments too far beyond one or two stops. Digital image stabilization can also support handheld recording.
Summary & Key Takeaways
-
Begin by installing a charged battery, a sufficiently fast SD card, and a lens, then select movie mode. Format the card only after transferring important files because formatting deletes everything. For reliable operation, raise the auto power-off temperature setting to high and disable unwanted power-saving behaviors.
-
For studio recording, use manual exposure, 4K at 24 or 30 fps, and the 4:2:2 10-bit recording format. Match shutter speed to frame rate, open the aperture for more light and background blur, and keep ISO as low as practical by adding light to the scene.
-
Accurate color and clean audio require deliberate setup. Use a gray card for custom white balance, choose the neutral picture style for a natural look, and set external microphone levels manually. For vlogging, switch to movie auto exposure, adjust exposure compensation when necessary, and enable digital stabilization as appropriate.
Read in Other Languages (beta)
Share This Summary 📚
Summarize YouTube Videos and Get Video Transcripts with 1-Click
Try YouTube Summary with ChatGPT & Claude or YouTube Transcript Generator
Explore More Summaries from Think Media 📚


Summarize YouTube Videos and Get Video Transcripts with 1-Click
Try YouTube Summary with ChatGPT & Claude or YouTube Transcript Generator