How to Connect STM32F103C to Arduino IDE
TL;DR
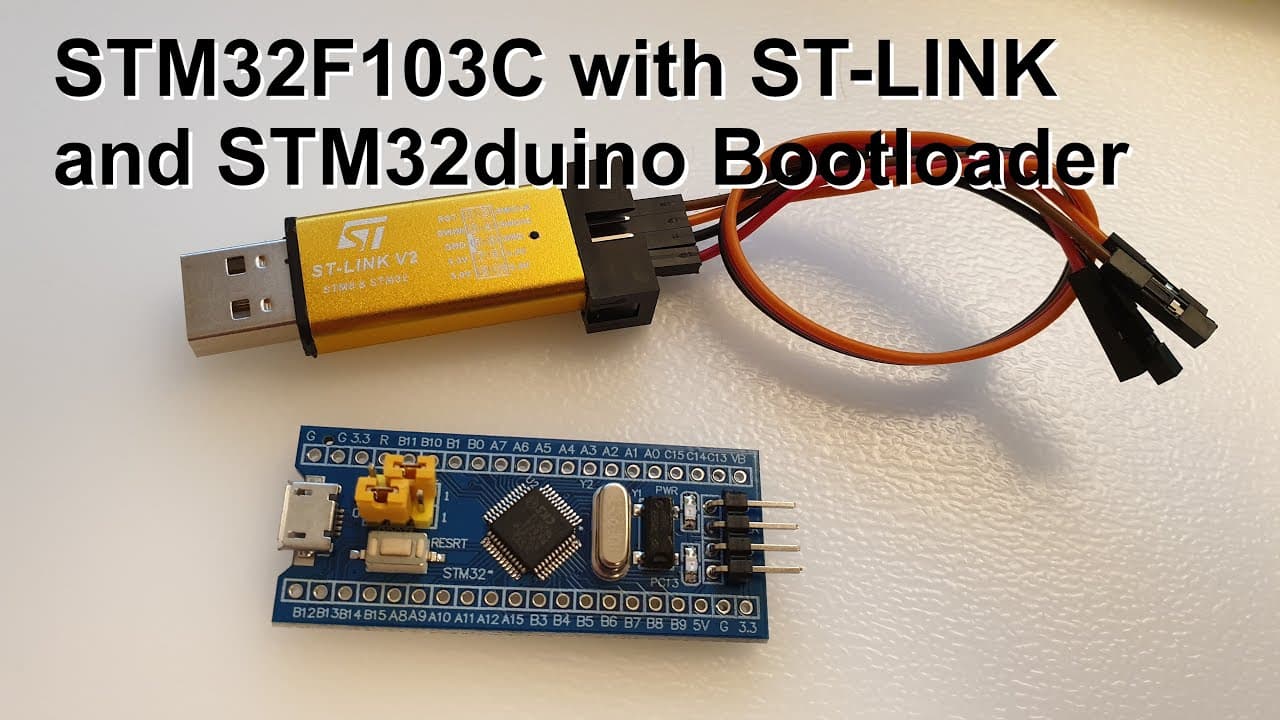
To connect the STM32F103C microcontroller to Arduino IDE, first connect the ST-Link v2 USB dongle to the microcontroller's pins and install the necessary drivers. Then, upload the bootloader using the ST-Link software to enable USB communication. Finally, configure Arduino IDE to recognize the STM32 board by adding the appropriate board manager URL and selecting the ST-Link bootloader as the upload method.
Transcript
welcome everyone in this video I just quickly want to show you how to connect the stm32 type of microcontroller to the computer and make it compatible with arduino ide so what you can see here is we have the stm32 type of microcontroller there is a micro USB here for pins for the connection to this s/t link so and you have the micro controller chip... Read More
Key Insights
- ❓ The STM32 microcontroller can be fitted with a bootloader to enable programming via USB, enhancing flexibility.
- ⌛ The ST-Link v2 USB dongle reduces connection complexity, providing real-time programming capabilities.
- 🏂 Configuring preferences in Arduino IDE to include STM32 board settings is critical for successful project development.
- 😫 Setting up jumper connections correctly before bootloading is essential to prevent errors during the installation process.
- ⚡ Understanding voltage ratings is important, as the STM32 operates at 3.3 volts, requiring careful wiring.
- 👤 Utilizing various software tools collectively can streamline the development process for users unfamiliar with STM32 programming.
- 👶 The presenter emphasizes gathering all necessary information into a single resource to reduce confusion for new users.
Install to Summarize YouTube Videos and Get Transcripts
Explore YouTube Video Summarizer or Get YouTube Transcript Extractor
Questions & Answers
Q: What components are needed to connect the STM32 microcontroller to the computer?
To connect the STM32 microcontroller, you'll need the microcontroller itself, an ST-Link v2 USB dongle, jumper wires, and a computer with Arduino IDE installed. Additionally, a micro USB cable for connecting the ST-Link to the computer is required. Proper connections to power and ground are essential for successful communication.
Q: How do you install the necessary drivers for the STM32 and ST-Link?
The installation involves downloading the drivers from a reliable source and running them by right-clicking the executable file and selecting "Run as administrator." Follow the installation instructions provided during the setup process, and it may be necessary to restart the computer afterward to ensure everything works properly.
Q: What is the function of the bootloader in this setup?
The bootloader serves as a bridge that allows the STM32 microcontroller to receive and execute programs uploaded through the Arduino IDE. Installing the bootloader is crucial because it establishes the necessary communication protocols for programming and enables the microcontroller to perform serial communication.
Q: How can you verify that the STM32 is communicating correctly with the Arduino IDE?
After uploading the software to the STM32 and making the relevant connections, you can open the serial terminal in Arduino IDE to see if data is being sent from the microcontroller. If the LED assigned to the board is blinking and you can see the transmitted numbers in the terminal, it indicates successful communication.
Summary & Key Takeaways
-
This video guides users on connecting an STM32 microcontroller to a computer and making it Arduino IDE compatible, emphasizing the required connections and components.
-
Instructions are provided for uploading the bootloader using an ST-Link, ensuring the microcontroller can communicate and be programmed via USB.
-
The presenter shares software requirements and setup steps, including links for drivers and tools, aiming to streamline the user experience for programming STM32 boards.
Read in Other Languages (beta)
Share This Summary 📚
Summarize YouTube Videos and Get Video Transcripts with 1-Click
Try YouTube Summary with ChatGPT & Claude or YouTube Transcript Generator
Explore More Summaries from Curious Scientist 📚


![Building a Peltier cooler-based cooling box - First iteration, improvements [Part 2/6] thumbnail](/_next/image?url=https%3A%2F%2Fi.ytimg.com%2Fvi%2F0YlNw0EGnzI%2Fhqdefault.jpg&w=750&q=75)
Summarize YouTube Videos and Get Video Transcripts with 1-Click
Try YouTube Summary with ChatGPT & Claude or YouTube Transcript Generator