8-digit 7-segment display - printing floating point numbers
TL;DR
A guide on using an eight-digit display to show floating point numbers with Arduino.
Transcript
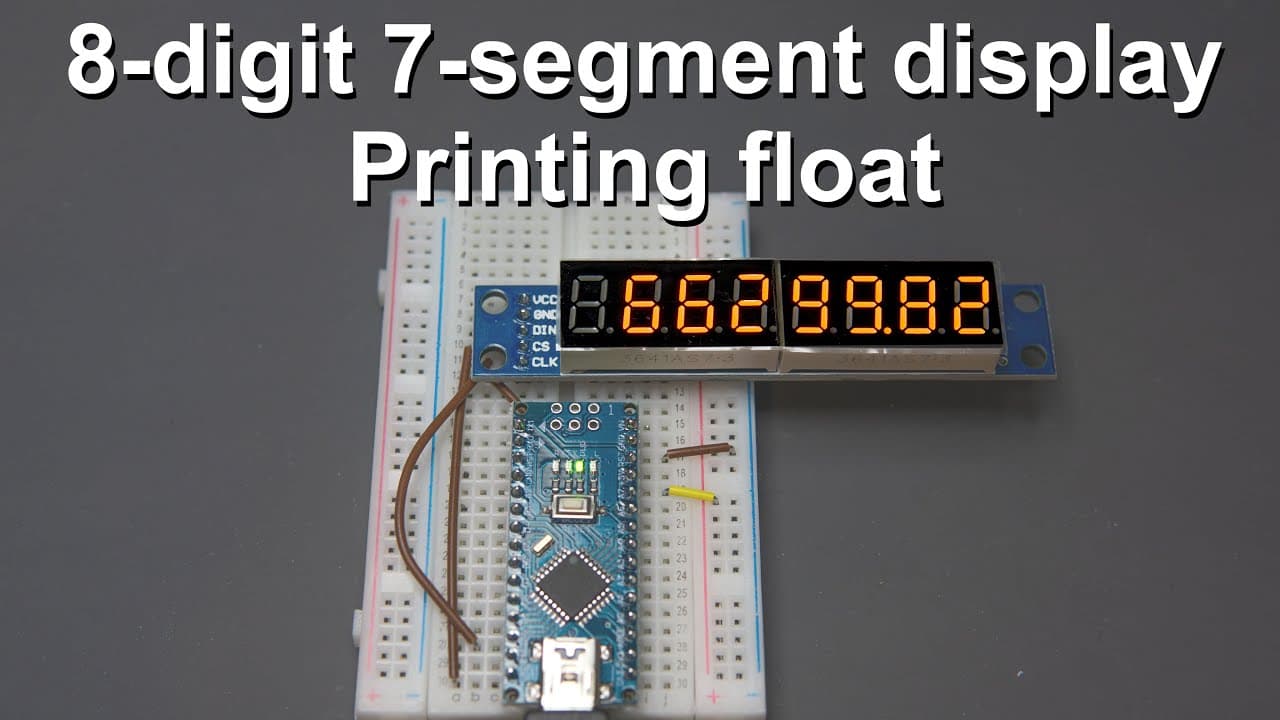
welcome everyone in this short video i'm going to talk about this eight digit seven segment digital display so this is a very nice display because it's relatively simple relatively small and it's very easy to write software for it to show the numbers that we want to see and the reason why i made this video is because i want to use this display in s... Read More
Key Insights
- 🐿️ The eight-digit seven-segment display is driven effectively by the MAX7219 chip, making it straightforward for programmers to display numerical values.
- 🥳 Floating point number processing necessitates separating values into integer and decimal parts, with attention to precision to reduce rounding errors.
- 🤨 SPI communication offers a reliable way to interface multiple displays, giving flexibility to expand projects without complicating hardware setups.
- 🤙 Customizing the display output calls for understanding of both display hardware capabilities and software logic, enabling developers to tailor the display for specific applications.
- 👨💻 Proper debugging of the serial output helps in verifying that the code correctly processes numbers and identifies any potential issues.
- 👨💻 The importance of using libraries to streamline coding practice is emphasized, making it easier for beginners to interact with complex hardware components.
- #️⃣ Random number generation can also be visually demonstrated on the display, showcasing the dynamic capabilities of the tutorial's applications.
Install to Summarize YouTube Videos and Get Transcripts
Explore YouTube Video Summarizer or Get YouTube Transcript Extractor
Questions & Answers
Q: What type of display is discussed in the video?
The video discusses an eight-digit, seven-segment digital display, known for its simplicity and ease of coding for number display, particularly in Arduino projects. It uses a MAX7219 driver for efficient control over the segments.
Q: How does the display communicate with the Arduino?
The display communicates with the Arduino through the SPI (Serial Peripheral Interface) protocol, utilizing three main pins: data in, chip select, and clock. This allows for efficient data transmission and enables multiple displays to be connected and controlled individually.
Q: What is the primary focus of the tutorial regarding the numbers displayed?
The tutorial's primary focus is processing and displaying floating point numbers, which commonly reflect measurements such as voltage, weight, or resistance. The tutorial addresses the challenge of displaying such numbers rather than just integers, as is often found in other resources.
Q: Can the code be modified to display negative numbers?
While the initial tutorial focuses on displaying positive numbers, the presenter mentions that with careful following of the provided instructions, viewers can modify the code to include functionality for negative numbers by adding a few lines to handle the sign.
Q: What challenges does the presenter face while displaying floating point numbers?
The main challenge is separating the floating point number into integer and decimal parts correctly for display, particularly due to potential inaccuracies that can arise from floating point representation in programming.
Q: What library is recommended for simplifying code with the display?
The tutorial suggests using the "LedControl" library, which simplifies the process of controlling the segments of the display, allowing for easier management of number printing and display control without starting from scratch.
Summary & Key Takeaways
-
This video tutorial demonstrates how to interface an eight-digit seven-segment display with an Arduino, specifically focusing on displaying floating point numbers.
-
It covers initial setup, wiring using SPI protocol, and software development, including processing floating point values into integer and decimal components for proper display.
-
The tutorial emphasizes the ability to customize the code for various applications, showcasing both fixed point and randomly generated floating point values in real-time.
Read in Other Languages (beta)
Share This Summary 📚
Summarize YouTube Videos and Get Video Transcripts with 1-Click
Try YouTube Summary with ChatGPT & Claude or YouTube Transcript Generator
Explore More Summaries from Curious Scientist 📚


Summarize YouTube Videos and Get Video Transcripts with 1-Click
Try YouTube Summary with ChatGPT & Claude or YouTube Transcript Generator