STM32F070F6P6 miniature development board with native USB
TL;DR
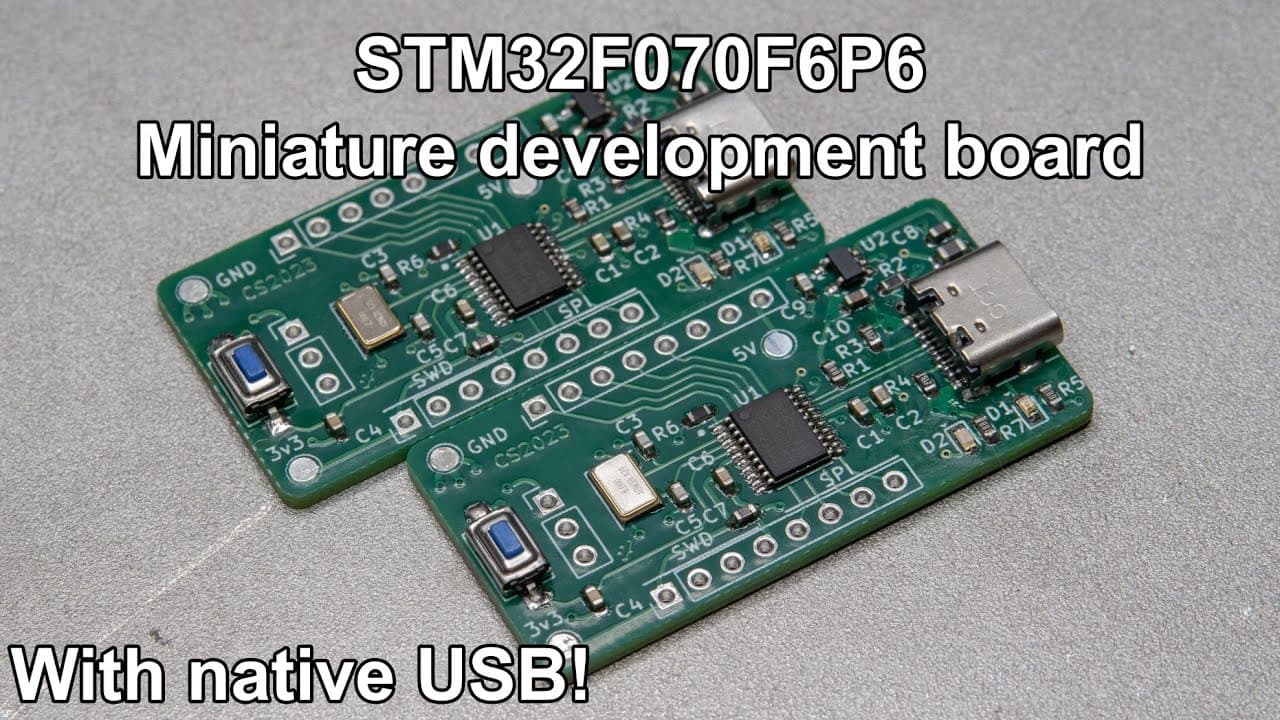
The video demonstrates assembling and testing a tiny STM32 F070 breakout board.
Transcript
this video is sponsored by pcbway welcome everyone in this video I'm going to assemble this tiny circuit that I recently uh designed so as you can see this is a quite tiny circuit and uh if you can guess by the components then you might already see what this is but this tiny circuit is a breakout board for the stm32 f07 0f 6p6 microcontroller so wh... Read More
Key Insights
- 💁 The STM32 F070 microcontroller is an excellent choice for projects requiring USB communication in a compact form factor.
- 🏂 The soldering process for the breakout board requires precision and attention to detail, particularly around critical connections like the USB port to avoid shorts.
- 🏂 Users must follow specific steps for programming the STM32 F070 in the Arduino IDE, including adding the correct board definitions.
- 💁 The creator recommends visiting their website for additional resources and troubleshooting tips related to the completed project.
- ❓ The STM32 F070 provides performance comparable to more widely-used microcontrollers while offering enhanced capabilities due to its integrated USB support.
- 🎮 The video includes practical advice for beginners in electronics, emphasizing the importance of meticulous assembly and testing.
- ❓ A thorough understanding of the IDE setup and configuration is necessary for utilizing the STM32 F070 effectively.
Install to Summarize YouTube Videos and Get Transcripts
Explore YouTube Video Summarizer or Get YouTube Transcript Extractor
Questions & Answers
Q: What are the key features of the STM32 F070 microcontroller?
The STM32 F070 microcontroller is compact and cost-effective, featuring native USB support. It possesses fewer pins than traditional microcontrollers, making it ideal for small-scale projects where space is a constraint. Additionally, it offers performance improvements with a clock speed of 48 MHz compared to standard Arduino boards, which typically operate at 16 MHz.
Q: How is the assembly process of the breakout board demonstrated in the video?
The video illustrates the assembly process by showing the soldering of various components on the STM32 F070 board. It emphasizes the importance of checking for shorts, particularly around the USB port. The creator also showcases the use of a stencil for precise solder application, ensuring a clean and effective assembly process.
Q: What troubleshooting steps are highlighted in the video?
The video highlights the importance of checking for shorts after soldering, particularly focusing on the USB port connections. The presenter also addresses previously made errors, such as forgetting to solder certain tabs. They recommend meticulous checking against visual guides on their website and ensuring that all connections are secure before powering the device.
Q: How are the microcontroller's capabilities tested after assembly?
After assembling the boards, the microcontroller's functionality is tested by connecting it to a power supply and then to a computer. The creator uses the Arduino IDE to program the microcontroller and checks device recognition in the system. Successful power consumption and LED blinking indicate that the microcontroller operates correctly, supporting USB communication.
Summary & Key Takeaways
-
The video showcases the assembly of a tiny breakout board designed for the STM32 F070 microcontroller, highlighting its cheap price and small size.
-
Soldering of the board components is demonstrated, with emphasis on checking for shorts, especially around the USB port connection before applying power.
-
Successful programming of the microcontroller is achieved using the STM32duino framework, demonstrating the board’s capabilities for USB communication and GPIO handling.
Read in Other Languages (beta)
Share This Summary 📚
Summarize YouTube Videos and Get Video Transcripts with 1-Click
Try YouTube Summary with ChatGPT & Claude or YouTube Transcript Generator
Explore More Summaries from Curious Scientist 📚
![Building a Peltier cooler-based cooling box - First iteration, improvements [Part 2/6] thumbnail](/_next/image?url=https%3A%2F%2Fi.ytimg.com%2Fvi%2F0YlNw0EGnzI%2Fhqdefault.jpg&w=750&q=75)
Summarize YouTube Videos and Get Video Transcripts with 1-Click
Try YouTube Summary with ChatGPT & Claude or YouTube Transcript Generator