Stepper motor control with buttons and rotary encoder

TL;DR
Learn how to control stepper motor speed and direction using a rotary encoder and buttons.
Transcript
welcome everyone in this video we are going to continue our work with stepper motor so in my previous video I was showing you how we can control the stepper motor directly by using a rotary encoder so basically I use this guy to rotate the stepper motor either in clockwise direction or counter clockwise direction and that was really good because yo... Read More
Key Insights
- 👻 Understanding how a stepper motor operates is crucial, as it allows precise control over positioning and speed through digital signals.
- 👻 The rotary encoder plays a pivotal role in allowing dynamic speed adjustment and enhancing user interaction with the motor.
- 👨💻 Efficient code structure is vital in embedded systems; proper timing management ensures both motor control and display updates can occur without interfering with each other.
- 🌍 Real-world applications for this setup include robotics, CNC machines, and automation systems where precise movement is required.
- 👻 Ideal speeds can be adjusted while observing the motor's performance, allowing for trial-and-error adjustments during testing.
- 👂 The integration of multimedia elements, such as sound, aids in user feedback during motor operation, enhancing the interactive experience.
- 😒 Balancing resource use in microcontroller projects is essential; understanding the limitations of the Arduino helps in optimizing performance.
Install to Summarize YouTube Videos and Get Transcripts
Explore YouTube Video Summarizer or Get YouTube Transcript Extractor
Questions & Answers
Q: What components are necessary for controlling a stepper motor in this setup?
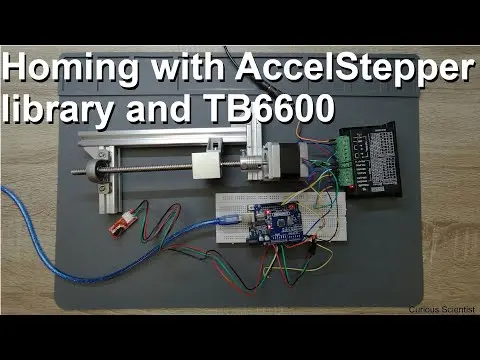
To control the stepper motor, you need an Arduino board, a rotary encoder, a stepper motor driver (like the TV 6600), two push buttons for directional control, and a 16x2 LCD to display speed and position. Additionally, a power supply is required to provide necessary voltage for the motor and components.
Q: How does the rotary encoder function in this motor control setup?
The rotary encoder allows users to adjust the speed of the stepper motor by rotating it. This rotation changes the steps per second that the motor operates at. The encoder provides variable resistance or outputs signals that the Arduino interprets, enabling fast adjustments to the motor’s speed as required by the application.
Q: What issue arises with updating the LCD during motor operation, and how might it be resolved?
Updating the LCD display can consume processing resources, causing delays in stepper motor control that result in erratic movement or "jumps." To resolve this issue, one can either limit the frequency of LCD updates, update it less frequently, or use a more efficient method to update the display, thus freeing up resources for smoother motor function.
Q: What does the Arduino code do in this project?
The Arduino code manages the motor's speed and direction based on button presses and rotary encoder rotation. It includes functions for checking button states, running the motor, and updating the LCD display. The loop continuously checks these inputs, adjusting motor parameters according to user interaction while managing timing to prevent delays.
Summary & Key Takeaways
-
This video tutorial enhances the understanding of controlling a stepper motor using a rotary encoder to adjust speed while allowing directional control with buttons, creating a practical project for hobbyists and engineers.
-
The setup includes an Arduino board, stepper motor driver, two buttons, and an LCD for real-time speed and position feedback, demonstrating the complexities involved in motor control and resource management.
-
The tutorial addresses potential issues when updating the LCD display, discussing how it can affect motor performance by introducing delays during operation, thus emphasizing the importance of balancing updates with maintaining motor speed and precision.
Read in Other Languages (beta)
Share This Summary 📚
Summarize YouTube Videos and Get Video Transcripts with 1-Click
Try YouTube Summary with ChatGPT & Claude or YouTube Transcript Generator
Explore More Summaries from Curious Scientist 📚


![Building a Peltier cooler-based cooling box - First iteration, improvements [Part 2/6] thumbnail](/_next/image?url=https%3A%2F%2Fi.ytimg.com%2Fvi%2F0YlNw0EGnzI%2Fhqdefault.jpg&w=750&q=75)

Summarize YouTube Videos and Get Video Transcripts with 1-Click
Try YouTube Summary with ChatGPT & Claude or YouTube Transcript Generator