How to Upgrade Your Arduino Temperature Logger with Multiple Sensors
TL;DR
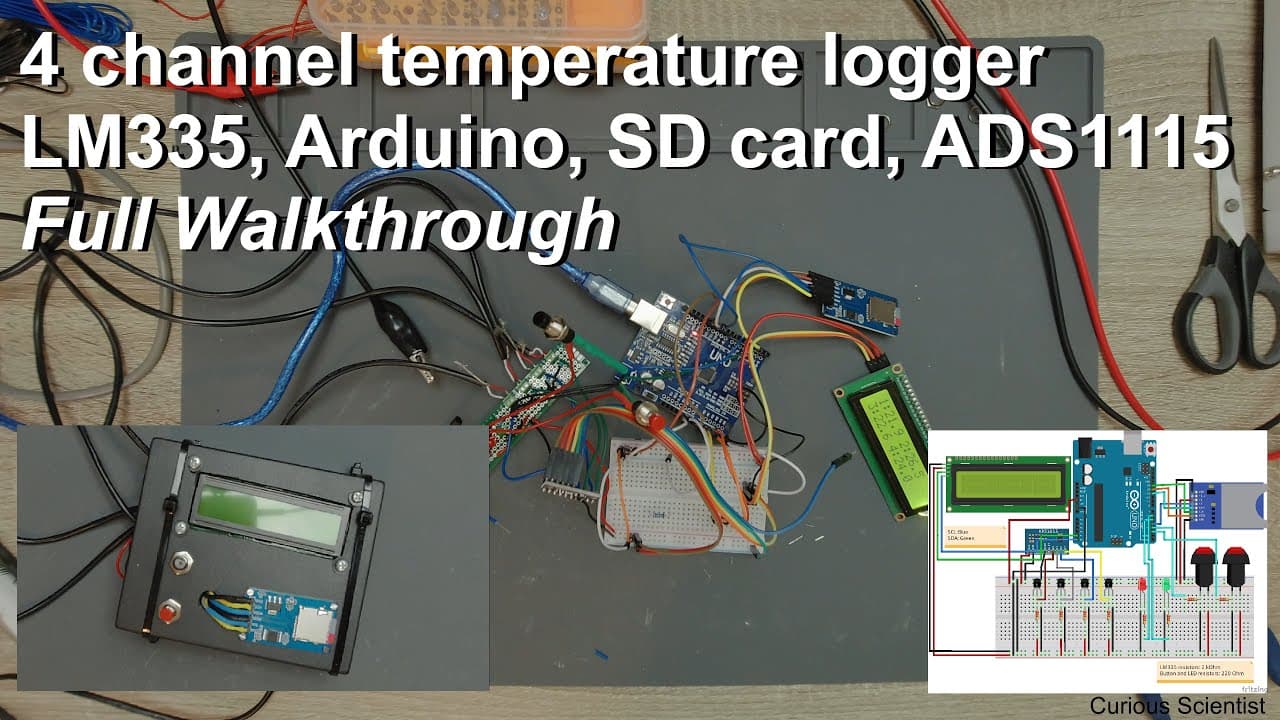
To upgrade your Arduino temperature logger, add push buttons for starting and stopping measurements, and integrate status LEDs for clear device functionality indication. The updated design allows for improved user interaction and logging accuracy by organizing the circuit more effectively and utilizing external sensors for better precision.
Transcript
welcome everyone in this video I'm going to show you some improvement for one of my earlier circuit so I have a video from some months ago there I made a thermo meter circuit which was saving the data on an SD card and I will improve that circuit on in this video and the reason for that is because I've been doing a lot of measurements where I neede... Read More
Key Insights
- 👤 The design of the improved circuit allows for simpler user interaction with dedicated buttons for measurements, reducing the risk of user error.
- 💨 Implementing status LEDs serves as an effective way to communicate the device's state, ensuring users know when data is being logged.
- 🥺 Voltage stability is crucial; fluctuations can lead to inaccurate readings, necessitating careful power management within the circuit.
- 💄 Transitioning from a breadboard setup to a dedicated PCB not only improves robustness but also makes troubleshooting and maintenance easier.
- 🎮 The video illustrates the iterative nature of electronics projects, showcasing trial and error during the development process.
- 📽️ The addition of an external ADC significantly enhances measurement precision, demonstrating the value of external components in Arduino projects.
- 🌍 The creator encourages practical experimentation with temperature sensors, indicating that real-world testing often reveals unforeseen challenges.
Install to Summarize YouTube Videos and Get Transcripts
Explore YouTube Video Summarizer or Get YouTube Transcript Extractor
Questions & Answers
Q: What improvements were made to the original thermometer circuit?
The main improvements include the addition of push buttons for starting and stopping measurements, status LEDs for indicating device readiness and operation, and a more organized circuit that uses a dedicated board for wiring, enhancing overall reliability and ease of use.
Q: How does the circuit handle data logging?
The circuit logs temperature readings from four different sensors to an SD card. When the measurement starts, a new file is created, and data is continuously written until the stop button is pressed, allowing for easy and organized data collection.
Q: What challenges did the creator encounter during the project?
The creator faced issues with voltage reading inconsistencies related to the built-in AD converter of the Arduino. To address this, a more precise ADS1115 ADC module was integrated to improve data accuracy, highlighting the importance of stable voltage levels in sensor readings.
Q: How are the temperature sensors connected and calibrated?
The temperature sensors are connected to the Arduino, with each output linked to an ADC for measurement. Calibration is suggested through immersion in known temperature sources (ice water and boiling water) to normalize the readings across sensors, ensuring reliable data output.
Summary & Key Takeaways
-
The video presents an upgraded thermometer circuit that stores temperature data from multiple sensors on an SD card, improving measurement accuracy and convenience.
-
New features include push buttons to start and stop measurements, status LEDs to indicate device functionality, and a more organized circuit design to enhance reliability.
-
The creator shares insights into the assembly process, challenges faced, and final testing of the circuit, resulting in a functional device suitable for various temperature logging applications.
Read in Other Languages (beta)
Share This Summary 📚
Summarize YouTube Videos and Get Video Transcripts with 1-Click
Try YouTube Summary with ChatGPT & Claude or YouTube Transcript Generator
Explore More Summaries from Curious Scientist 📚
![Building a Peltier cooler-based cooling box - First iteration, improvements [Part 2/6] thumbnail](/_next/image?url=https%3A%2F%2Fi.ytimg.com%2Fvi%2F0YlNw0EGnzI%2Fhqdefault.jpg&w=750&q=75)
Summarize YouTube Videos and Get Video Transcripts with 1-Click
Try YouTube Summary with ChatGPT & Claude or YouTube Transcript Generator