How to Connect a Keypad to Arduino for Motor Control
TL;DR
To connect a keypad to an Arduino for motor control, use a PCF8574 I/O expander to minimize pin usage. The keypad enables input through a matrix connection, allowing users to enter numbers that can be converted into a double data type for controlling parameters. Implement string manipulation to process inputs and include a delete function for correcting mistakes.
Transcript
welcome everyone in this video i'm going to show you how to use a keypad with an arduino and how to process the entered characters and numbers and the reason why i do this is because a lot of people suggested me to improve my control panel for stepper motors by adding a keypad so this guy here because it would be much easier to modify and enter the... Read More
Key Insights
- 🧑🦼 Incorporating a keypad into Arduino projects can significantly streamline user input and control parameters like speed and steps for motors.
- 😴 Utilizing I2C IO expanders simplifies wiring by allowing multiple components to communicate through just a few pins, making circuit design more efficient.
- 🤩 The implementation of row and column scanning allows quick identification of key presses, enhancing responsiveness and user interaction.
- 👻 String manipulation functions are crucial in managing user input, allowing for easy conversions and corrections in entered data.
- 👨💻 The project emphasizes the importance of code optimization to efficiently manage input without unnecessary processing delays.
- 🔠 Correct input validation is necessary to avoid errors during conversions from strings to numerical variables.
- 👻 Adding functionality for input deletion improves user experience by allowing real-time corrections during data entry.
Install to Summarize YouTube Videos and Get Transcripts
Explore YouTube Video Summarizer or Get YouTube Transcript Extractor
Questions & Answers
Q: What components are needed to connect a keypad to an Arduino?
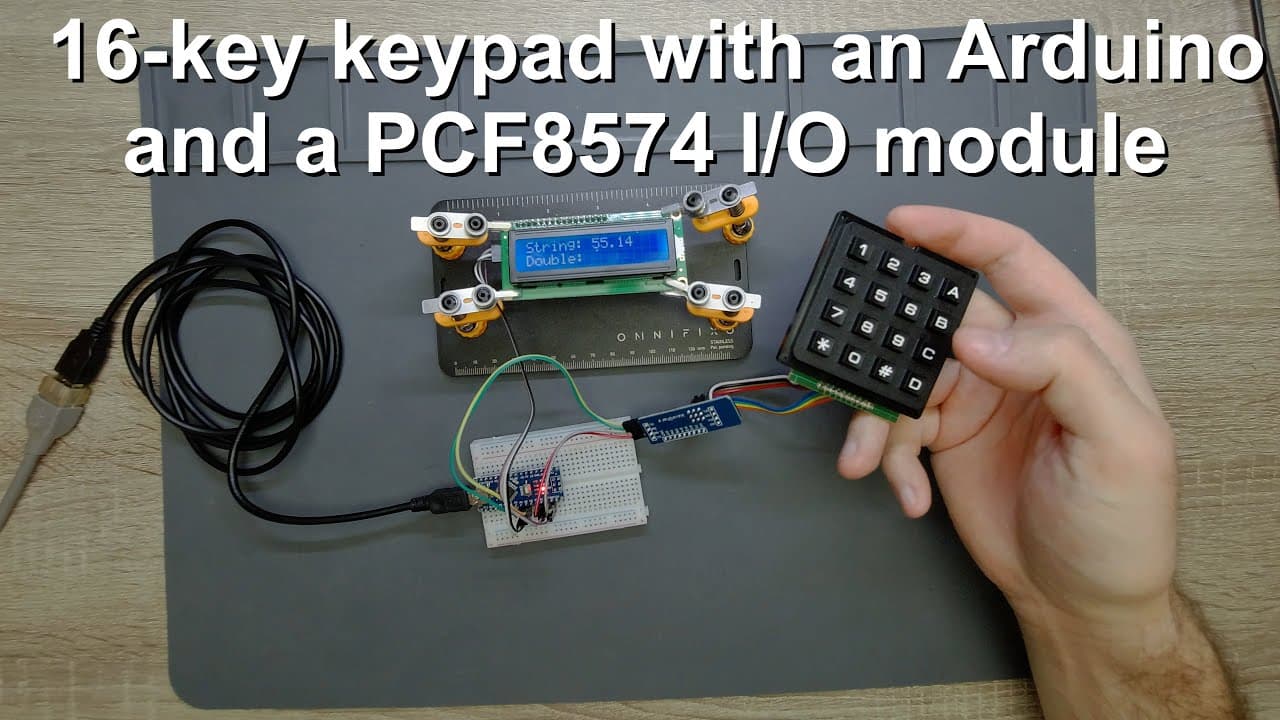
To connect a keypad to an Arduino, you need a keypad, an Arduino Nano, an I2C IO multiplexer module, and a 16x2 LCD. The I2C multiplexer allows for fewer pins to be used by combining multiple inputs into two data pins (SDA and SCL), streamlining the circuit while ensuring efficient communication.
Q: How does the matrix connection of the keypad work?
The keypad features four rows and four columns, totaling eight pins. When a key is pressed, one row and one column are activated to create a circuit. The microcontroller detects which key was pressed by identifying the row that goes low through binary coding, enabling efficient input capture using minimal pins.
Q: Can you explain how to process the entered characters from the keypad?
Characters entered via the keypad are collected into a string. For instance, when a number is pressed, it appends to the existing string. When a designated button is pressed (like 'A'), the string is converted to a double for further calculations, allowing the entered numbers to be utilized in various programming contexts.
Q: What functionality does the delete button provide in this project?
The delete function, assigned to the ‘D’ key, allows users to correct mistakes by removing the last character from the string. This is particularly useful for ensuring accurate numerical input before conversion. Each deletion updates the display accordingly, enhancing user experience.
Q: How is the conversion from a string to a double handled in the code?
The conversion process involves taking the full concatenated string and applying a function that transforms it into a double or numerical format compatible with Arduino variables. This process includes error checking to ensure a valid format before conversion to avoid issues during logical processing.
Q: Why use an I2C multiplexer instead of connecting multiple pins directly?
Using an I2C multiplexer simplifies connections by reducing the number of pins needed from the microcontroller. Instead of requiring eight pins for direct connections, two pins (SDA and SCL) are used for communication, allowing for a cleaner and more efficient circuit design without sacrificing functionality.
Summary & Key Takeaways
-
This video tutorial demonstrates how to connect a keypad to an Arduino Nano, enabling user input for controlling stepper motors. It emphasizes the benefits of using an I2C IO multiplexer module to simplify pin usage.
-
The presenter explains the keypad's matrix connection, detailing how to read input characters and process them into a numerical format for the Arduino to interpret.
-
Practical examples illustrate how to implement string manipulation and conversion to double data types, showcasing the keypad's functionality for input correction.
Read in Other Languages (beta)
Share This Summary 📚
Summarize YouTube Videos and Get Video Transcripts with 1-Click
Try YouTube Summary with ChatGPT & Claude or YouTube Transcript Generator
Explore More Summaries from Curious Scientist 📚


Summarize YouTube Videos and Get Video Transcripts with 1-Click
Try YouTube Summary with ChatGPT & Claude or YouTube Transcript Generator