How to Properly Prepare a Character Rig in Adobe Animate with the EDAP Toolset (Part 1 of 2)
TL;DR
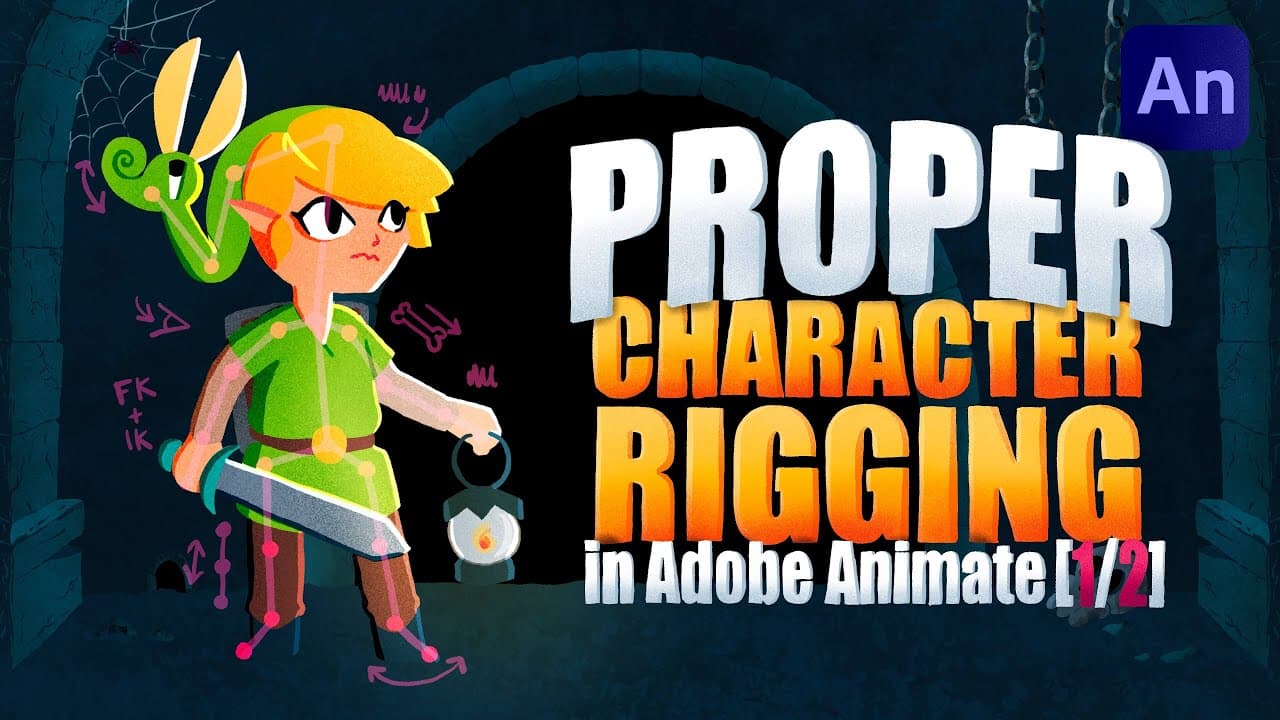
Prepare an Adobe Animate character rig by installing Flanimate Power Tools version 6, activating the EDAPT CC v6 shortcuts, and marking every rotation point with a perfect circle. Convert each body component into a centered graphic symbol, preserve alignment references on guide layers, organize artwork on named layers, and overlap connected shapes to prevent visible gaps during rotation. Read on for the exact installation, alignment, symbol, and layer setup.
Transcript
let's learn how to do adobe animate character rigging that's actually good using the edap toolset instead of the crappy bone tool plus we'll announce the five winners from last week's giveaway tiptop hello everybody and welcome back to tiptup today we're going to take a look at creating the structure the symbols needed to rig this character using t... Read More
Key Insights
- The EDAP Toolset is installed by downloading the latest package, extracting its JSFL file, and choosing Run Command from Adobe Animate's Commands menu while no files are open. Animate must then be restarted so the installed extensions can initialize.
- The EDAPT CC version 6 keyboard shortcut set must be selected in Adobe Animate after installation. The installation can be checked by opening a test project and confirming that the EDAP commands and toolsets appear under Window and Extensions.
- Perfect circles define the character's intended articulation points, including shoulders, elbows, wrists, hand tips, hips, and knees. Their geometry provides reliable registration and transform references, helping connected symbols rotate around consistent points without breaking the puppet's structure.
- Object Drawing mode keeps newly created circles as separate object shapes. Holding Shift while drawing or scaling preserves a perfect aspect ratio, holding Alt scales from the center, and Alt can also duplicate selected objects when repeated joint markers are needed.
- Graphic symbols should use centered registration points when they are created with F8. Artwork and copied joint circles must then be aligned precisely inside those symbols because the registration and transform positions determine how each body component will rotate during animation.
- Guide layers hold construction circles and alignment references without displaying their contents outside the symbol. A guide can temporarily be changed back into a visible layer when an exact reference is needed to align a connected torso, hip, or limb component.
- Overlapping artwork prevents visible gaps when connected body parts rotate. The belt extends above the tunic, the tunic continues behind adjoining components, and shoulder artwork covers part of the rotation joint so slight hyperextension does not immediately expose empty space.
- Separate named layers make a complex character easier to assemble and select. Torso, hips, belts, buckles, guide shapes, and other elements are moved onto corresponding layers, while completed layers can be locked to prevent accidental selection during construction of additional limbs.
Install to Summarize YouTube Videos and Get Transcripts
Explore YouTube Video Summarizer or Get YouTube Transcript Extractor
Questions & Answers
Q: How do you install the EDAP Toolset in Adobe Animate?
Download the latest Flanimate Power Tools package, which is version 6 in the tutorial, and extract the ZIP to access its JSFL file. With no documents open in Adobe Animate, choose Commands, then Run Command, and open the JSFL file. Accept the license terms and restart Animate so the toolset can initialize.
Q: How do you verify that the EDAP Toolset is configured correctly?
After restarting Adobe Animate, open a new or test project and check Window and Extensions for the EDAP commands and toolsets. Then open Edit and Keyboard Shortcuts and select the EDAPT CC v6 shortcut set instead of the default shortcuts.
Q: Why are perfect circles used when preparing an Adobe Animate character rig?
Perfect circles mark rotation and articulation points such as the shoulders, elbows, wrists, hand tips, hips, and knees. They provide consistent references for the registration and transform points at the base of each symbol, helping the puppet rotate without breaking apart.
Q: How do you create and duplicate articulation circles accurately?
Select the Oval tool, enable Object Drawing mode, and hold Shift while drawing or scaling to preserve a perfect circle. Hold Alt to scale from the center. You can duplicate a circle with Alt or copy and paste it in place with Control+C and Control+Shift+V.
Q: How should graphic symbols be created for the character rig?
Select a prepared component, press F8, give it a clear body-part name, and choose the Graphic symbol type. Set its registration point to the center, then enter the symbol and align its artwork and copied joint references precisely with the intended rotation points.
Q: What is the purpose of guide layers in character symbols?
Guide layers preserve construction circles and alignment references inside a symbol without showing that reference content outside it. A guide can temporarily be changed back into a normal layer when another torso, hip, or limb component needs to be aligned to it exactly.
Q: How do overlapping shapes prevent gaps when a rig rotates?
Artwork should extend beyond its visible boundary and behind neighboring body parts. For example, the belt can extend above the tunic, while torso and shoulder artwork can cover connected areas so rotation or slight hyperextension does not reveal empty space.
Q: How should layers be organized while preparing the character?
Place major symbols and artwork elements on separate, clearly named layers such as torso, hips, belt, buckle, and guide. Move each completed element onto its matching layer and lock finished layers to prevent accidental selection or movement while building the remaining components.
Summary & Key Takeaways
-
The setup begins by downloading version 6 of the Flanimate Power Tools, extracting its JSFL file, and running it through Adobe Animate with no documents open. After accepting the license terms, restart Animate, confirm that the EDAP extensions appear, and select the EDAPT CC version 6 keyboard shortcuts instead of the default shortcut set.
-
Perfect circles are placed over the character's shoulders, elbows, wrists, hand tips, torso connection, hips, knees, and other articulation points. Object Drawing mode keeps the circles separate, Shift maintains their proportions, and Alt supports centered scaling or duplication. These circles establish consistent registration and transform points for later rotation of the puppet's components.
-
Each body component becomes a graphic symbol with its registration point centered. Guide layers preserve construction references without appearing outside symbols, while separate named layers organize tunic, belt, buckle, torso, hips, and limb artwork. Shapes extend behind adjacent components to prevent gaps during rotation, and precise joint alignment prepares the character for rigging and animation in part two.
Read in Other Languages (beta)
Share This Summary 📚
Summarize YouTube Videos and Get Video Transcripts with 1-Click
Try YouTube Summary with ChatGPT & Claude or YouTube Transcript Generator
Explore More Summaries from TipTut 📚
![How to Merge Animation and Film [2/3] thumbnail](/_next/image?url=https%3A%2F%2Fi.ytimg.com%2Fvi%2FemjKD_a68Uw%2Fhqdefault.jpg&w=750&q=75)
Summarize YouTube Videos and Get Video Transcripts with 1-Click
Try YouTube Summary with ChatGPT & Claude or YouTube Transcript Generator