DIY Variable Laboratory Power Supply
TL;DR
Learn to create a low-cost laboratory power supply using basic components.
Transcript
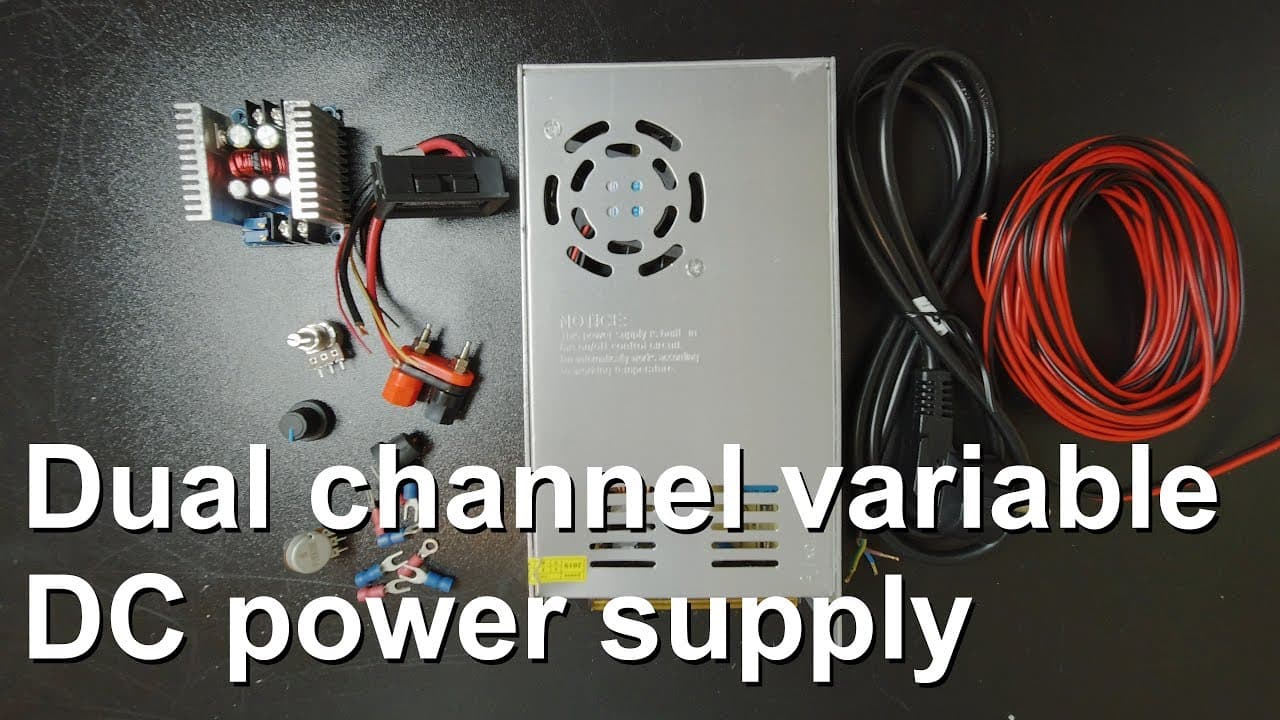
welcome everyone in this video I'm going to show you how to build a small laboratory power supply so you can see the parts that I'm going to use for this power supply in fact this power supply will be a Tube channel or to output power supply but I'm just showing you one because basically you just have to duplicate and then you can make it into two ... Read More
Key Insights
- ✊ Building a laboratory power supply from cheap components is feasible and can be done with readily available materials.
- 👻 Adjustable potentiometers allow users to tailor the current and voltage to suit their specific needs during lab work.
- ✊ Using a power meter enhances the setup, providing real-time insights into voltage, current, and power consumption.
- 😎 Safety precautions, such as using appropriate wire gauges and cooling methods, are essential to prevent accidents during operation.
- 👀 The methodology demonstrated focuses on simplicity, suitable for beginners and hobbyists looking to create their electronic projects.
- 🤩 The power supply can be adapted for multiple outputs by replicating key components effectively.
- ⚡ Regular testing of outputs at different voltage settings is crucial to ensure system reliability before full-scale usage.
Install to Summarize YouTube Videos and Get Transcripts
Explore YouTube Video Summarizer or Get YouTube Transcript Extractor
Questions & Answers
Q: What components are essential for building this laboratory power supply?
Key components include a 12V power supply rated at 30A, a 300W DC-DC buck converter, two potentiometers for controlling current and voltage, and a power meter for monitoring output. These parts work together to create a flexible and efficient laboratory power supply for various applications, even under higher loads.
Q: Why is it important to use thicker wires in this power supply?
Thicker wires are crucial for safety and efficiency in power applications as they can handle higher currents without overheating. The presenter uses 0.5 mm² wires for demonstration, but for actual use with high currents, thicker wires are recommended to prevent voltage drops and potential hazards such as fires.
Q: How does the cooling system function in the power supply?
The power supply employs heat sinks along with potential fans to dissipate heat generated during operation. Since the heat sinks are relatively small, a fan is needed to ensure the components do not overheat, maintaining performance and longevity of the power supply.
Q: What are the steps to set up the power meter with the buck converter?
To set up the power meter, connect it to measure the load's power consumption. The presenter describes wiring the meter to both the input of the buck converter and the output load, ensuring it accurately tracks power flowing through the desired circuit portions for performance analysis.
Q: Can this setup be modified for better performance?
Yes, the design can be expanded to include multiple channels or outputs, enhancing its versatility. By duplicating components and integrating more potentiometers and buck converters, users can create a multi-channel laboratory power supply that can accommodate various experiments and devices.
Q: What kind of loads can this power supply handle?
The power supply is primarily designed for low to moderate loads, suitable for driving small electronic devices or components. The presenter highlights its capability to power a thermoelectric device, demonstrating its effectiveness in practical applications while maintaining stability in voltage and current output.
Summary & Key Takeaways
-
The video demonstrates how to build a two-channel laboratory power supply using affordable components, including a 12V power supply and a DC-DC buck converter.
-
Thicker wires are recommended for handling higher currents, and the setup includes adjustable potentiometers for current and voltage control.
-
The presenter tests the setup by running a thermoelectric device, confirming efficient performance and stable output under various loads.
Read in Other Languages (beta)
Share This Summary 📚
Summarize YouTube Videos and Get Video Transcripts with 1-Click
Try YouTube Summary with ChatGPT & Claude or YouTube Transcript Generator
Explore More Summaries from Curious Scientist 📚


![Building a Peltier cooler-based cooling box - First iteration, improvements [Part 2/6] thumbnail](/_next/image?url=https%3A%2F%2Fi.ytimg.com%2Fvi%2F0YlNw0EGnzI%2Fhqdefault.jpg&w=750&q=75)
Summarize YouTube Videos and Get Video Transcripts with 1-Click
Try YouTube Summary with ChatGPT & Claude or YouTube Transcript Generator