Arduino menu navigation with rotary encoder and LCD
TL;DR
Learn to create a simple menu system with rotary encoders and LEDs via Arduino.
Transcript
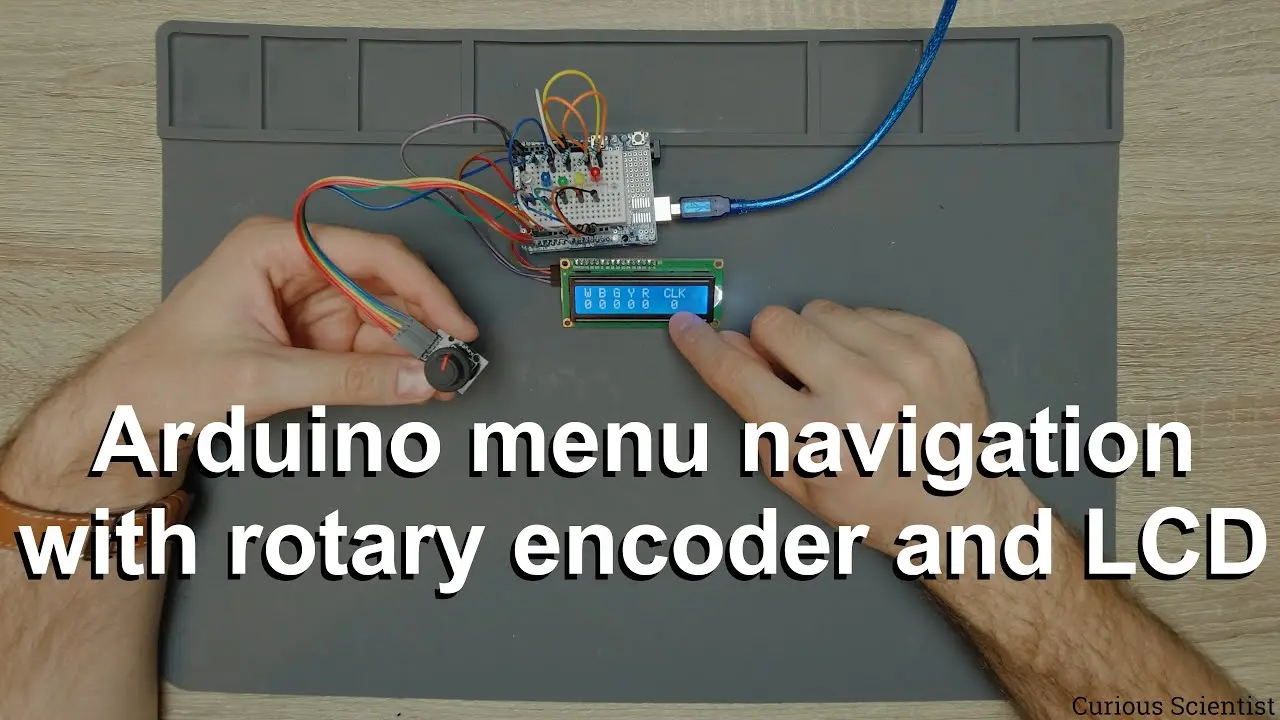
welcome everyone in this video i will show you another use of rotary encoders and i will show you how you can build a very simple menu or menu system and how you can navigate in the menu so i will give you some advices or some guidelines how you can work out your own menus and own system so as you can see there is a very humble setup on the desk so... Read More
Key Insights
- 👤 Rotary encoders offer a versatile and user-friendly method for navigating menus in electronic projects, bridging simple hardware with essential programming concepts.
- 👤 Utilizing interrupt-driven inputs can optimize responsiveness in user interface projects, preventing lag and unnecessary updates on displays.
- 👫 The combination of LEDs and a rotary encoder provides an intuitive visual representation of system options, enhancing user interactions in electronic devices.
- 🔠 Effective code structure, like switch-case statements in conjunction with rotary encoder inputs, streamlines management of multiple user commands and enhances software clarity.
- 🔄 Software debouncing ensures accurate recognition of button presses, addressing common mechanical limitations associated with rotary encoder buttons.
- 👶 Building upon fundamental electronics concepts permits creators to scale and customize projects, integrating familiar components into new applications.
- 👤 Creating a circular, user-friendly menu experience contributes to improved engagement and usability in electronics projects, particularly essential in complex interfaces.
Install to Summarize YouTube Videos and Get Transcripts
Explore YouTube Video Summarizer or Get YouTube Transcript Extractor
Questions & Answers
Q: What components are required for the rotary encoder menu project?
The key components required for this project include an Arduino Uno, a 16x2 LCD, a rotary encoder with a button, a set of five LEDs in different colors, and resistors for the LEDs. The Arduino will act as the central control unit, powering and processing input from the rotary encoder.
Q: How does the rotary encoder function in the menu system?
The rotary encoder allows users to scroll through menu options by rotating the knob, with each rotation registering a "click" that increments or decrements the displayed menu item. Pressing the knob serves to select an option, enabling actions such as turning LEDs on or off in the demo.
Q: Can the principles used in this project be applied to more complex systems?
Yes, the foundation established by using a rotary encoder for simple menu navigation can be scaled to manage more complex systems. This includes managing settings for motors, controlling different output devices, or even integrating with more extensive user input systems with multiple encoders or buttons.
Q: What programming techniques are used to manage the rotary encoder’s functionality?
The code primarily utilizes interrupt routines to detect changes in the rotary encoder’s position and button presses. Variables track the state of the buttons, enabling efficient updates and LED management through a switch-case structure, avoiding unnecessary screen flickering by controlling how often the display updates.
Q: How does the software ensure that the menu behaves in a circular fashion?
The software is designed to recycle the menu options, allowing the user to circle back to the top after reaching the last item and vice versa. This is accomplished by resetting the count to zero or to the maximum depending on the direction of the rotation, creating a seamless user experience.
Q: What are some potential applications for this rotary encoder menu system?
Potential applications for this menu system include controlling home automation systems, managing settings in electronic projects, using it in hobby robotics to navigate instructions, and incorporating it as an interface in user-driven art installations or displays.
Q: How does the author handle the physical limitations of the rotary encoder button?
The author acknowledges potential hiccups with the rotary encoder’s button responsiveness. Implementing software debouncing techniques helps contain random errors due to button 'bouncing,' ensuring that only intentional presses are recognized while also allowing specified time between inputs to prevent double-counting.
Q: Will the author provide additional resources for learning more about this topic?
Yes, the author mentions a website (curiousscientist.tag) offering additional content and encourages viewers to reach out with questions or for more detailed explanations. This indicates a commitment to fostering a community around learning in the electronics and Arduino space.
Summary & Key Takeaways
-
This video tutorial demonstrates how to set up a simple menu system using a rotary encoder, LEDs, and an Arduino. The rotary encoder serves dual functions: to navigate through the menu and to confirm selections by pressing the button.
-
The presentation includes an overview of the hardware components, namely a 16x2 LCD display, a rotary encoder with push-button functionality, and five LEDs representing different menu options or settings that can be toggled on and off.
-
The creator will provide the source code and schematic diagrams, while also addressing the importance of managing the rotary encoder’s counts effectively to create a smooth user experience in menu navigation.
Read in Other Languages (beta)
Share This Summary 📚
Summarize YouTube Videos and Get Video Transcripts with 1-Click
Try YouTube Summary with ChatGPT & Claude or YouTube Transcript Generator
Explore More Summaries from Curious Scientist 📚

![Building a Peltier cooler-based cooling box - First iteration, improvements [Part 2/6] thumbnail](/_next/image?url=https%3A%2F%2Fi.ytimg.com%2Fvi%2F0YlNw0EGnzI%2Fhqdefault.jpg&w=750&q=75)


Summarize YouTube Videos and Get Video Transcripts with 1-Click
Try YouTube Summary with ChatGPT & Claude or YouTube Transcript Generator