How to Color Grade Videos in DaVinci Resolve
TL;DR
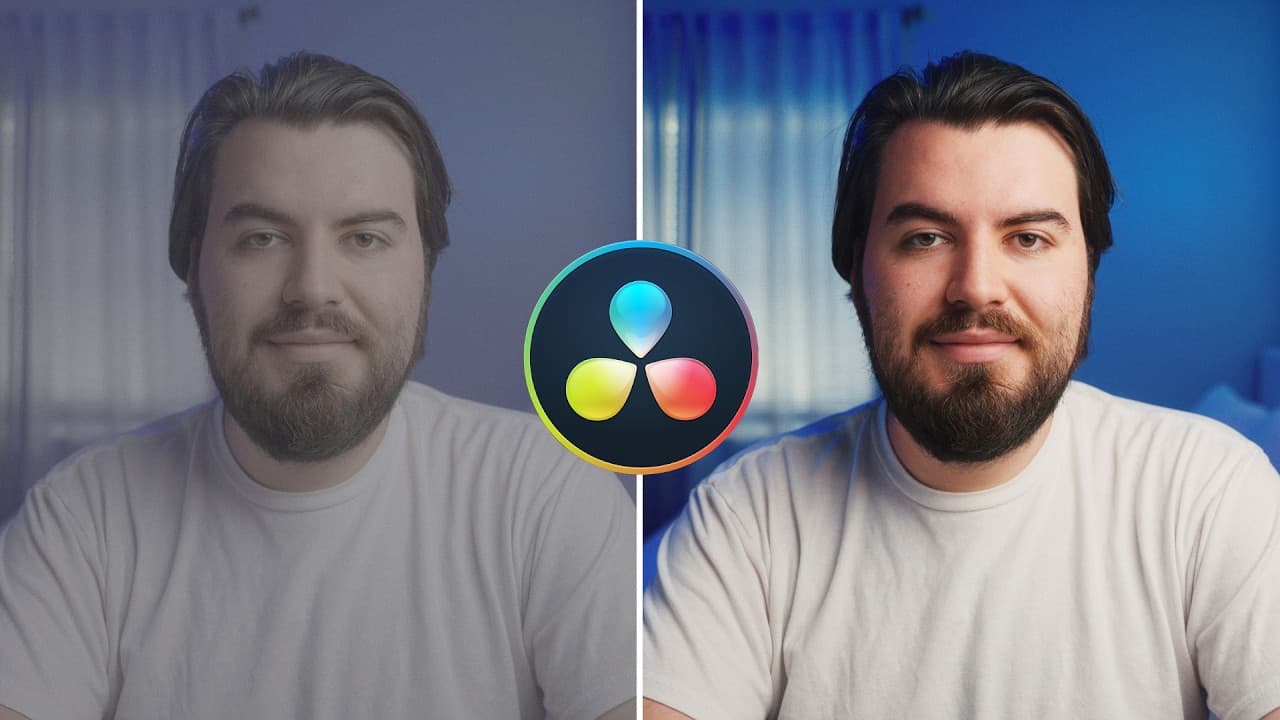
Start by correcting exposure and white balance, then refine contrast and saturation before applying any creative style. DaVinci Resolve’s waveform helps identify overly bright or dark areas, while separate nodes keep each adjustment organized. Aim for a clean, natural image first, paying particular attention to preserved detail and believable skin tones.
Transcript
If you're new to color grading, Da Vinci Resolve is without a doubt the best place to start. It's quickly become the industry standard for Hollywood films and high-end video production. But you don't need to be a pro to get great results. That's why in this video, I'm going to walk you through my simple five-step workflow that instantly makes your ... Read More
Key Insights
- Color correction is the process of fixing exposure, white balance, contrast, and saturation so footage appears accurate and neutral. Color grading is a stylistic stage that adds a chosen mood or feeling after that technical foundation has been established.
- DaVinci Resolve uses nodes as an ordered chain of adjustments rather than conventional layers. Assigning exposure, white balance, contrast, saturation, and creative styling to separate nodes keeps the workflow organized and makes the purpose of each adjustment easier to identify.
- Log footage is a flat-looking recording format that provides additional flexibility during grading. Before normal grading begins, the footage must be converted into the standard Rec. 709 color space, while footage already recorded in that space does not require the same conversion step.
- Exposure is controlled through lift, gamma, gain, and offset, which correspond broadly to shadows, midtones, highlights, and overall brightness. Offset offers a simple starting point, while the other controls allow more targeted corrections within different tonal areas.
- The waveform is an objective guide to brightness across the image. It helps reveal clipped highlights, crushed dark areas, and the screen location of those regions, although an intentionally bright object such as a lamp may reasonably approach the upper limit.
- White balance is corrected by sampling a bright, neutral object with the eyedropper tool. A white shirt can provide an initial reference, while a gray card can produce a more accurate reading before temperature and tint receive any desired manual refinement.
- Contrast is the separation between brighter and darker parts of an image. Increasing it can deepen shadows, brighten highlights, and make footage feel less washed out, but excessive contrast can damage the natural appearance and may also increase perceived color intensity.
- Saturation is the intensity of color within the image, and subtle adjustments are often sufficient. Skin tones deserve particular attention because viewers quickly notice unnatural color there, even when vibrant lighting or other colorful background elements appear visually appealing.
Install to Summarize YouTube Videos and Get Transcripts
Explore YouTube Video Summarizer or Get YouTube Transcript Extractor
Questions & Answers
Q: What is the difference between color correction and color grading?
Color correction fixes technical image problems so footage looks accurate and neutral. The workflow addresses exposure, white balance, contrast, and saturation before creative styling begins. Color grading is the optional process of giving the corrected image a particular mood, style, or feeling. A clean, natural image may already be complete after correction if no distinctive creative treatment is needed.
Q: How should nodes be organized for color work in DaVinci Resolve?
Nodes should be arranged as a chain of clearly labeled adjustments, with each node serving a distinct purpose. Separate nodes can handle exposure, white balance, contrast, saturation, and the creative look. This structure makes the grade easier to follow because each operation occupies its own step, while the ordered chain combines those individual changes into the final image.
Q: How do you correct exposure in DaVinci Resolve?
Correct exposure by selecting the exposure node and adjusting the color wheels. Lift affects shadows, gamma affects midtones, gain affects highlights, and offset changes overall brightness. Offset is a simple place to begin when the whole image appears too bright or dark. Use restrained adjustments, inspect the viewer, and consult the waveform to protect important detail from clipping.
Q: How does the waveform help with exposure correction?
The waveform displays the brightness distribution of the image and maps its horizontal position to the picture shown in the viewer. Dark image information appears near the lower region, while bright information appears near the upper region. The display helps identify lost detail and clipping. Bright practical objects may remain very bright, but important subjects such as skin should retain visible information.
Q: How do you fix white balance in DaVinci Resolve?
Select the white balance node, activate the eyedropper, and sample something bright and neutral within the frame. A white shirt can place temperature and tint near an accurate result, while a gray card can provide a more dependable reference. After sampling, manually adjust temperature to make the image warmer or cooler and refine tint if the colors still need correction.
Q: Why should log footage be converted before color grading?
Log footage appears flat and unattractive before processing, but that flat recording provides additional flexibility for color work. It requires conversion into the standard Rec. 709 color space before the usual correction and grading workflow. Footage already recorded in Rec. 709 appears more contrasty and saturated, so it does not need that same preliminary conversion described for the log material.
Q: How do you add contrast without making footage look unnatural?
Use a dedicated contrast node and increase the contrast control gradually while watching both highlights and shadows. More contrast can make a flat or washed-out image feel clearer by brightening highlights and deepening shadows, and it may also make colors appear stronger. Stop before the adjustment becomes harsh. Footage that already has substantial contrast may need only a subtle change.
Q: How should saturation be adjusted for natural-looking color?
Adjust saturation after exposure, white balance, and contrast have been established. Increase it carefully to add vibrancy, or reduce it when a less colorful appearance is desired. Small changes can be sufficient, especially when the scene already contains colorful lighting. Keep watching skin tones throughout the adjustment because unnatural saturation is particularly noticeable on people, even when the background remains attractive.
Summary & Key Takeaways
-
Color correction creates an accurate, neutral foundation by fixing exposure, white balance, contrast, and saturation. Color grading is the separate creative process of adding a particular style, mood, or feeling. A video can be considered finished after correction if its clean and natural appearance already suits the intended result.
-
DaVinci Resolve organizes adjustments through connected nodes rather than conventional layers. Separate nodes can hold exposure, white balance, contrast, saturation, and a creative look. This ordered structure makes the workflow easier to understand because every node represents a distinct step contributing to the final appearance of the footage.
-
Exposure can be adjusted with lift, gamma, gain, and offset, while the waveform provides an objective reference for brightness and clipping. White balance can be sampled from a neutral white object or gray card. Contrast and saturation should then be adjusted subtly, with close attention paid to image detail and skin tones.
Read in Other Languages (beta)
Share This Summary 📚
Summarize YouTube Videos and Get Video Transcripts with 1-Click
Try YouTube Summary with ChatGPT & Claude or YouTube Transcript Generator
Explore More Summaries from Think Media 📚




Summarize YouTube Videos and Get Video Transcripts with 1-Click
Try YouTube Summary with ChatGPT & Claude or YouTube Transcript Generator