How to Edit Dream Sequences in Premiere Pro
TL;DR
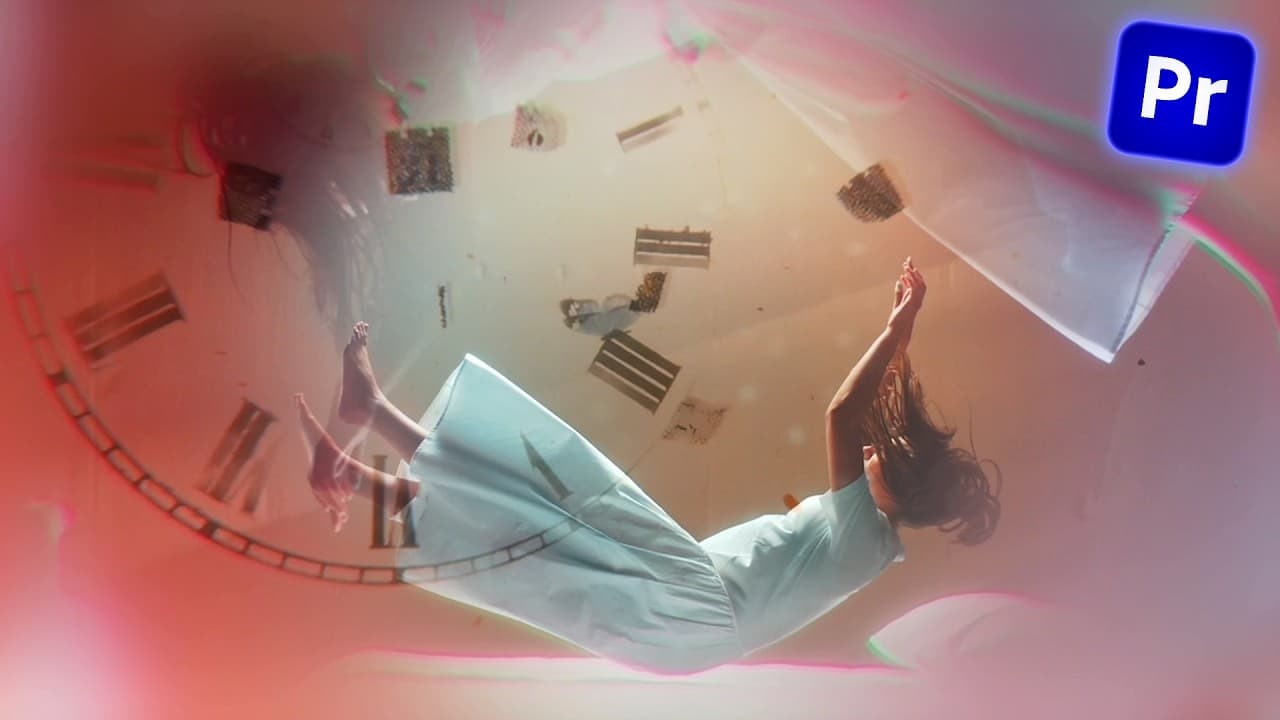
Build a convincing dream sequence by choosing music first, cutting visual changes to its beats, and using adjustment layers to animate color shifts and double exposure. In Premiere Pro, reversed footage, progressive scaling, rate stretching, opacity ramps, and precisely timed effects can transform ordinary shots into a character-focused hallucination while keeping the edit flexible.
Transcript
One of my favorite things about editing is experimenting with different effects to better reflect your character's point of view in your films. And after all, filmm is about sharing that human experience. So, in this video, I'm going to share with you some effects and editing techniques to edit an awesome dream sequence from a character's point of ... Read More
Key Insights
- Music selection is the foundation of the demonstrated workflow because its rhythm can inspire both the pacing and imagery. A track with clocklike strings prompted the editor to develop clock-related hallucinations and use prominent musical beats as precise locations for visual changes.
- Premiere Pro’s Remix tool is a practical way to shorten a longer music track while retaining a coherent ending. The editor first removes the unwanted slow introduction, selects the Remix tool from the Ripple Edit tool submenu, and drags the track toward a 30-second duration.
- Client music approval is most useful before visual editing begins. Sending the chosen track for approval early reduces the risk of rebuilding a sequence after its cuts, effects, and timing have already been designed around music that the client later wants replaced.
- Audio waveforms are visual guides for rhythm-based editing. Enabling Show Audio Waveform from the timeline wrench menu reveals prominent string beats, allowing the editor to place cuts accurately and synchronize scaling changes, color shifts, and other visual events with the soundtrack.
- Progressive scaling creates escalating dramatic intensity without requiring complicated animation. The editor divides the shot at musical beats, increases a later section to 125 percent, copies its motion attributes forward, and raises the final section to 175 percent while adjusting position to preserve the eye line.
- The Rate Stretch tool extends a moment by slowing its playback. After cutting where the character’s eyes close, pressing R and stretching the final segment makes that action last longer, giving the transition into the dream sequence more time and visual emphasis.
- Adjustment layers keep color treatments flexible because their effects apply to every clip positioned beneath them. The Tint effect maps dark and light image values to blue tones, while the adjustment layer’s opacity line and pen-created keyframes form a ramp resembling a light turning on.
- Double exposure can communicate dissociation or an approaching hallucination. The demonstrated preset applies the look automatically, while cuts determine where it appears and opacity ramps animate its entrance. Extending its adjustment layer allows the same treatment to continue across multiple underlying shots.
Install to Summarize YouTube Videos and Get Transcripts
Explore YouTube Video Summarizer or Get YouTube Transcript Extractor
Questions & Answers
Q: How do you choose music for a dream sequence?
Choose music that supports the intended emotional state and suggests a usable visual rhythm. The demonstrated sequence takes inspiration from the nightmare scene in Vertigo and uses a similarity-search service to find a related licensed track. Its string rhythm resembles a clock, which inspires clocklike hallucinations and provides clear beats for timing cuts, scaling changes, color shifts, and other effects.
Q: How do you shorten music with Premiere Pro’s Remix tool?
First remove any section that should not appear in the shortened version, such as the track’s slow opening. Open the Ripple Edit tool submenu, select the Remix tool, and drag the end of the remaining audio toward the desired duration. In the demonstration, a track lasting about 2 minutes and 11 seconds is remixed to approximately 30 seconds with automatically created splice points.
Q: How do you cut dream sequence footage to music beats?
Enable Show Audio Waveform from the wrench menu and enlarge the audio track so its peaks are easy to see. Identify the visible waveform peaks corresponding to the prominent string beats, press C to activate the cut tool, and divide the footage at those points. Those cuts can then anchor progressive crops, color changes, double exposure, or transitions throughout the sequence.
Q: How can reversed footage introduce a dream sequence?
Reverse footage when the recorded action moves opposite to the desired transition. In the example, the original shot shows a sleeping character opening her eyes, but the sequence needs her eyes to close before the dream begins. Right-click or Control-click the clip, open Speed and Duration, enable reverse speed, and trim the clip so the eye closure lands at the intended moment.
Q: How do you create a progressive zoom effect on music beats?
Split the footage at selected beats, then change the Scale and Position controls for successive sections. The demonstrated edit scales one later segment to 125 percent, repositions it to center the eye line, and copies those motion attributes to another clip. The final section is enlarged further to 175 percent, making each beat feel progressively closer and more intense.
Q: How do you make a closed-eye shot last longer in Premiere Pro?
Make a cut at the moment the character closes her eyes, press R to select the Rate Stretch tool, and drag the end of that segment outward. Extending the segment slows its playback and increases its duration. This gives the eye-closing moment more time before the dream imagery begins without requiring a different source shot or an additional transition.
Q: How do you animate dreamlike color shifts with adjustment layers?
Create an adjustment layer, place it above the footage, and apply Premiere Pro’s Tint effect. Map the black value to a dark blue and the white value to a lighter blue. Enable Show Video Keyframes if necessary, use the pen tool to add opacity keyframes, and shape a ramp so the tint gradually appears like a colored light turning on.
Q: How do you create and animate a double-exposure dream effect?
A double exposure can be built by duplicating footage, masking portions of the image, and adding blur, although the demonstration uses a prepared Premiere Pro extension preset to apply the treatment automatically. Cut the adjustment layer where the effect should stop, then use pen-created opacity ramps to fade it in and out. Extend the layer when the effect should cover several underlying clips.
Summary & Key Takeaways
-
The workflow begins with music that establishes the dream sequence’s rhythm and suggests visual ideas. After removing the unwanted slow opening, Premiere Pro’s Remix tool shortens the selected track from about 2 minutes and 11 seconds to approximately 30 seconds while preserving a satisfying musical progression and ending.
-
The opening footage is rotated 180 degrees, reversed so the character closes her eyes, and trimmed to the desired moment. Visible audio waveforms guide cuts on prominent string beats. Successive shots are scaled from a closer view to 125 percent and then 175 percent, creating an increasingly intense progression toward the dream.
-
Adjustment layers provide flexible control over the dream effects. A Tint effect maps black and white values to dark and light blue, while opacity keyframes create gradual color ramps. A double-exposure preset is added and animated in the same way, producing a visual transition that suggests dissociation, hallucination, and entry into a dream state.
Read in Other Languages (beta)
Share This Summary 📚
Summarize YouTube Videos and Get Video Transcripts with 1-Click
Try YouTube Summary with ChatGPT & Claude or YouTube Transcript Generator
Explore More Summaries from Premiere Gal 📚

Summarize YouTube Videos and Get Video Transcripts with 1-Click
Try YouTube Summary with ChatGPT & Claude or YouTube Transcript Generator