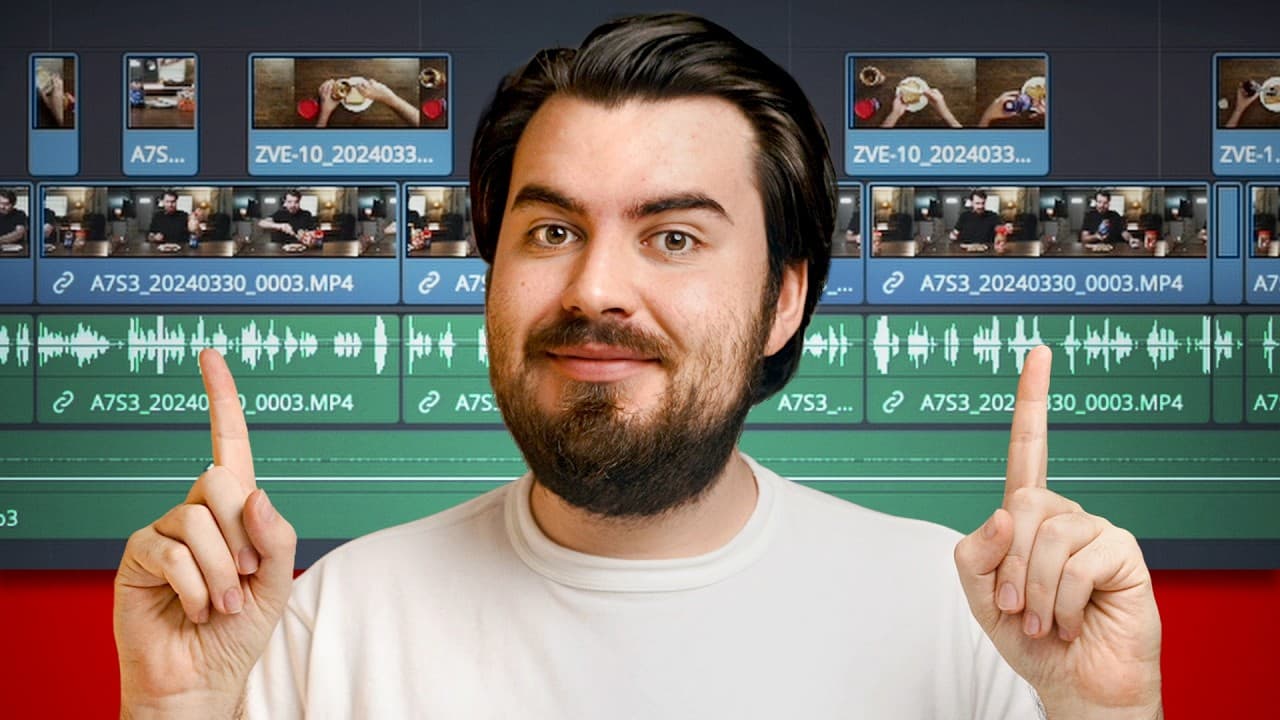
How to Turn Raw Footage Into a YouTube Video
TL;DR
Organize and copy your footage to a dedicated project folder before importing it into your editor, then build a rough A-roll timeline and remove anything that does not help or entertain viewers. Strengthen the first 30 seconds, illustrate key points with B-roll, keep background music near -30 dB, use royalty-free tracks, and correct exposure, white balance, and contrast before applying a creative color grade.
Transcript
So, you just filmed your first YouTube video and now you're staring at your footage thinking, "Where do I even start?" Hey, my name is Nate and I've been editing for over 11 years. And today, I'm breaking down my simple 10-step process to turn raw footage into a finished YouTube video you're proud of. And yes, this will work no matter what editing ... Read More
Key Insights
- Project organization is the foundation of an efficient edit. Copy footage into one main folder with separate subfolders for A-roll, B-roll, audio, graphics, and other assets so every required file remains easy to locate throughout the editing process.
- Editing directly from an SD card is slower and less reliable than working from copied files. Moving clips to a separate computer folder also reduces the stated risk of file corruption, while an external-drive backup provides another copy for important projects.
- A media pool or project bin is the editor's organized storage area for imported assets. Dragging an already structured project folder into the editor preserves that organization, and additional bins can be created later for screenshots, B-roll, or newly added materials.
- A rough timeline can be assembled in two practical ways. Chronological footage can be dragged in all at once, while footage recorded out of order can be previewed and trimmed with in and out points before selected portions are added.
- The purpose of the rough cut is to remove anything that does not serve the story, viewer, or subject. Dead space, awkward pauses, bad takes, and unnecessary material should be cut even when recording those moments required significant effort.
- The first 30 seconds are the video's most important opening section. A vlog can begin with its strongest moment, an educational video can state the promised value immediately, and an interview or podcast can preview a compelling sound bite.
- B-roll is supplemental footage placed over the main A-roll. It shows what the narration describes through visuals such as camera close-ups, screen recordings, or licensed stock footage, although podcasts and interviews may sometimes work with A-roll alone.
- Audio and color should support clarity before style. Background music should sit roughly around -30 dB and use royalty-free licensing, while beginner color work should prioritize natural white balance, exposure, and contrast before adding a creative grade.
Install to Summarize YouTube Videos and Get Transcripts
Explore YouTube Video Summarizer or Get YouTube Transcript Extractor
Questions & Answers
Q: How should beginners organize footage before editing?
Copy every clip from the phone, camera, or SD card into one main folder named after the video's subject or working title. Inside it, create subfolders for footage, B-roll, audio, graphics, and any other required assets. This folder becomes the project hub. Important footage can also be copied to an external hard drive so another version exists if something goes wrong.
Q: Why should you avoid editing directly from an SD card?
Editing directly from an SD card is described as slower, less reliable, and capable of putting files at risk of corruption. The safer workflow is to remove the card from the camera, insert it into the computer or a card reader, and copy the clips into a dedicated footage folder. The editor should then work with those copied files rather than the originals on the card.
Q: How do you import organized files into a video editor?
Open the chosen editor and import the project folder into its media pool, which may also be called a project bin. In DaVinci Resolve, the complete folder can be dragged into the media pool from the edit page, preserving its organization. If more categories are needed later, create additional bins for assets such as screenshots or B-roll so the project remains tidy.
Q: What is the best way to build a rough video timeline?
Use the method that matches how the material was recorded. If clips were filmed chronologically, select them in the media pool and drag them into the timeline together. If they were filmed out of order, preview each clip, press I to set its starting point and O to set its ending point, then drag only that selected section into the timeline.
Q: What should be removed during the rough cut?
Remove dead space, awkward pauses, bad takes, repetition, and any section that does not help the viewer, support the story, or provide entertainment. Zoom into the timeline when necessary so silent gaps can be seen and trimmed precisely. A recording that begins at 15 minutes and becomes a focused 7-minute edit is presented as a successful result, not a problem.
Q: How should the first 30 seconds of a YouTube video be edited?
The opening should reach the most valuable or interesting material quickly instead of spending time on a long greeting. A vlog can lead with its best or most dramatic moment. An educational video can tell viewers exactly what they will gain. A podcast or interview can begin with a strong sound bite from later in the conversation as a teaser.
Q: What is B-roll, and when should it be added?
B-roll is supplemental footage layered over the main talking footage, which is called A-roll. It visually demonstrates what the narration describes, such as showing a close-up of a camera or displaying a screen recording during a software explanation. Stock footage can also provide visuals that were not filmed. Podcasts and interviews may need less B-roll, but relevant visuals can clarify spoken points.
Q: How should beginners handle music and color correction?
Keep background music low enough that speech remains easy to hear, with roughly -30 dB given as a useful level. Use royalty-free music rather than any song you happen to like, because unlicensed material may bring a copyright claim, lost monetization, or removal. For visuals, first correct white balance, exposure, and contrast so footage looks natural, then consider creative color grading.
Summary & Key Takeaways
-
Start by copying footage from your phone, camera, or SD card into a dedicated project folder instead of editing directly from removable media. Create subfolders for footage, B-roll, audio, and graphics, then back up important projects to an external drive. Import this organized structure into your editor's media pool or project bin.
-
Build the initial timeline by dragging in chronologically recorded clips or selecting useful sections with in and out points. Arrange the main A-roll in approximate order, then remove dead space, bad takes, repetition, and material that neither helps nor entertains viewers. A shorter, focused edit can improve watchability and audience retention.
-
Refine the rough cut by making the first 30 seconds immediately useful or interesting. Add relevant B-roll, screen recordings, music, and sound effects without overwhelming the main message. Use royalty-free audio, keep background music around -30 dB, correct white balance and exposure, and treat creative color grading as a later step.
Read in Other Languages (beta)
Share This Summary 📚
Summarize YouTube Videos and Get Video Transcripts with 1-Click
Try YouTube Summary with ChatGPT & Claude or YouTube Transcript Generator
Explore More Summaries from Think Media 📚
Summarize YouTube Videos and Get Video Transcripts with 1-Click
Try YouTube Summary with ChatGPT & Claude or YouTube Transcript Generator