How to Transcribe Audio Files: Audio Transcripts
Feb 11, 2026
6 min read
558 views
Transcribing audio files into text doesn’t have to be complicated. With Glasp’s free AI-powered audio transcription tool, you can upload audio files like MP3, WAV, or M4A and instantly turn them into accurate text transcripts.
Beyond transcription, Glasp helps you turn audio into reusable knowledge you can search, annotate, and connect across your tools.
Whether it’s podcasts, interviews, meetings, lectures, or voice memos, Glasp lets you:
Automatically generate accurate transcripts from audio files
Automatically detect and label different speakers in the transcript
Highlight key insights and add notes directly to transcripts
Organize and tag spoken ideas for future reference
Search only the important parts by focusing on your highlights
Reuse transcript highlights across your knowledge workflow
In this tutorial, we’ll walk you through how to upload audio files, generate transcripts, highlight important ideas, and turn spoken content into structured knowledge — so you can spend less time replaying audio and more time thinking.
Step 1: Sign up for Glasp
Choose your preferred browser, such as Google Chrome, Brave, Safari, or Microsoft Edge.
In your browser’s address bar, type glasp.co and you’ll be taken directly to Glasp’s website. You can also access it using the link below.
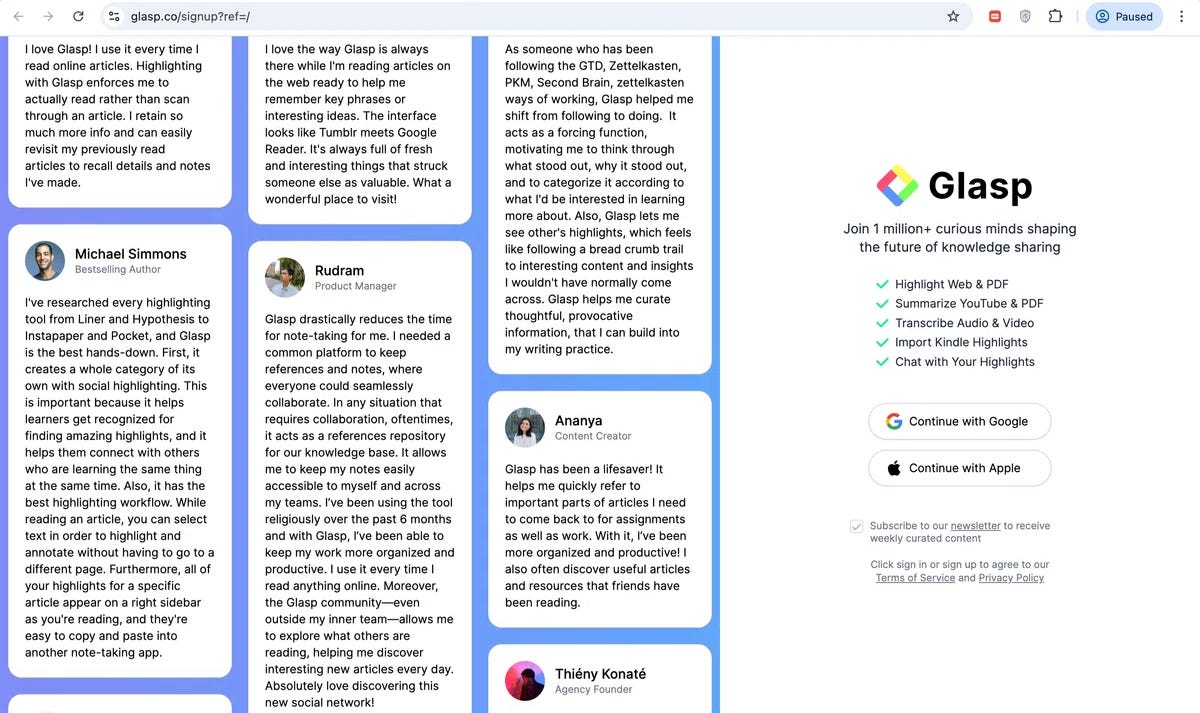
Once you’re on the site, click Sign up and continue with your Google account.
You can sign up for Glasp with either Google Sign-in or Apple Sign-in. If you’re not an iPhone/iPad user, we strongly recommend you use Google Sign-in.
After finalizing your account, you will be taken to welcome page.
Step 2: Go to Your Glasp Dashboard (Profile Page)
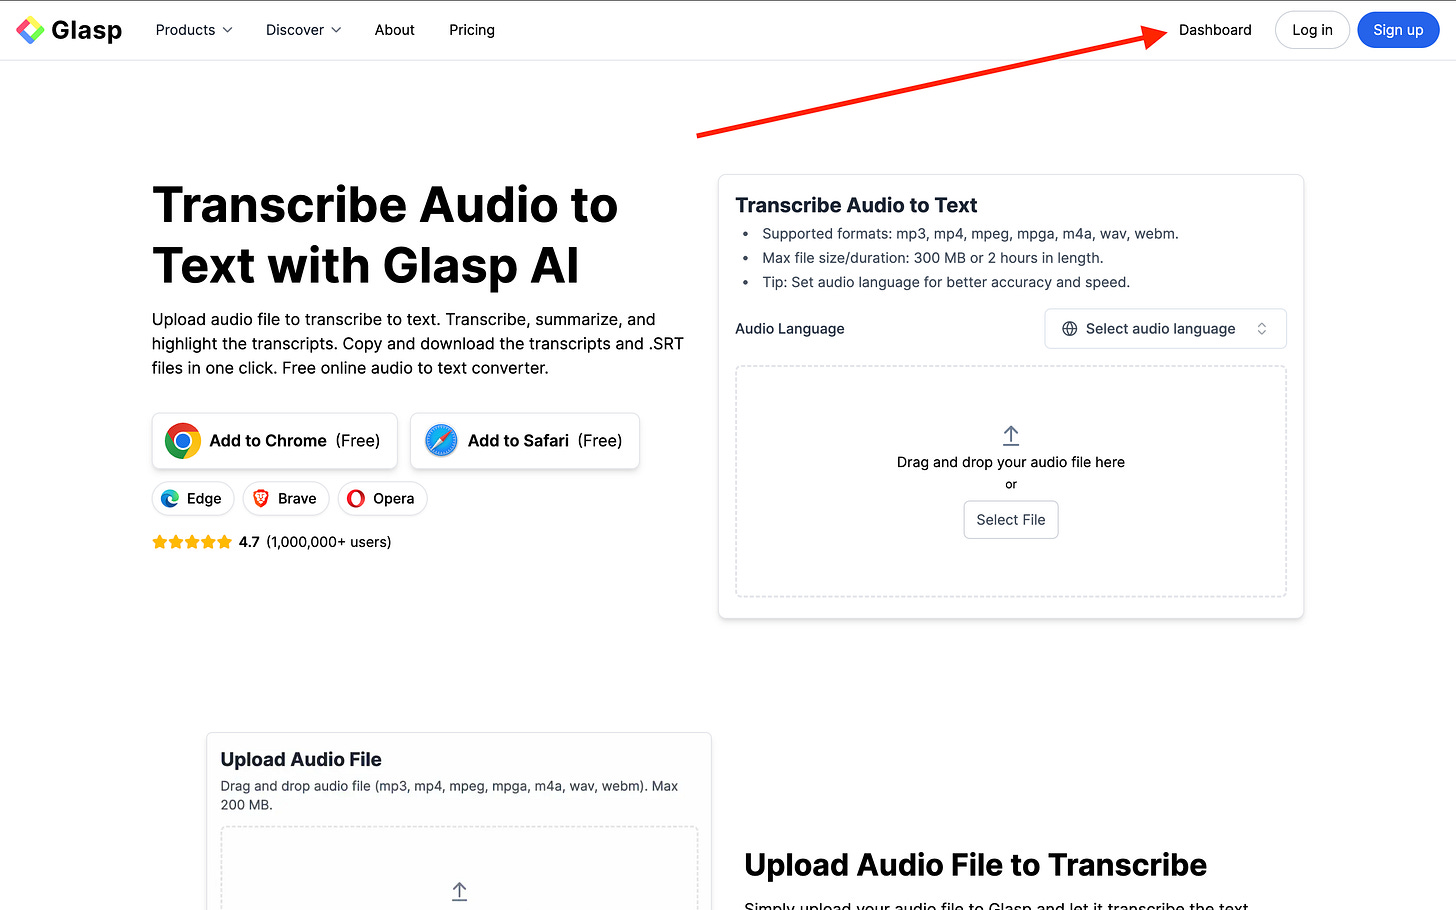
Once you’ve signed up for Glasp, go to Glasp – Audio Transcriber and click “Dashboard.”
This will take you to your Glasp dashboard (your profile page), where you can upload audio files and manage your transcripts.
This will take you to your profile page. From there, click the + button in the left sidebar.
Step 3: Start a New Audio Transcription
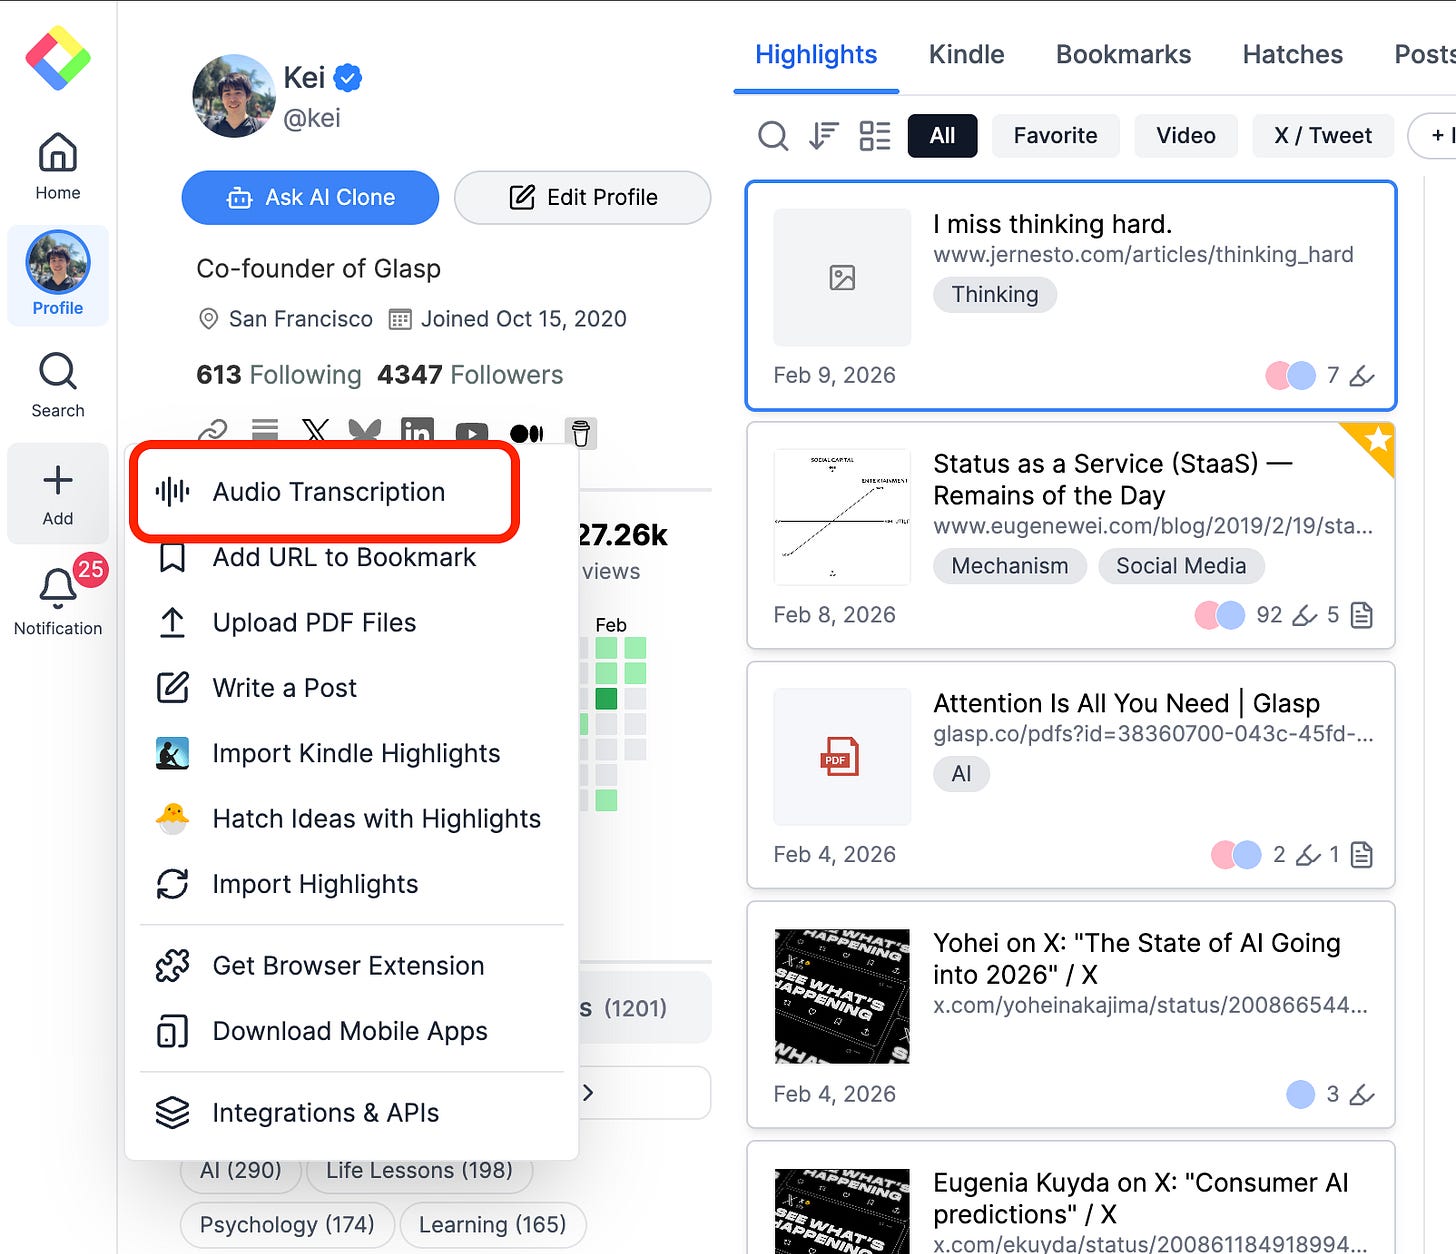
Once you’re on your Glasp dashboard (profile page), click the “+” button in the left sidebar and select “Audio Transcription.”
This will open the upload screen where you can add your audio file.
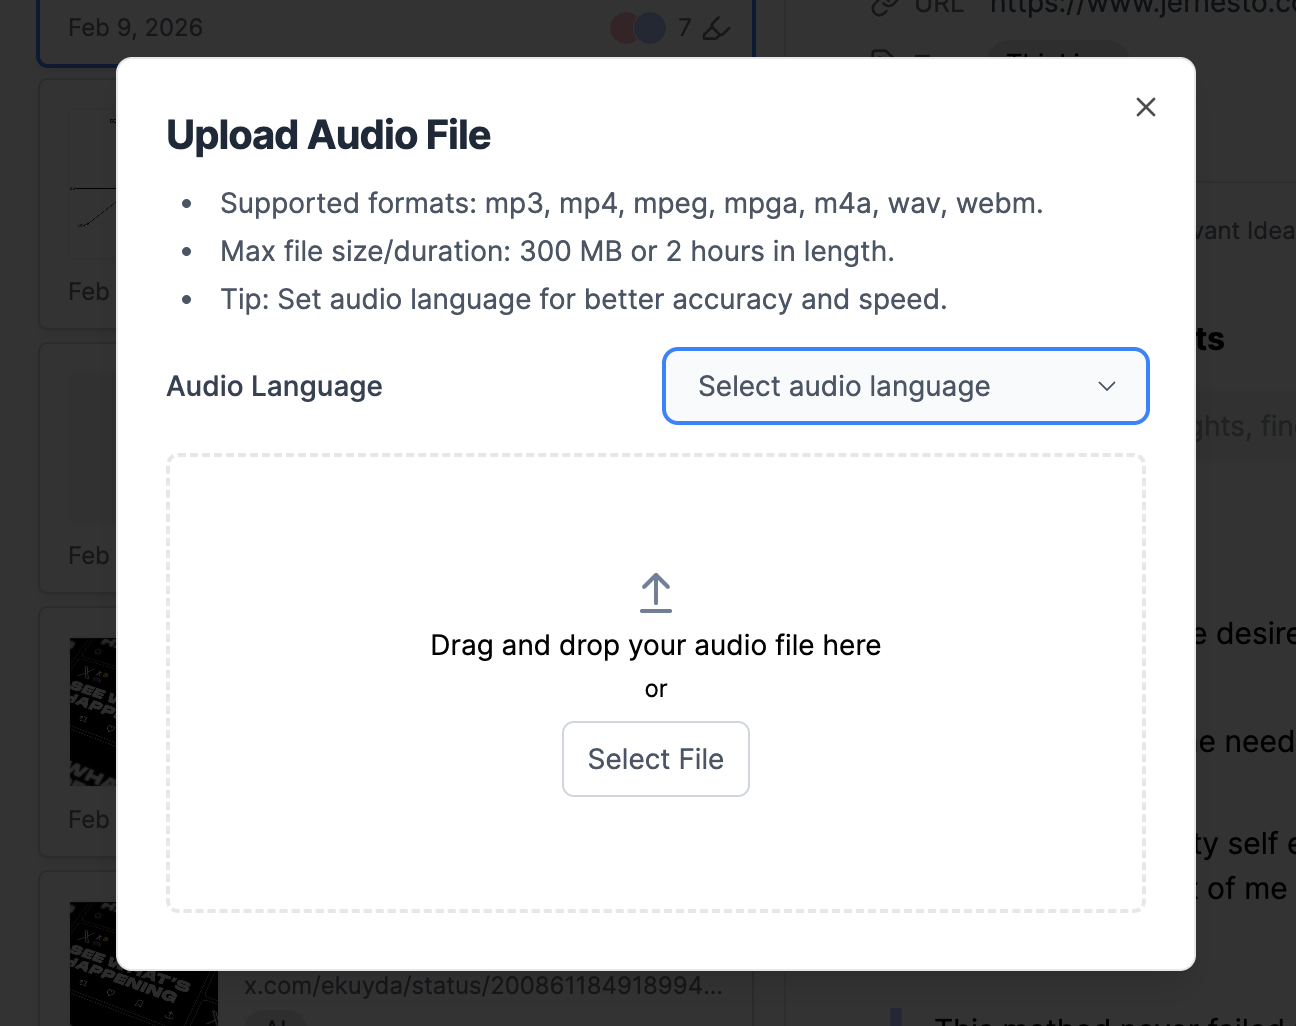
Drag and drop your audio file into the upload area, or click “Select File.”
Once the file is added, click “Upload Audio File” to start the transcription.
Glasp automatically detects the language of your audio file, so you don’t need to manually select it. (You can still choose a language if you prefer.)
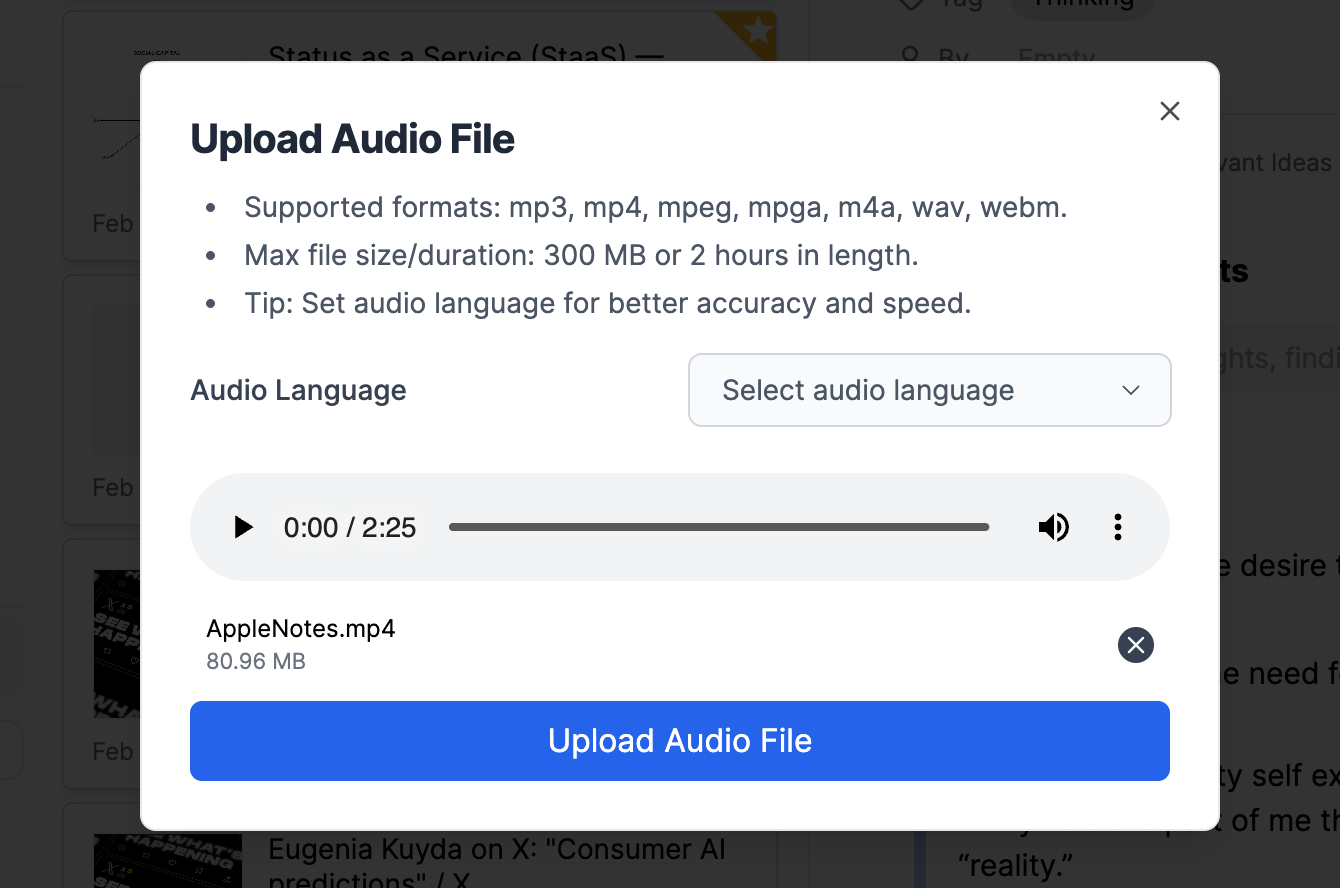
Click “Upload Audio File” to begin uploading.
Once the file is uploaded, Glasp will start generating the transcript automatically. Depending on the length of the audio, this may take a few minutes.
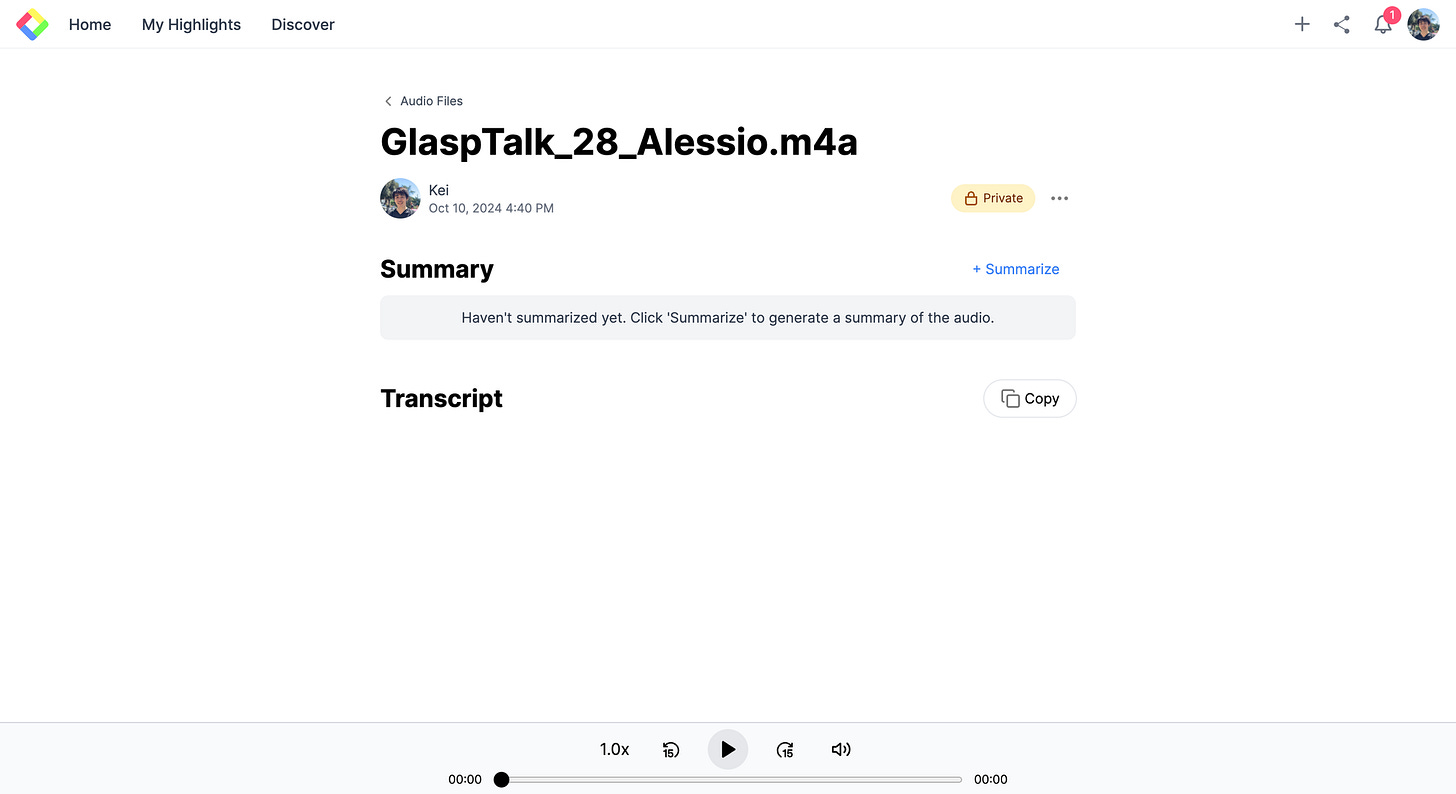
When the transcript is ready, you’ll see the summary and full transcript on your audio page.
Step 4: View and Use Your Transcript
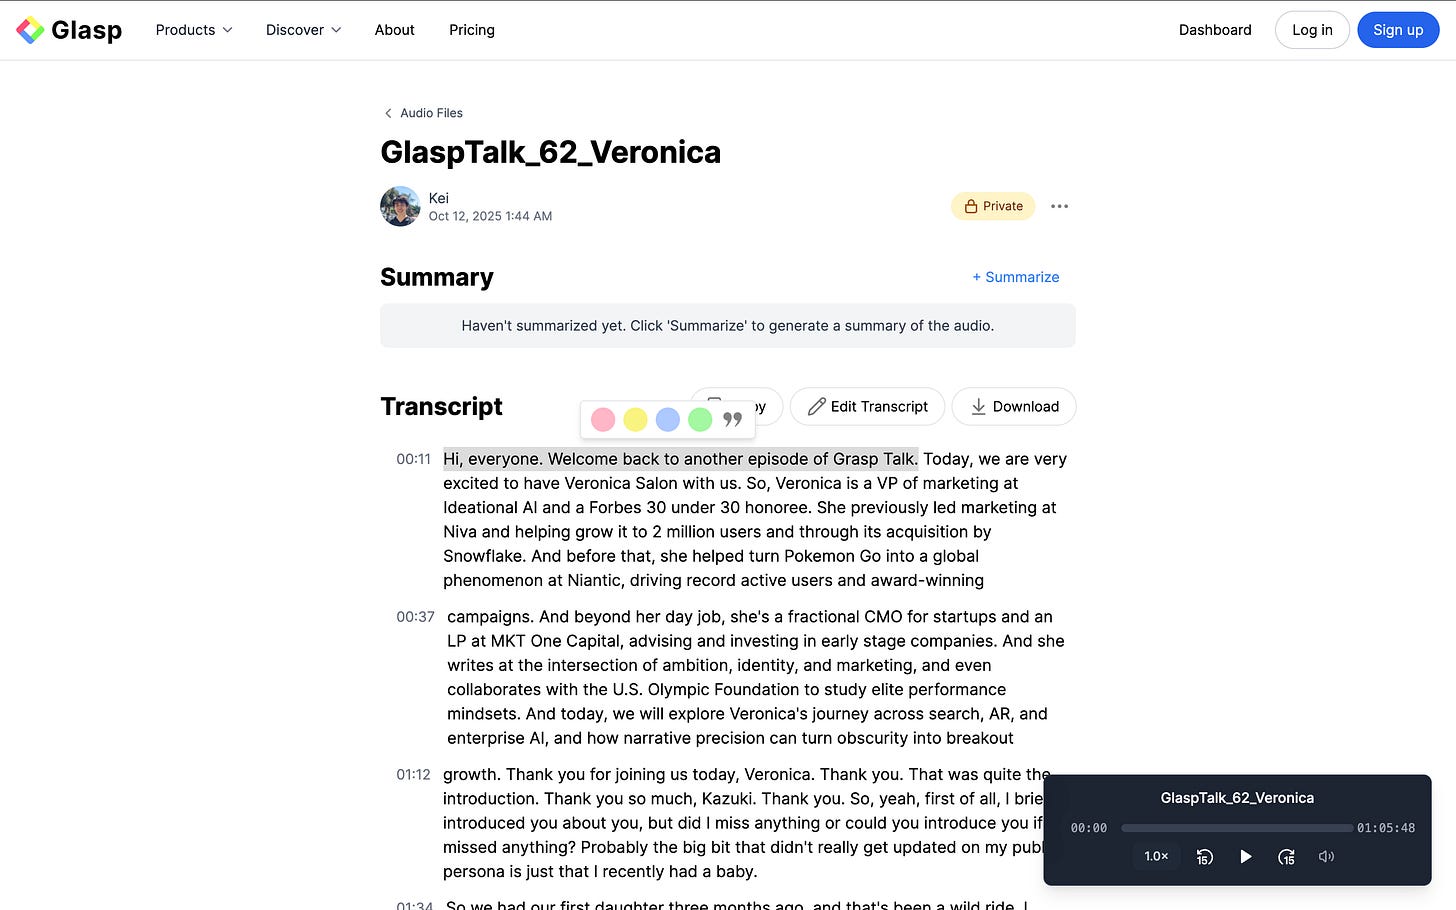
Once the transcription is complete, you’ll see the full transcript on your audio page.
From there, you can:
View the transcript by speaker (automatic speaker detection)
Highlight key sentences
Add notes to important moments
Generate an AI summary
Copy the transcript with one click
Download it as .srt or .mp4
Your audio is now fully searchable and reusable.
View Speakers (Speaker Detection)
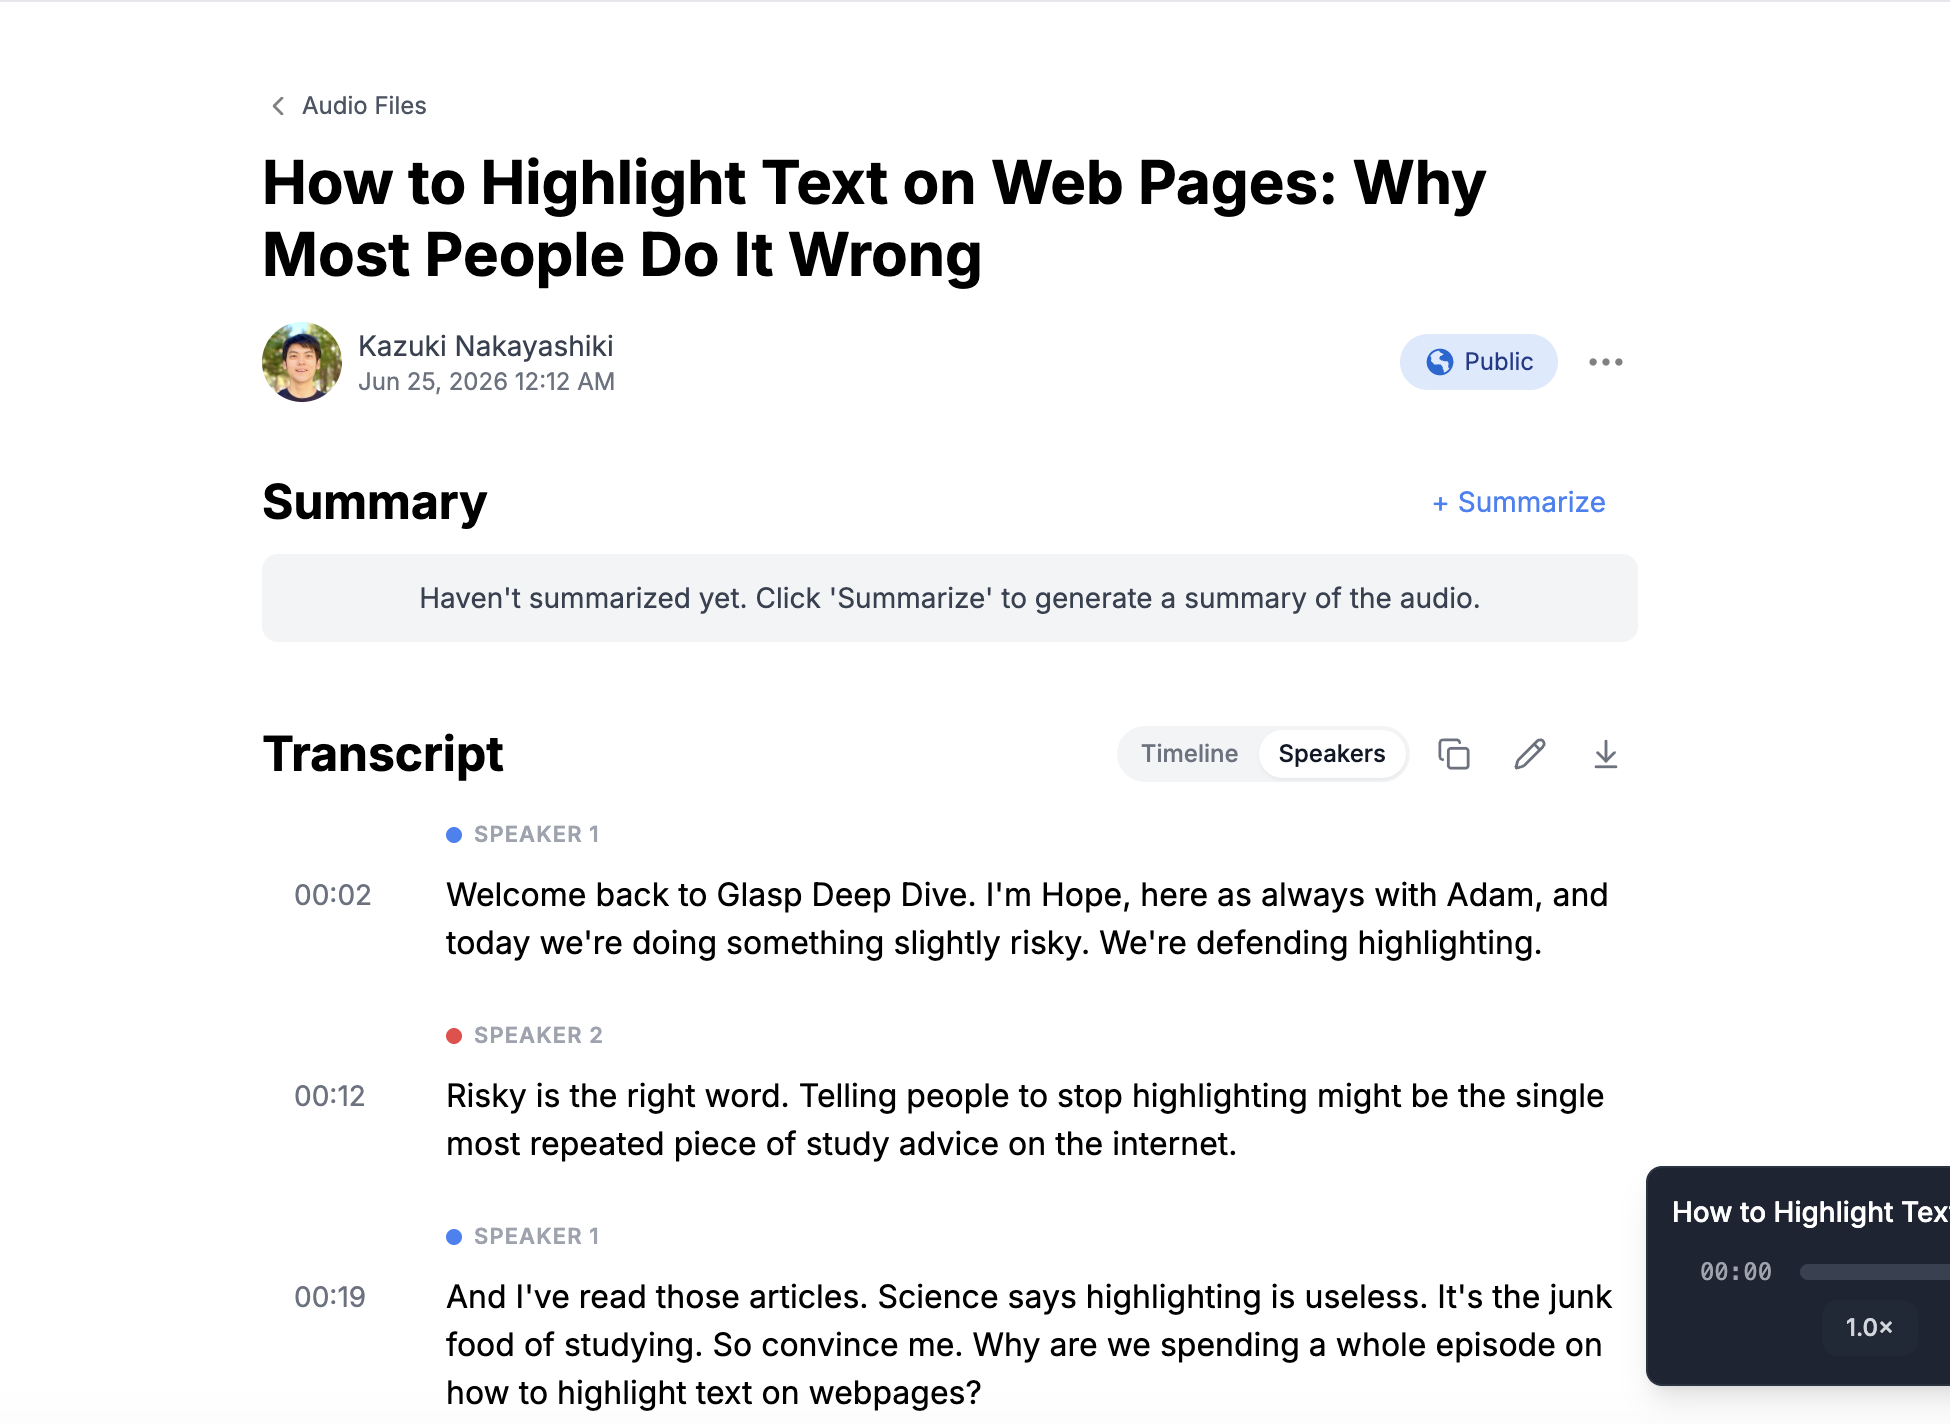
Glasp automatically detects different speakers in your audio and labels them in the transcript (e.g., SPEAKER 1, SPEAKER 2).
To see the conversation organized by speaker, switch the view from Timeline to Speakers using the toggle at the top of the Transcript section. Each speaker gets a color-coded label with timestamps, so you can easily follow who said what.
This is especially useful for podcasts, interviews, panel discussions, and meeting recordings.
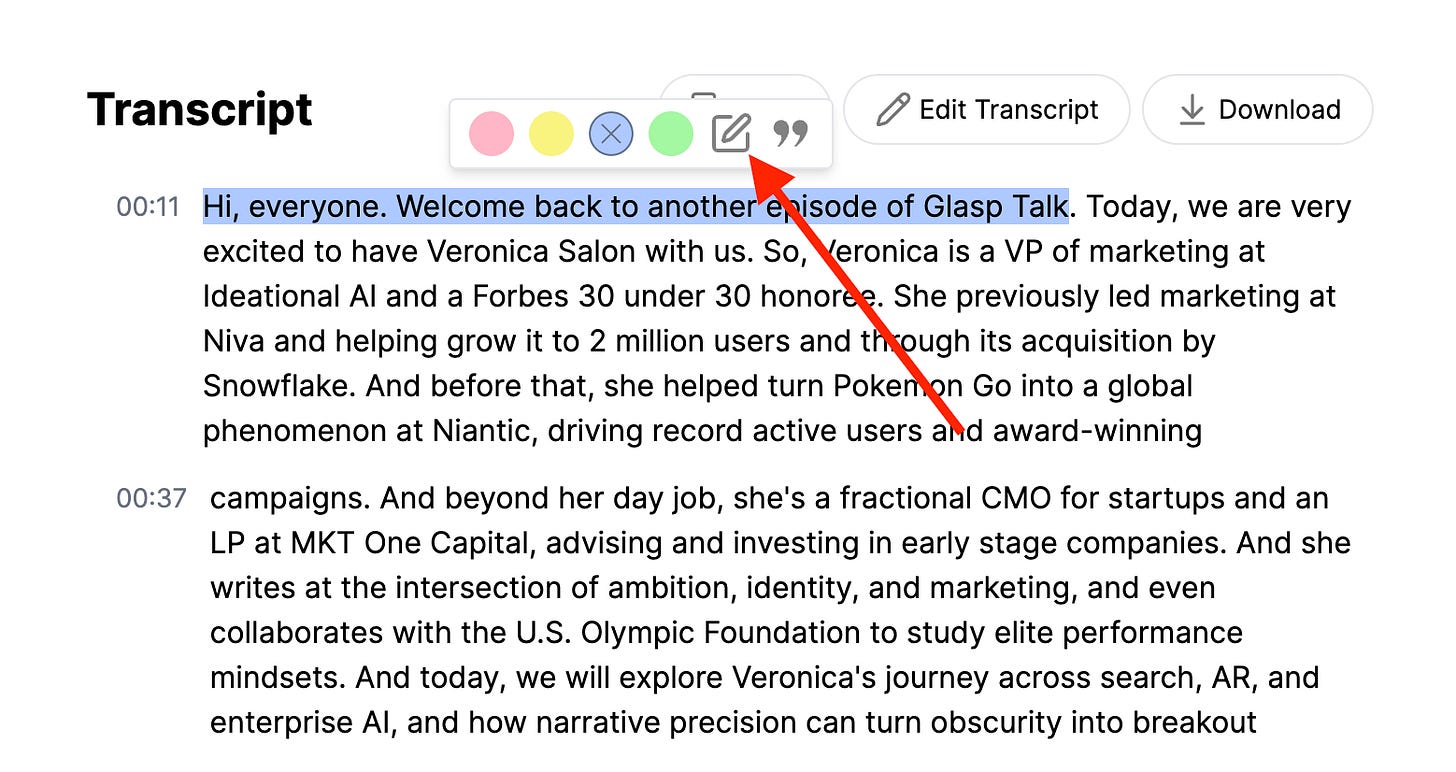
Highlight the Transcript with Glasp
Simply select a sentence and choose a highlight color from the popup.
Your highlight will be saved to your Glasp profile — just like web articles or PDFs.
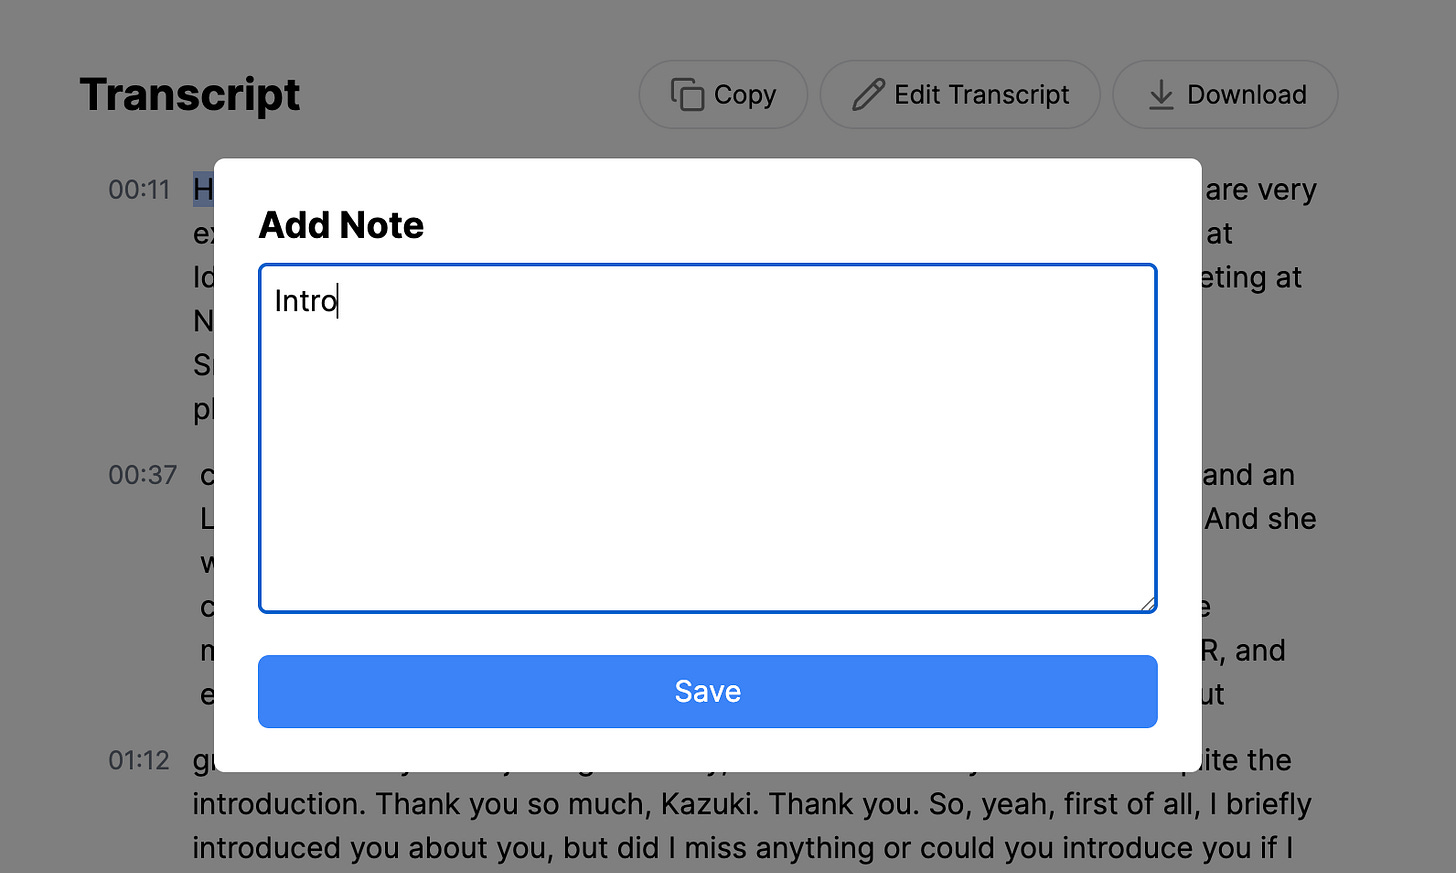
Add a Note to the Transcript
Select a sentence in the transcript and click the note icon in the popup.
A note window will appear where you can write your thoughts, insights, or summaries. Click “Save” to attach your note to that highlighted section.
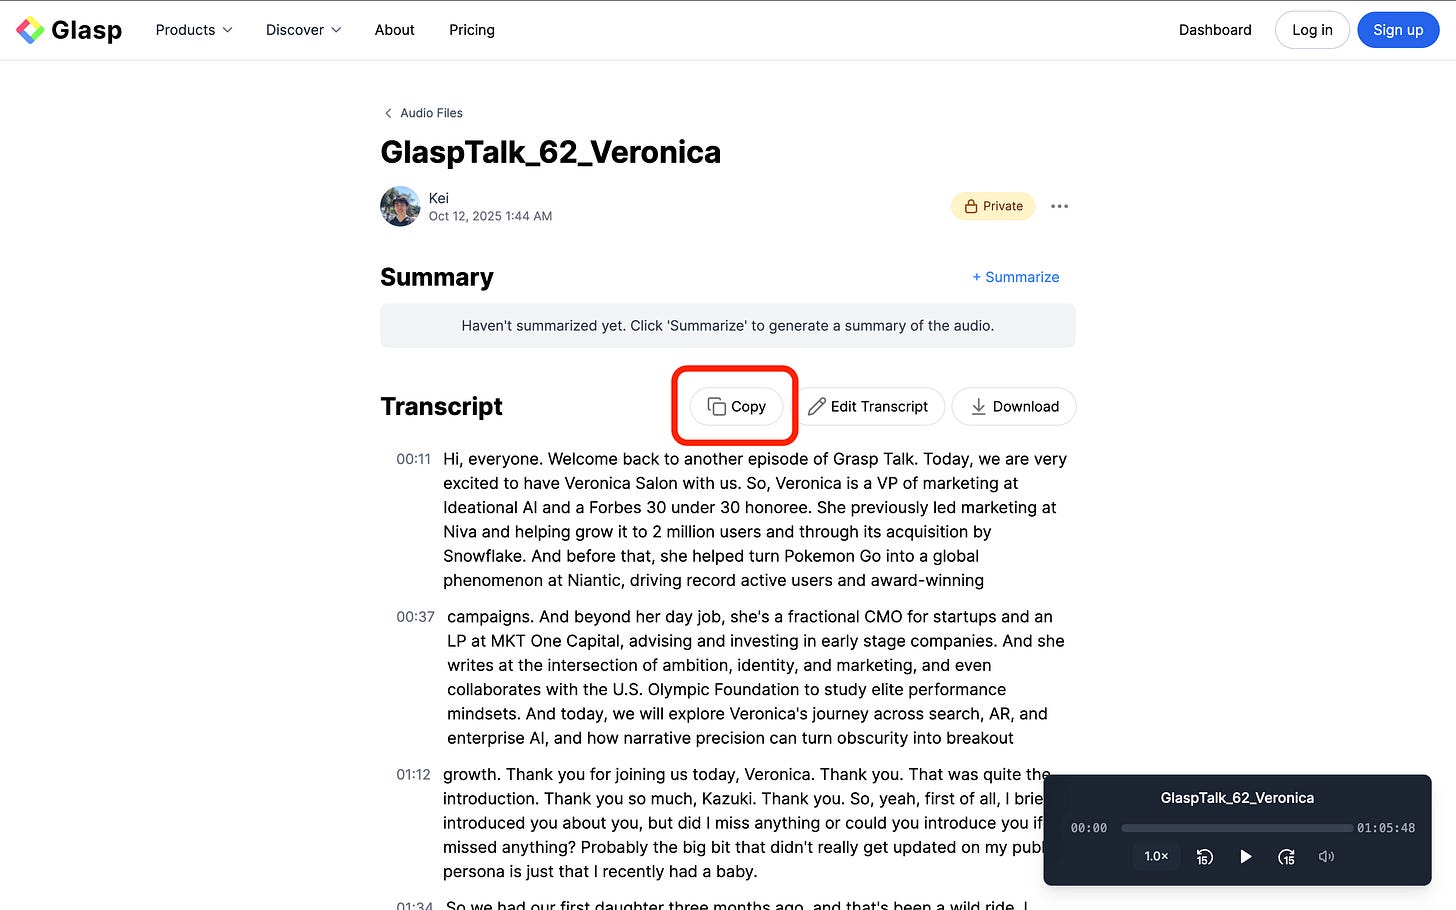
Copy the Transcript
Click “Copy” to copy the entire transcript with one click. You can paste it into Notion, Google Docs, Obsidian, or anywhere you work.
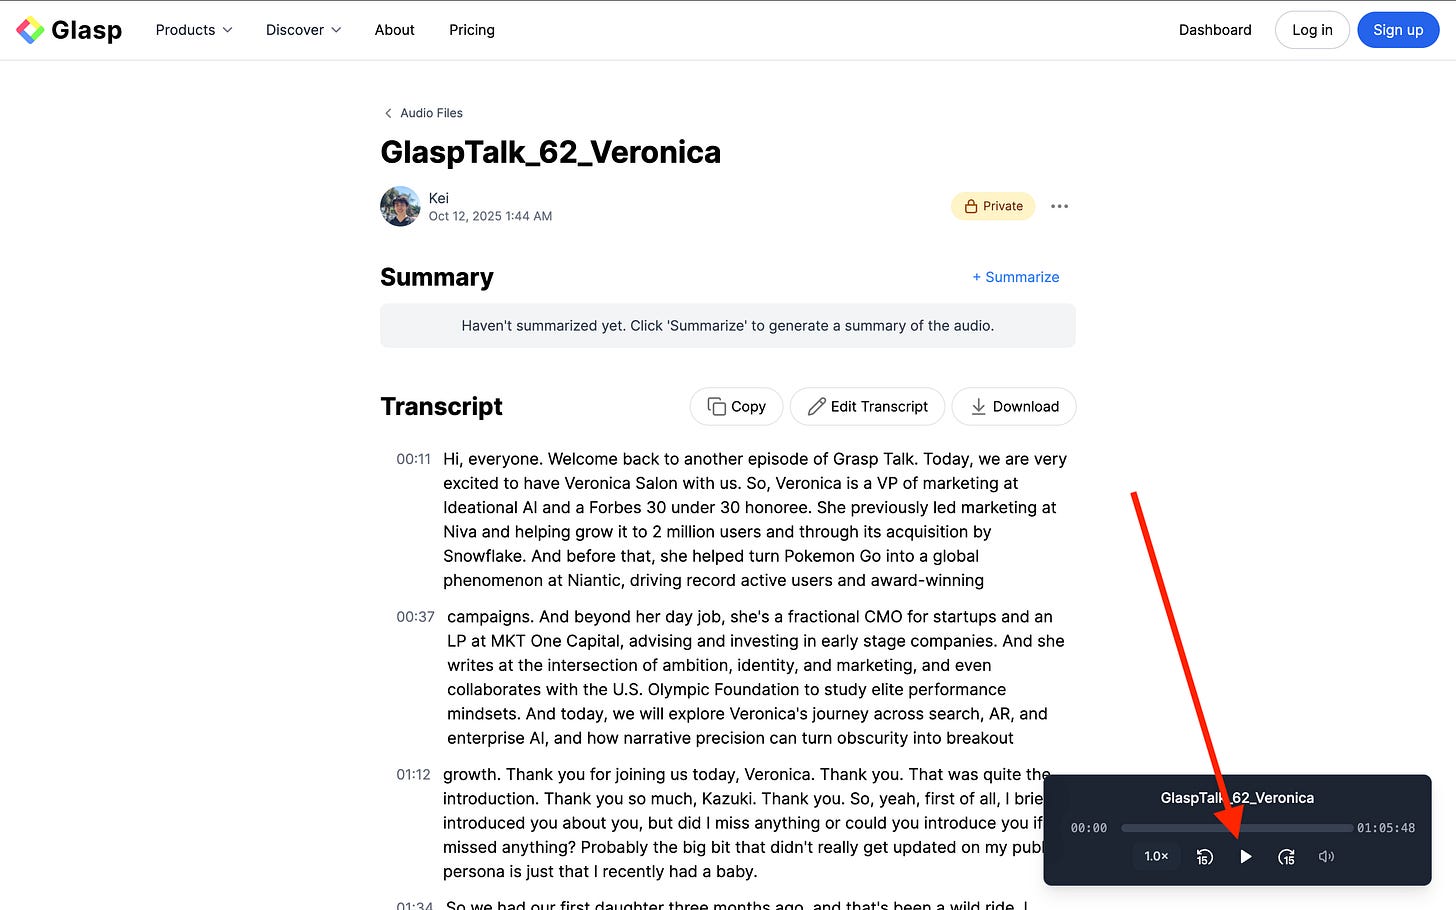
Play the Audio
Use the built-in audio player to listen directly from the transcript page. You can change the playback speed, skip ahead, or adjust the volume as needed.
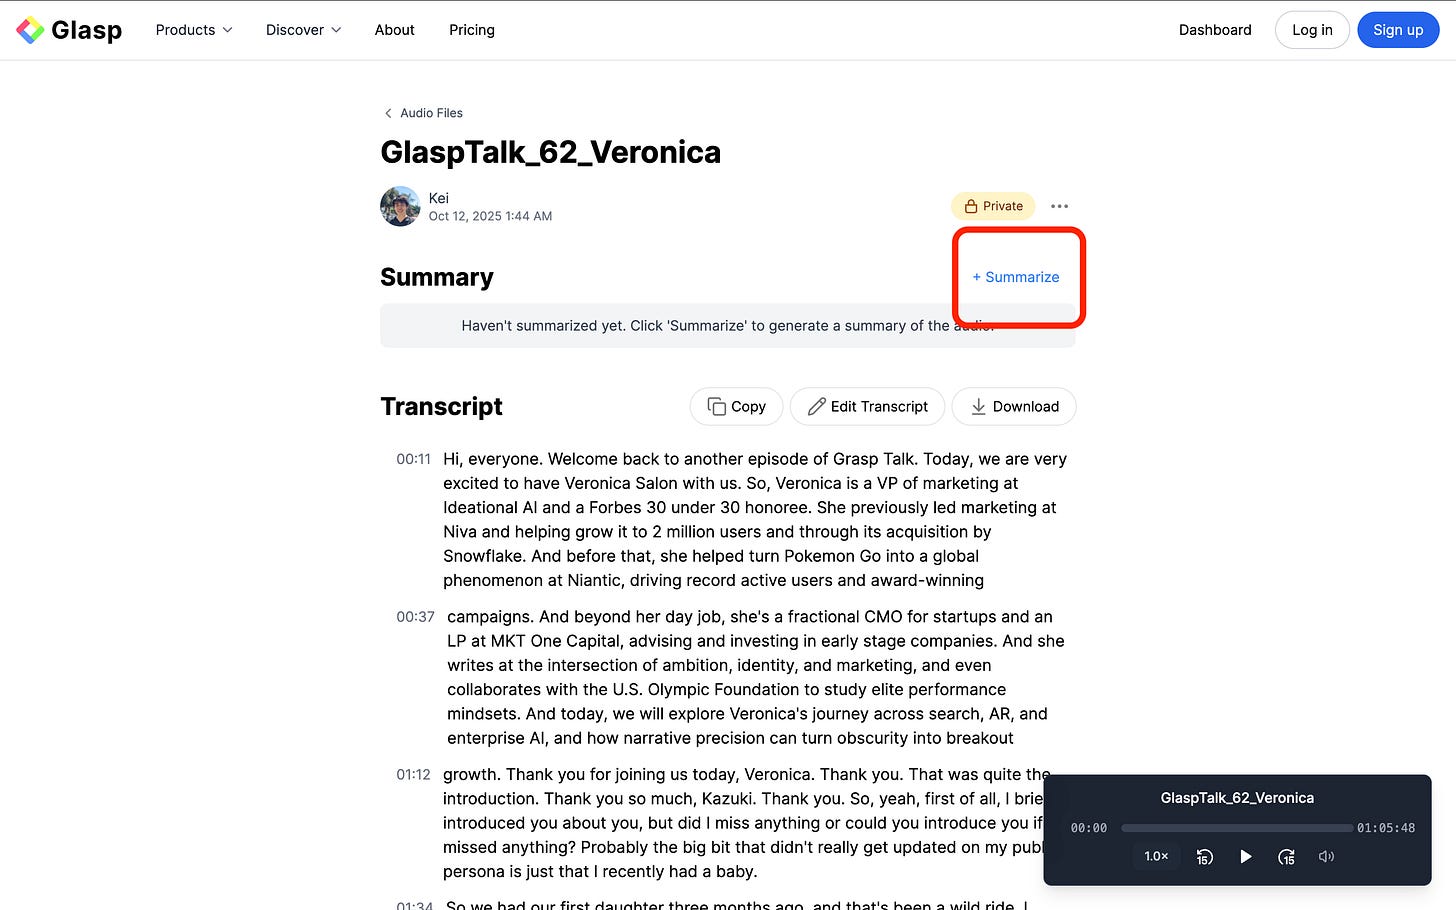
Summarize the Transcript
Click “+ Summarize” to instantly generate an AI-powered summary of your transcript. This helps you quickly grasp the key ideas without rereading the entire conversation.
Once the AI finishes generating the summary, it will appear at the top of the page.
The summary includes key sections and timestamps, so you can quickly understand the main ideas at a glance.

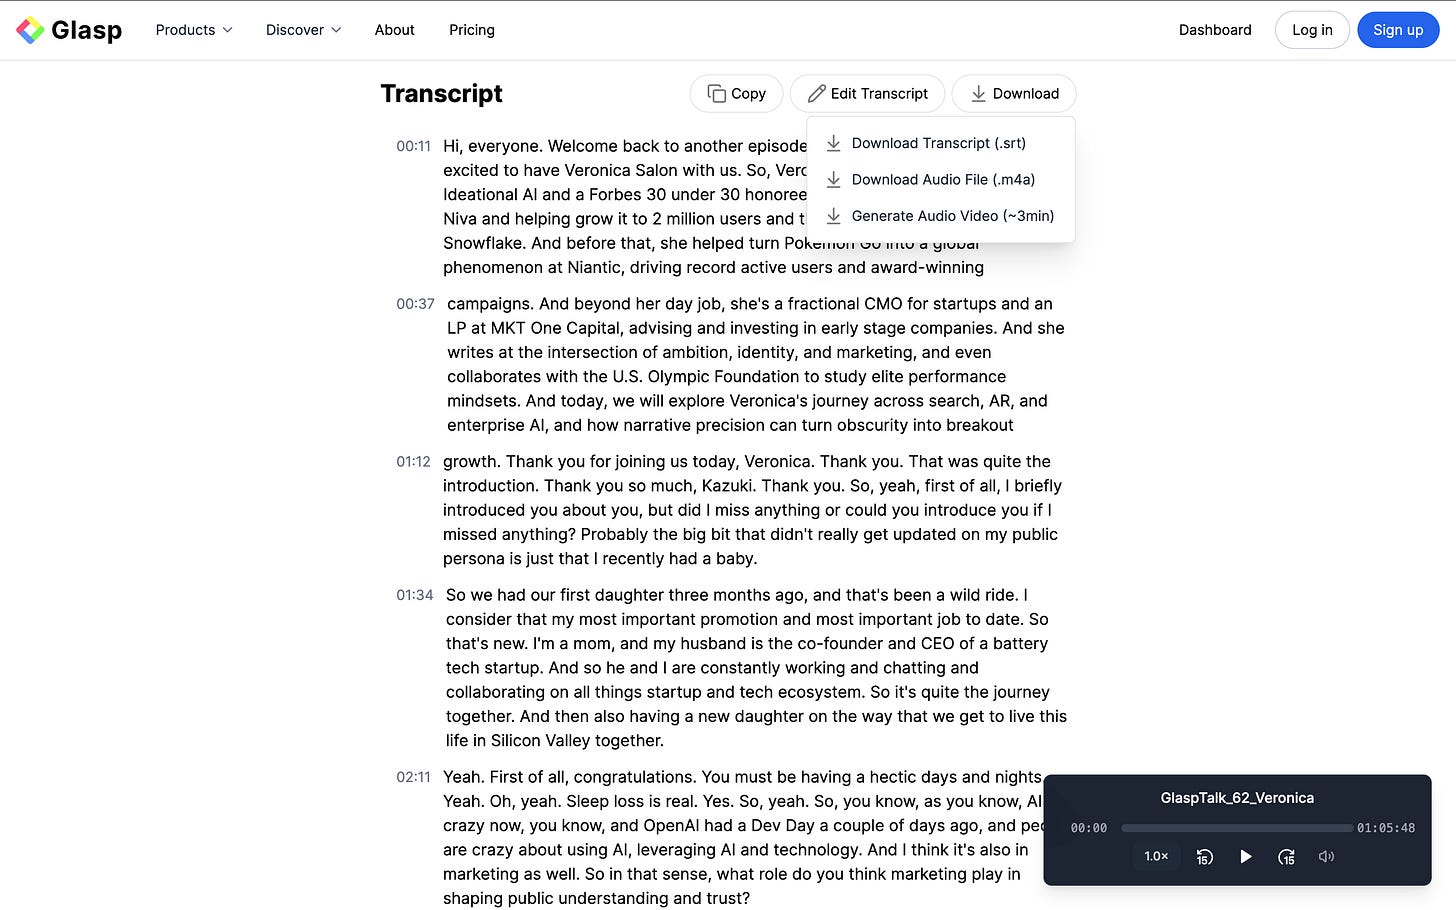
Download or Repurpose Your Content
Click “Download” to choose how you’d like to export your content.
You can:
Download the transcript as an .srt file
Download the original audio file (.m4a)
Generate a short audio video (~3 minutes) for easy sharing
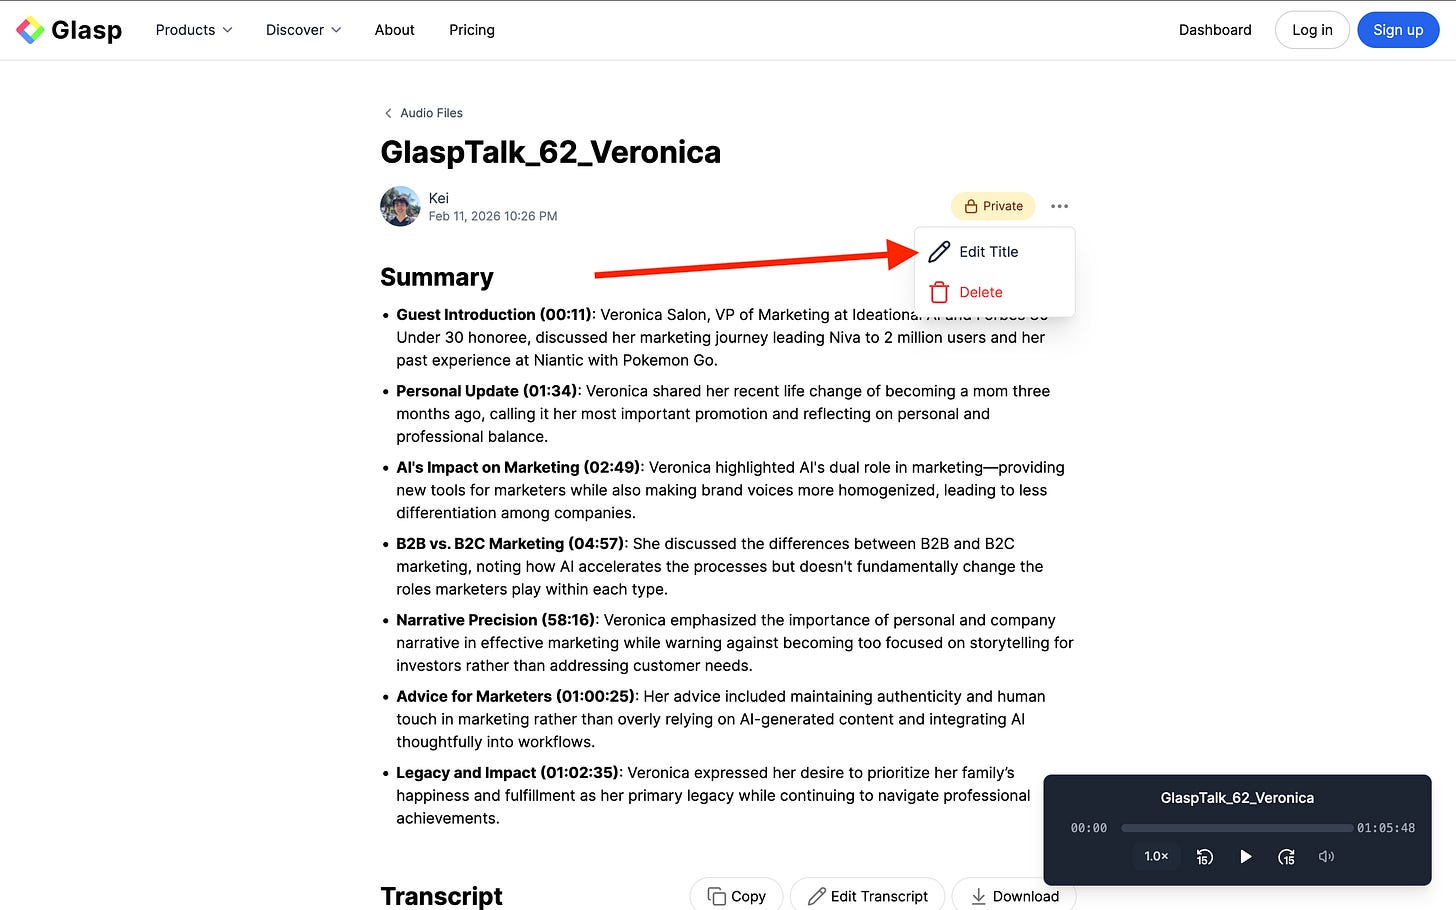
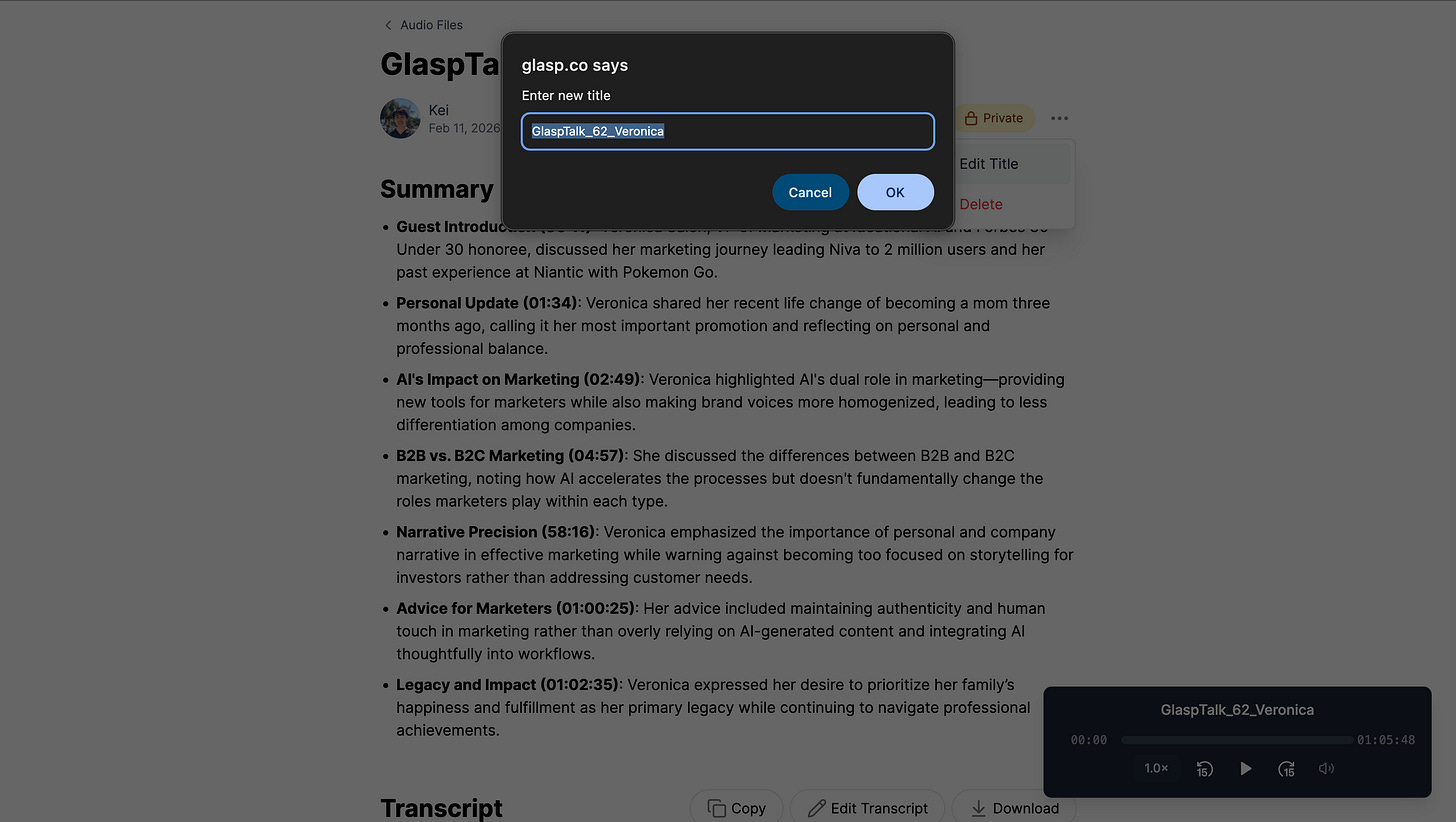
(Optional) Step 5: Edit the Title
To rename your audio file, click the three dots (⋯) in the top right corner and select “Edit Title.”
Enter a new title and click “OK” to save your changes.
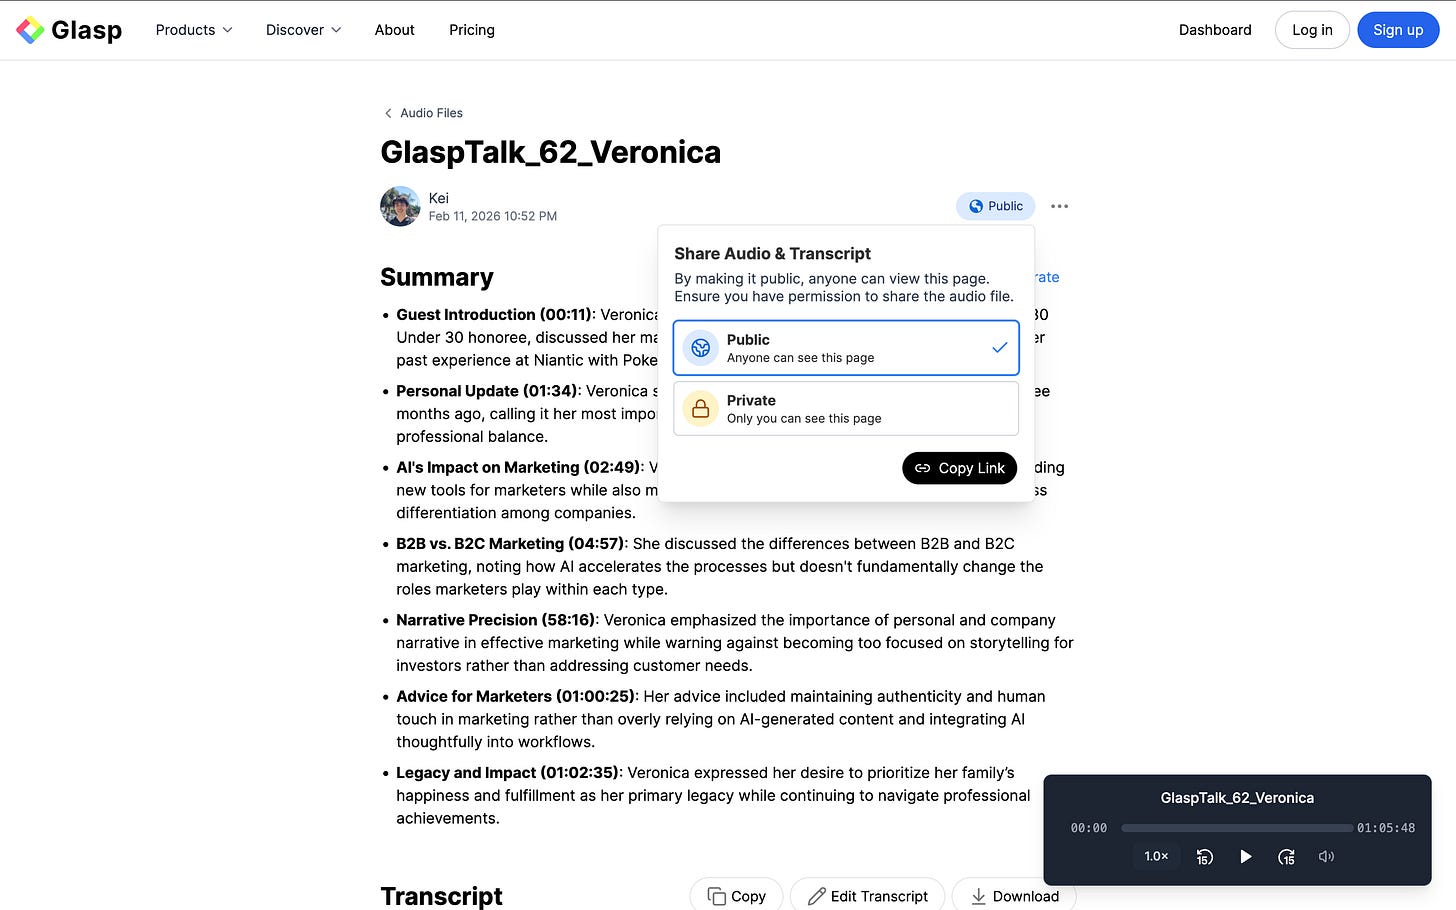
(Optional) Step 6: Share Your Transcript
Audio files are saved privately by default.
If you’d like to share your transcript, switch the visibility to Public and use the generated link to send it to your team, audience, or collaborators.
(Optional) Step 7: Delete the Audio File
Click the three dots (⋯) next to the title and choose “Delete.” Once confirmed, the audio file and transcript will be permanently removed.

Audio shouldn’t disappear after you press play.
With Glasp, you can transcribe, highlight, annotate, summarize, and repurpose your audio — making every conversation part of your long-term knowledge system.
If you haven’t already, sign up for Glasp and start building knowledge from everything you consume — including audio.
FAQs
Q. What audio file formats does Glasp support?
Glasp supports mp3, mp4, mpeg, mpga, m4a, wav, and webm files. The maximum file size/length per upload is 300MB or 5 hours.
Q. How accurate is the transcription?
Accuracy depends on audio quality (clear voices, minimal background noise). For most standard recordings (lectures, meetings, interviews), Glasp provides highly reliable transcripts.
Q. Can I download the transcript?
Yes. You can download transcripts in .srt or .mp4 format and copy-paste them into any note-taking or document tool.
Q. Can I summarize my audio transcript automatically?
Yes. After generating the transcript, you can click the + Summarize button to get a concise AI-generated summary.
Q. Can Glasp detect different speakers?
Yes. Glasp automatically detects and labels speakers (e.g., SPEAKER 1, SPEAKER 2) in the transcript. Switch to the Speakers view at the top of the Transcript section to see the conversation organized by speaker.
Q. Can I keep my transcripts private?
By default, all transcripts are private. If you want to share them, you can switch the visibility to Public and copy the shareable link.
Q. Can I edit or delete an uploaded audio file?
Yes. You can rename the file, edit the title, update its visibility, or delete it at any time from your Glasp profile.
Before you leave
Thanks for reading. We hope this tutorial helps you turn your audio files into clear, usable transcripts.
See you next time,
Glasp team
