How to Implement Role-Based Authorization in Next.js

TL;DR
To implement role-based authorization in Next.js apps, use conditional rendering based on user roles, such as admin, owner, or member. Track user memberships in a database and dynamically adjust the user interface with helper functions that check permissions. This setup ensures that users only see features relevant to their role, enhancing security and usability.
Transcript
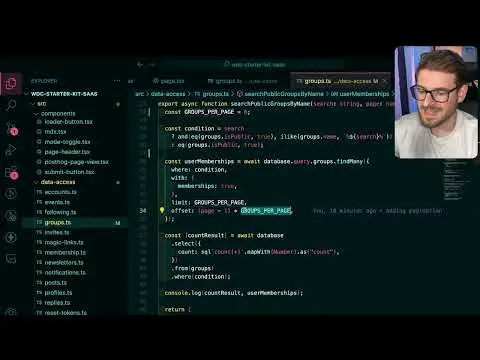
so as I've been working on the starter kit I'm really trying to add in a lot of like role based authorization checks so for example I'm logged in as a group owner which gives me access to the settings tab where I can come in here I can change the group visibility I can update the group image I'm not able to leave my own group so there's a condition... Read More
Key Insights
- 👥 Role-based authorization checks are essential for correct user interactions within group management applications, ensuring secure access.
- 👤 The distinction in user access, based on roles, influences the rendered user interface, providing a tailored experience for different user types.
- 👤 Implementing a database for membership tracking enhances the system's ability to track user activities and roles effectively.
- 👤 Conditional rendering in user interfaces is vital for granting users appropriate access to features, improving app security.
- 👤 User access capabilities are efficiently handled through utilized helper functions that query the database for role assignments.
- 👨💻 The content suggests that the project aims to provide practical coding resources for developers interested in authorization implementation.
- 🦻 Continuous user feedback and engagement through platforms like newsletters can aid in refining and showcasing application features.
Install to Summarize YouTube Videos and Get Transcripts
Explore YouTube Video Summarizer or Get YouTube Transcript Extractor
Questions & Answers
Q: What is the significance of role-based authorization in group management?
Role-based authorization is crucial in group management as it determines what actions users can take based on their roles. Owners can edit group details, while regular members have limited access. This ensures secure and appropriate access to features, preventing unauthorized changes and maintaining group organization.
Q: How does the application differentiate between an admin, owner, and normal member?
The application differentiates users by checking their membership status against the database. For instance, an owner can access all settings, while an admin has specific permissions, and normal members can join or leave groups. These checks are implemented in the code to dynamically render the appropriate user interface.
Q: Can multiple users share the same permissions within a group?
Yes, multiple users can have similar roles within a group. The system permits various users to be either admins or members. Each user is tracked through a dedicated memberships table that associates their user ID with a group ID, thus allowing for collaborative management of group settings and information.
Q: What role does the memberships table play in the authorization process?
The memberships table is integral as it tracks each user's role within a group implementation. This table links user IDs with group IDs and defines their roles, facilitating the retrieval of permissions and ensuring that the correct interface features are displayed based on the user's status.
Q: How can users implement similar role-based authorization in their applications?
Users can implement role-based authorization by following the outlined logic in the content, utilizing helper functions to determine user roles from the database. The author encourages coding practices and provides snippets that can guide developers in setting up similar systems in their applications.
Q: What is the purpose of the tip editor, and who can access it?
The tip editor is designed for group owners and admins, allowing them to modify group information. This feature is not available to normal members, which reinforces the role-based access control. When an eligible user accesses the page, the editor is displayed based on the authorization checks.
Q: What challenges did the author face while working on the starter kit?
The author anticipated that creating the starter kit would require significant effort and time. They mentioned that it turned out to be more work than expected, indicating the complexities involved in implementing a comprehensive role-based authorization system within the application.
Q: Where can interested users find more resources or updates on the starter kit?
Interested users can visit the WDC starter kit website (wdcstarterkit.com) to subscribe to a newsletter for updates on the project. The author plans to share code snippets and further developments through this platform, helping others implement similar features in their applications.
Summary & Key Takeaways
-
The content discusses developing a starter kit that incorporates role-based authorization checks, particularly within group management settings for different user roles, such as admins and members.
-
It highlights the differences in user interface elements available to group owners, admins, and normal members, emphasizing the importance of conditional rendering based on user roles.
-
The author provides insight into the underlying logic for membership tracking and dynamic interface changes, suggesting that practical examples and code snippets will be available in a future release.
Read in Other Languages (beta)
Share This Summary 📚
Summarize YouTube Videos and Get Video Transcripts with 1-Click
Try YouTube Summary with ChatGPT & Claude or YouTube Transcript Generator
Explore More Summaries from Web Dev Cody 📚


Summarize YouTube Videos and Get Video Transcripts with 1-Click
Try YouTube Summary with ChatGPT & Claude or YouTube Transcript Generator