Premiere Pro CC Warp Stabilizer Tutorial | How to Use Warp Stabilizer in Adobe Premiere Pro
TL;DR
Learn how to stabilize shaky footage in Adobe Premiere Pro using the warp stabilizer effect.
Transcript
- [Roberto] Hey, everybody, this is Roberto Blake at RobertoBlake.com, helping you create something awesome today. Today we're gonna do a quick Adobe Premiere Pro CC tutorial. I'm gonna show you how to stabilize your footage using the warp stabilizer effect. What this effects is, video that might be a little shaky that you need to improve. So when ... Read More
Key Insights
- 🎮 The warp stabilizer effect in Adobe Premiere Pro can quickly enhance the stability of shaky video footage.
- 🥠 Adjusting settings like smoothness and scale can fine-tune the stabilization process for optimal results.
- 🎮 This tutorial demonstrates how to improve the quality of handheld video footage for vlogging or product reviews.
- 👤 The warp stabilizer tool is user-friendly and can be applied to various types of camera footage for smoother results.
- 🎮 By utilizing the warp stabilizer effect, content creators can elevate the professionalism of their videos with minimal effort.
- 🐎 Having a powerful video card like the GeForce GTX 1070 can significantly speed up the stabilization process in Adobe Premiere Pro.
- 👤 Feedback and suggestions for more Premiere Pro tutorials can help users explore advanced editing techniques and tools.
Install to Summarize YouTube Videos and Get Transcripts
Explore YouTube Video Summarizer or Get YouTube Transcript Extractor
Questions & Answers
Q: How can you access the warp stabilizer effect in Adobe Premiere Pro?
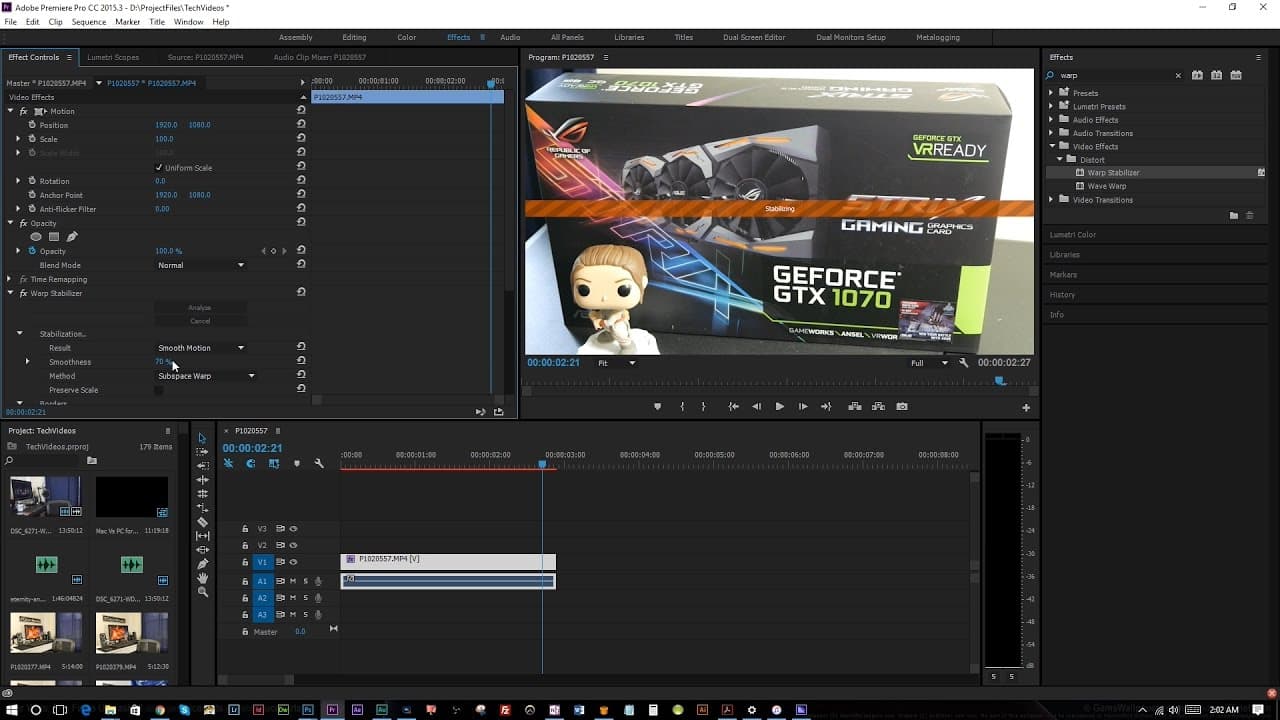
To access the warp stabilizer effect, navigate to the effects panel in Premiere Pro by pressing Shift + 7, then search for "warp stabilizer" and drag it onto your footage to begin stabilizing.
Q: Can the warp stabilizer tool work effectively with handheld DSLR footage?
Yes, the warp stabilizer tool is designed to automatically stabilize handheld video footage from DSLR and mirrorless cameras, providing smoother results without much manual tweaking.
Q: What are some default settings you can adjust when using the warp stabilizer effect?
Default settings for the warp stabilizer include options for smoothness, sub-warped space, stabilize, crop, and auto scale, allowing users to customize the stabilizing process to suit their needs.
Q: How does adjusting the smoothness setting in the warp stabilizer affect the final footage?
Adjusting the smoothness setting in the warp stabilizer can impact the level of stabilization applied to the footage, with higher percentages resulting in a smoother but potentially over-stabilized look.
Summary & Key Takeaways
-
Roberto Blake demonstrates how to stabilize shaky video footage using the warp stabilizer effect in Adobe Premiere Pro.
-
The tutorial showcases how to access the effects panel and apply the warp stabilizer tool to enhance video quality.
-
By adjusting settings like smoothness and scale, users can easily improve the stability of their footage for a professional look.
Read in Other Languages (beta)
Share This Summary 📚
Summarize YouTube Videos and Get Video Transcripts with 1-Click
Try YouTube Summary with ChatGPT & Claude or YouTube Transcript Generator
Explore More Summaries from Roberto Blake 📚


Summarize YouTube Videos and Get Video Transcripts with 1-Click
Try YouTube Summary with ChatGPT & Claude or YouTube Transcript Generator