Creating Cover Art for Your Print on Demand Paperback

TL;DR
Learn to create a paperback cover using InDesign for print-on-demand.
Transcript
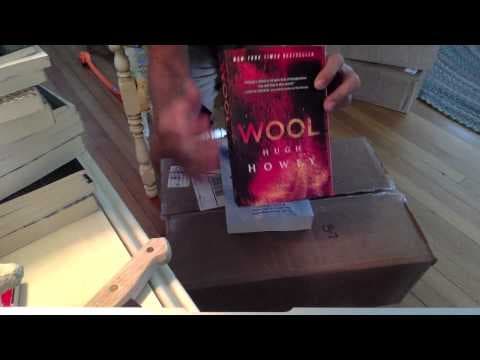
Hey everybody, this is Hugh and I'm back with the third and what should be the last video in this series. So, we've done a video on laying out an interior uh PDF for a print on demand paperback uh using Inesign and pasting your manuscript in from Microsoft Word. Uh also did a video on uh making edits to your ebook using Calibbre and Sigil. um both ... Read More
Key Insights
- The video is the final part of a series on creating print-on-demand books, focusing on designing the book cover using InDesign.
- InDesign is used to create a precise layout for the book cover, including the front, back, and spine, ensuring text is centered on the spine.
- The concept of 'bleed' is crucial in cover design, allowing for minor misalignments during trimming without exposing white edges.
- Amazon's guidelines for cover dimensions include adding 0.125 inches to the width and height for bleed, critical for a professional finish.
- The spine width is calculated based on the number of pages and paper type, with cream paper recommended for a professional look.
- Typography is emphasized as a key element of cover design, with a preference for bold, simple fonts over elaborate scripts.
- The video provides a step-by-step guide to creating and placing a UPC code using an online barcode generator, ensuring compatibility with bookstore systems.
- Layers are essential in InDesign for organizing different elements of the cover, allowing for easy adjustments and experimentation.
Install to Summarize YouTube Videos and Get Transcripts
Explore YouTube Video Summarizer or Get YouTube Transcript Extractor
Questions & Answers
Q: What is the purpose of bleed in cover design?
Bleed is an essential aspect of cover design that ensures the cover image extends beyond the trim lines. This extra space allows for minor misalignments during the trimming process, preventing any white edges from appearing on the final printed cover. By adding 0.125 inches to the width and height, designers can ensure the cover art reaches all edges, resulting in a professional finish.
Q: How is the spine width calculated for a book cover?
The spine width is calculated based on the number of pages in the book and the thickness of the paper used. For cream paper, which is recommended for a professional look, each page has a specific thickness in inches. By multiplying the total number of pages by this thickness, designers can determine the exact width of the spine, ensuring that text and design elements are accurately centered.
Q: Why is typography important in book cover design?
Typography is a critical element of book cover design because it significantly impacts the cover's readability and visual appeal. The video emphasizes using bold, simple fonts that are easy to read, even at thumbnail size. Avoiding elaborate scripts and focusing on clean, blocky text ensures the title and author name stand out, making the book more attractive to potential readers.
Q: How can a UPC code be added to a book cover?
A UPC code can be added to a book cover by using an online barcode generator, which creates a barcode image based on the book's ISBN and price. The video demonstrates downloading the barcode as a PNG file and placing it on the cover in InDesign. By including the UPC code, the book becomes compatible with bookstore systems, allowing for easy scanning and inventory management.
Q: What role do layers play in InDesign for cover design?
Layers in InDesign are crucial for organizing different elements of the cover design, such as text, images, and the UPC code. By placing each element on a separate layer, designers can easily adjust and experiment with the layout without affecting other components. This organization allows for greater flexibility and precision in the design process, ensuring a cohesive and professional final product.
Q: What are some common mistakes in cover design mentioned in the video?
Common mistakes in cover design include using overly elaborate fonts that reduce readability, failing to account for bleed, and not accurately calculating the spine width. The video also warns against using portrait-oriented images for print covers, as they do not provide enough space for the back cover, leading to a need for image splicing, which can look unprofessional.
Q: How can cover art be effectively integrated into the design?
Cover art can be effectively integrated into the design by considering the layout during the photography or selection process. The video suggests using landscape-oriented images that provide ample space for the front and back covers. By placing the cover art on the bottom layer in InDesign, other elements like text and the UPC code can be layered on top, ensuring a seamless and visually appealing cover.
Q: What is the advantage of creating a custom drop shadow for text?
Creating a custom drop shadow for text adds depth and dimension to the typography, enhancing its visual impact. The video demonstrates a manual method for creating drop shadows, allowing for precise control over the shadow's placement and intensity. This technique can make the text stand out more against the cover art, improving readability and overall design aesthetics.
Summary & Key Takeaways
-
The video guides viewers through the process of creating a paperback cover using InDesign, focusing on precise layout and design techniques. It emphasizes the importance of bleed and spine width calculations to ensure a professional finish.
-
Typography is highlighted as a crucial element in cover design, with recommendations for using bold and simple fonts. The video also demonstrates how to create and place a UPC code, ensuring the book's compatibility with bookstore systems.
-
Layers play a significant role in organizing cover elements in InDesign, allowing for easy adjustments and experimentation. The video provides a comprehensive overview of the design process, from setting up the document to finalizing the cover for print.
Read in Other Languages (beta)
Share This Summary 📚
Summarize YouTube Videos and Get Video Transcripts with 1-Click
Try YouTube Summary with ChatGPT & Claude or YouTube Transcript Generator
Explore More Summaries from Hugh Howey 📚


Summarize YouTube Videos and Get Video Transcripts with 1-Click
Try YouTube Summary with ChatGPT & Claude or YouTube Transcript Generator